Playing PS1 games on the Steam Deck is actually a lot simpler than you’d think. Oddly enough, it’s about as difficult as playing PS2 games, but way less hectic than getting 3DS games up and running.
Plus there are pictures taken directly by me to help guide you through every step. Believe me, if I can do it, you can too.
Step 1: Boot into Desktop Mode
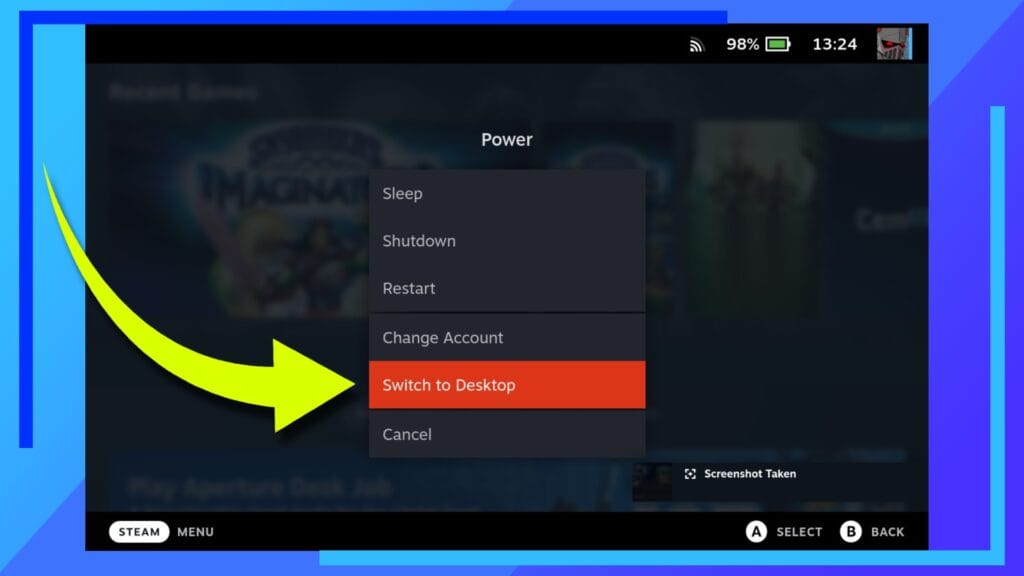
As always, we’ll be doing all of the work over in Desktop Mode; the Linux-based desktop environment.
To access Desktop Mode, hold down the Power Button until the menu seen above pops up. Then click on Switch to Desktop and you’ll be transported over.
Step 2: Decide on EmuDeck or DuckStation
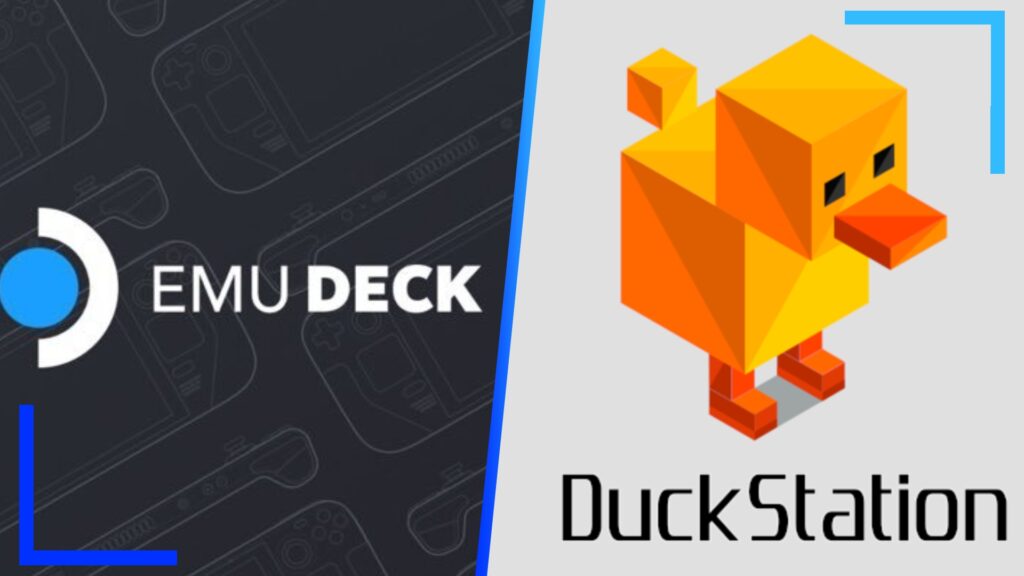
You now have a choice to make: EmuDeck or DuckStation. Let’s dig in to what’s what.
EmuDeck is the app of choice for installing retro software. Not only will it install a bunch of different emulators, it’ll also configure each of them so they work on the Steam Deck. That means you don’t need to worry about custom paths to certain folders or manually setting up controllers. Everything just works with minimal fuss.
The downside of EmuDeck, though, is you end up with a lot of files and folders, some of which aren’t removed when you uninstall. For what it’s worth, I’ve never needed to fully uninstall EmuDeck and it’s what I use on the Steam Deck and the ASUS ROG Ally because it simplifies a lot of the process.
Alternatively, you could go to the Discover Store and just download DuckStation. If you’re only going to be playing PS1 games on the Steam Deck, this is the more lightweight option.
Either way you’ll end up with DuckStation installed as it’s the best PS1 emulator from my testing, it all just depends on whether you want to go with the pre-configured EmuDeck route or with the standalone option.
Step 3: Install EmuDeck (Option 1)
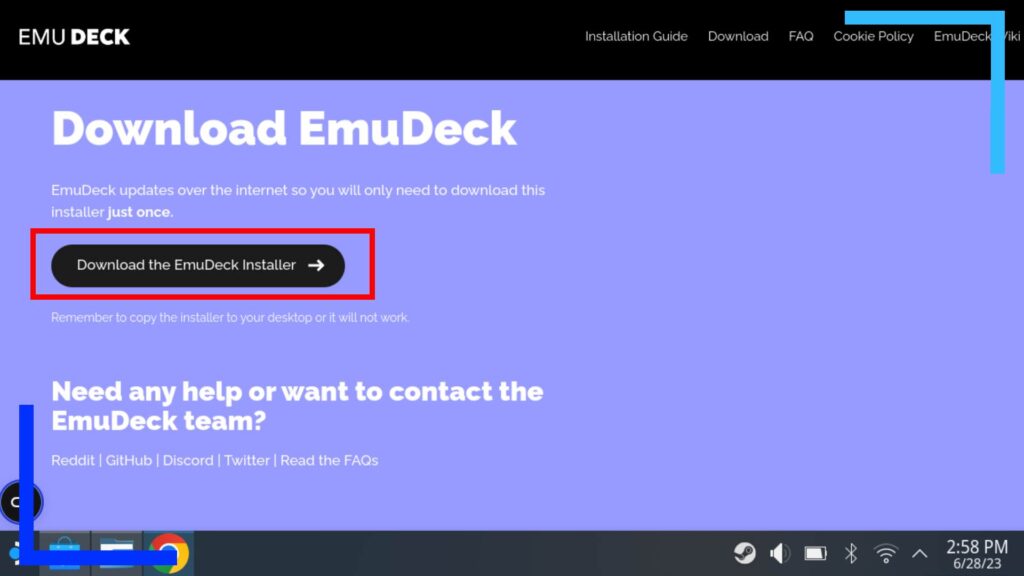
If you’ve chosen to go the EmuDeck route, let’s start by heading to the EmuDeck homepage. See that big download button shown above? Click on that to download the EmuDeck installer.
Next, click on the Dolphin File Explorer (the blue folder icon) to open it up.
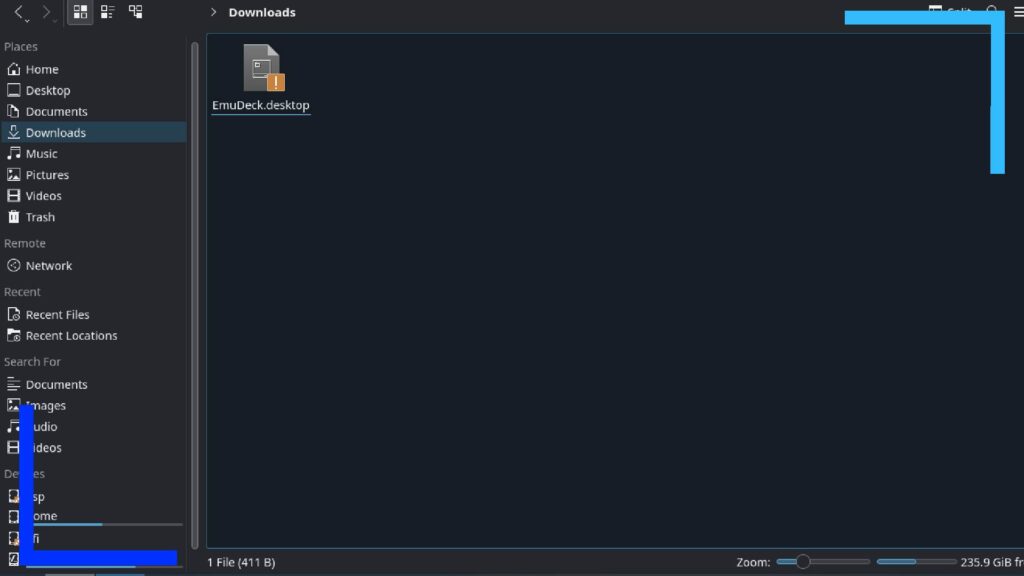
Click on the Downloads folder and inside you should spot the EmuDeck installer you just grabbed.
Use the right trigger to click on this file twice and you’ll be asked if you want to run it. Click on Execute, then follow the on-screen instructions to install EmuDeck and its wealth of emulators.
It’s a fairly straightforward setup process where you’ll be asked questions and you answer them to your liking. If you do find yourself stuck at any point, I’ve got an in-depth guide to getting EmuDeck up and running that covers anything.
Step 4: Install DuckStation (Option 2)
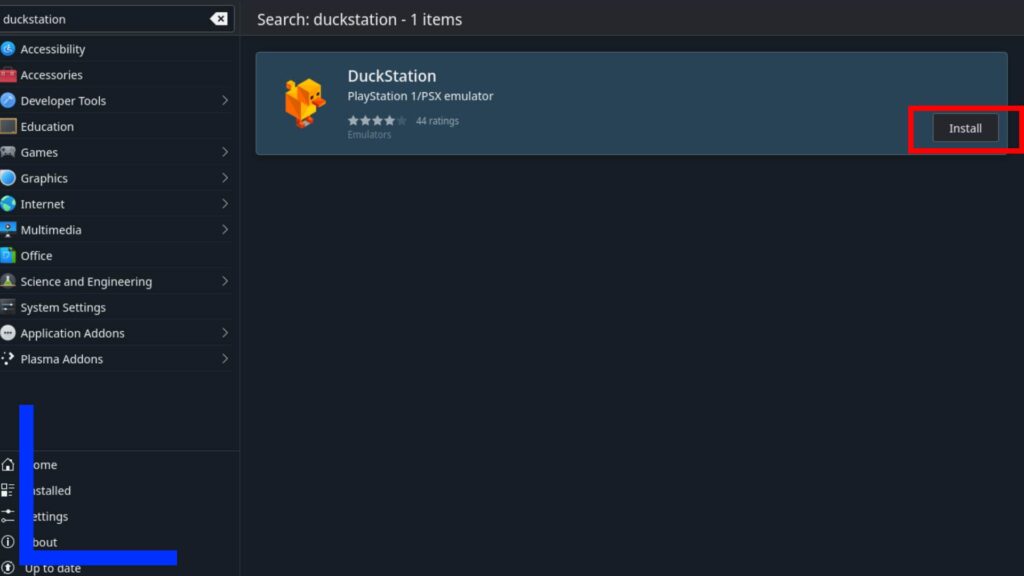
Downloading DuckStation is even easier than EmuDeck. Just open up the Discover Store (the blue folder icon) and type “DuckStation” into the search bar then hit enter (enter being the right trigger, and the X button being the button to bring up the keyboard so you can type).
On the right side of the screen should be DuckStation, then it’s just a case of hitting the big Install button to download and install it. Easy stuff, right?
Step 5: Where to Put the BIOS Files
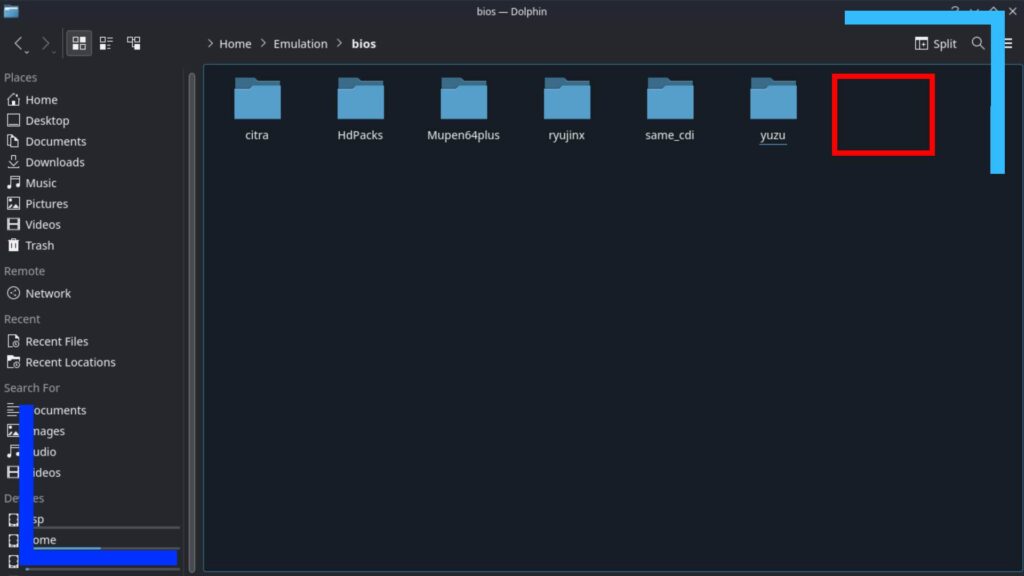
Regardless of which version you installed, you’re going to need to have a PS1 BIOS installed for DuckStation to work.
For reasons I hope are obvious, I can’t offer guidance on where to download the BIOS files because it’s illegal. RetroGameCorp has a great guide for dumping the BIOS yourself if you want to avoid getting in trouble, so be sure to check that out if you want to do it yourself.
Also, if you already have your BIOS files and they’re in a Zip format, you’ll need to extract them now. If you don’t have any Zip extraction software, have a look in the Discover Store. Oh, and a quick way to transfer files wirelessly onto the Steam Deck from a Windows PC is Warpinator. This single piece of software has made sending stuff from Linux to Windows and vice-versa so much easier for me.
Once you’ve got the files, and you’re using EmuDeck, you’ll want to move them to the following path:
Home > Emulation > BIOS.
Note: You can use the left trigger to bring up the submenu, then the right trigger to click on Copy or Paste when needed.
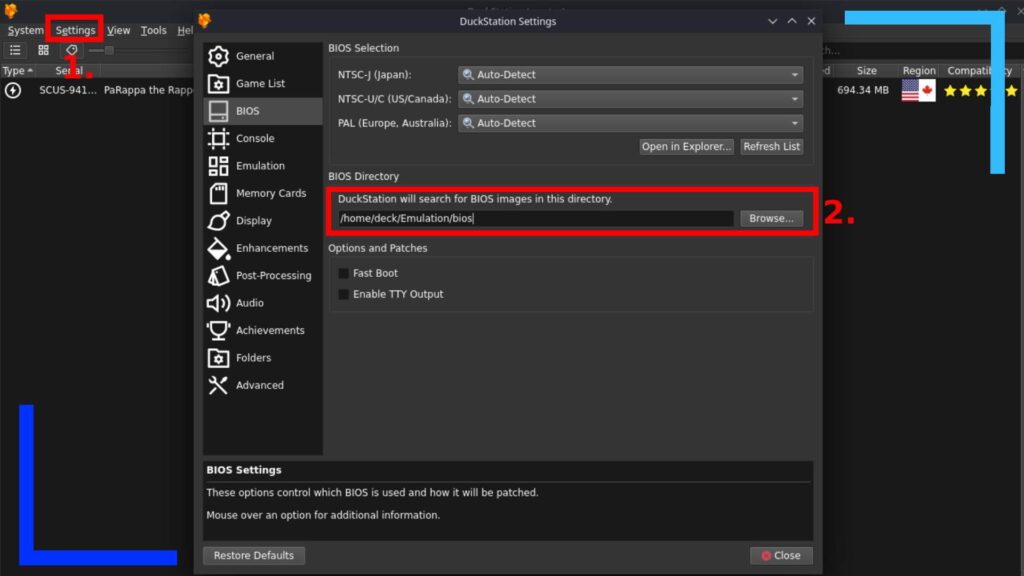
If you installed the standalone DuckStation, then you’ll need to load up DuckStation like you would any app or game then click on Settings (1.), then BIOS, then the final screen you’ll see will let you manually set a path to where your BIOS files are located (2.).
Step 6: Set the Game Path
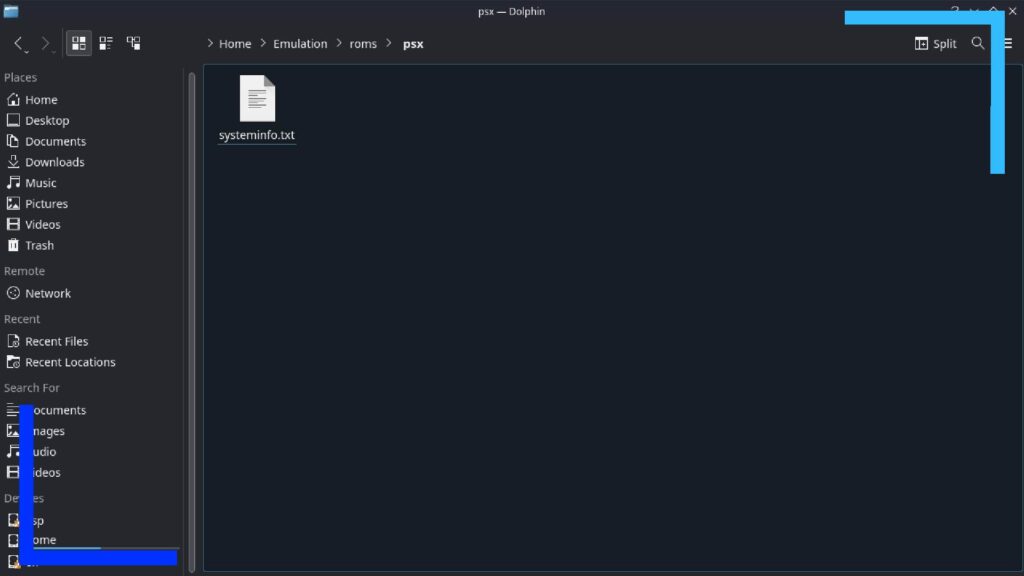
Once you’ve got your games or ROMs, you’ll be wanting to know where to copy them to. For EmuDeck users, it’s the following path:
Home > Emulation > roms > psx
Once you’re inside the PSX folder, just hit the left trigger and select Paste after you’ve Copied the games you want on the Steam Deck.
By the way, if you’ve got EmuDeck installed on an SD card, your path will be slightly different:
/run/media/mmcblk0p1/Emulation/roms/psx.
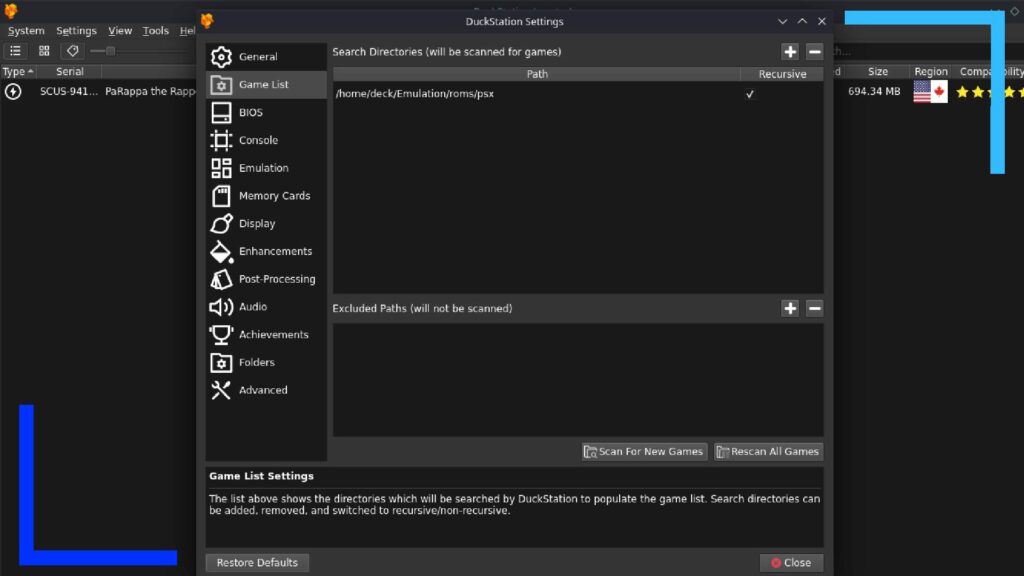
For standalone users, load up DuckStation, hit Settings, then Game List. Here you can click on the plus button to add the above path before clicking on Scan New Games.
That’s it! You’re now all set up and free to go and play PlayStation 1 games on the Steam Deck. That was surprisingly easy, right?
Best PS1 Settings on Steam Deck
Once you’ve got DuckStation up and running, it’s worth taking a moment to make sure your settings are getting the most out of the Steam Deck.
To do this, head into Settings and click on Enhancements. Now, it’s important to remember what the Steam Deck is and isn’t capable of. You can set the internal resolution to 1080p but that’s a waste on the Deck’s 800p screen. You won’t see any extra improvements and you’ll be using more battery juice for no reason.
Instead, it’s worth setting that to 720p. That’s only 80p below what the Steam Deck’s max output and is still a massive improvement over the original PS1’s 480p resolution.
Of course, feel free to change this to 1080p or 4K if you’re playing the Steam Deck in docked mode. But in handheld mode, keep things simple.
Here are the settings I’ve been using to play PS1 games on the Steam Deck.
| Emulation | |
| Emulation Speed | 100% (60 FPS NTSC/50 FPS PAL) |
| Fast-forward Speed | Unlimited |
| Turbo Speed | 200% |
| Enhancements | |
| Internal Resolution Scale | 3x for 720p |
| Texture Filtering | Nearest-Neighbor |
| Downsampling | Disabled |
The above settings get me crisp visuals and solid load times. Feel free to have a play around with the above to find what works for you, though. That’s half the fun of emulation!
To finish, if you’re wondering what PS1 games look like in action, take a look at my Steam Deck below. Glorious, isn’t it?

All screenshots captured on Steam Deck. | Testing performed on Steam Deck.

