EmuDeck remains the easiest solution to getting all the best emulators on a device with minimal fuss. Rather than downloading everything separately, EmuDeck does all the hard work for you with just a few clicks.
I’ve already got EmuDeck installed on the Steam Deck, but given the extra power found in the ASUS ROG Ally, anyone into emulation is surely going to want this thing installed.
In This Article
Is EmuDeck on the ASUS ROG Ally?
Yes, EmuDeck is available for Windows 11 and the ASUS ROG Ally specifically. This version is known as EmuDeck WE (Windows Edition) and is accessible through the EmuDeck Patreon.
Step 1: Download EmuDeck
Before we do anything, the only way to get EmuDeck on the ASUS ROG Ally is to subscribe to the EmuDeck Patreon page. Once you’ve signed up and purchased the correct tier to get access to EmuDeck, head on over to the GitHub and download EmuDeck Windows Edition. The file we’re after for the ROG Ally is the EmuDeck-Setup file ending in “exe”.
Check out the image above to see what I mean, but keep in mind the exact file name may change as time goes on and new updates come out.
And before you ask, you can’t just download the EmuDeck WE installer and use it without joining the Patreon unless the team at EmuDeck is doing token giveaways. There’s currently no way around the Patreon requirement, so you’ll need an account that’s subbed for EmuDeck to work on the Ally.
This is likely to change in the future once EmuDeck WE gets a full release, but for now, you need to sign up.
Step 2: Run in the EmuDeck Installer
Once the EmuDeck WE file has finished downloading, open up the file manager (the yellow folder icon) and click on Downloads. Inside you should see the EmuDeck file we just grabbed.
Use the right trigger to click on the EmuDeck installer and that’ll bring up the sub-menu. From here, use the right bumper to click on Run As Administrator.
EmuDeck should boot without administrator privileges, but mine didn’t, and doing so fixed it.
After a few short moments EmuDeck will begin the installation process in a new window.
Step 3: Link EmuDeck WE With Your Patreon Account
When you load the installer, it may ask you to install some extra files and programs so EmuDeck can work. One of these is something to let EmuDeck grab what it needs from GitHub so it can update smoothly. Install these now.
After that’s all done, it’ll ask you to reboot EmuDeck. Close the window, then boot up the installer again.
Upon reloading, you should eventually come to the screen above. This is how you link your Patreon account with EmuDeck. Click on Login with Patreon button on the furthest left and it’ll open a new window. Log in with your credentials, then it’ll give you a token. Click Copy to Clickboard then head back to the EmuDeck installer.
Now click the Login with Token button on the furthest right. We now need to paste the code in. To do that, click on the text box. If the ROG Ally keyboard doesn’t appear, press the left ROG Ally menu button and tap on Show Keyboard. You should now have the option to paste from the on-screen keyboard itself.
Next click on the check token button and you should be safe to move on.
After entering the token you’ll be sent to an update screen telling you what’s new. Click Back to exit that and the installation process should begin properly when you hit Continue.
Step 4: Install EmuDeck WE on the ASUS ROG Ally
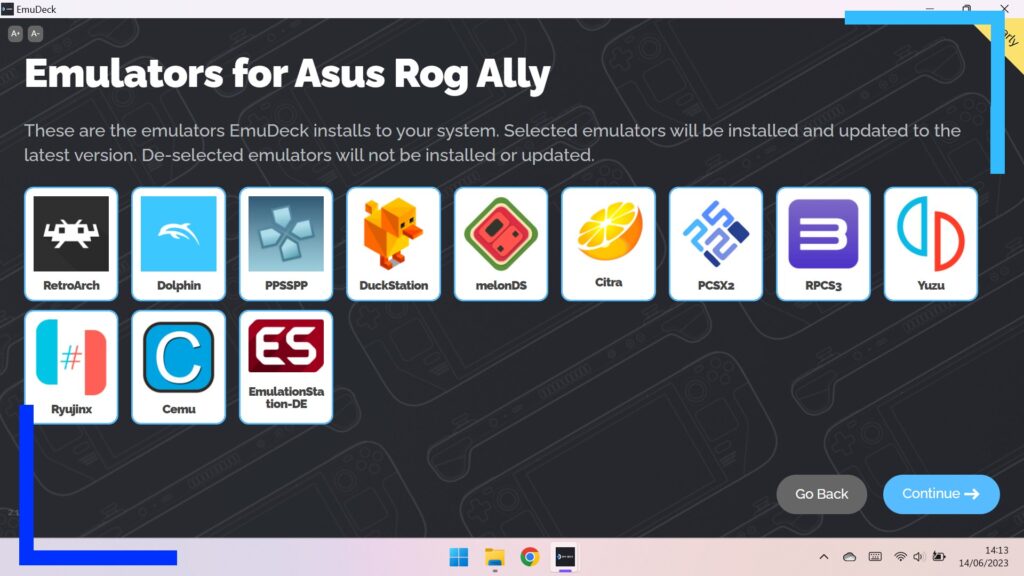
The main installation process is all just a case of answering questions as to what emulators you want and what settings you want turned on.
The above image shows the current list of emulators. Use the right stick to move the cursor and the right bumper to toggle these on and off.
Something to note: Feel free to install EmuDeck WE to a memory card if you want to save your internal space for gaming. That’s what I did and it’s a killer way to stop the SSD from getting full.
You’ll also be asked about aspect ratios. As the ASUS ROG Ally supports 16:9 outputs, feel free to turn those on when asked.
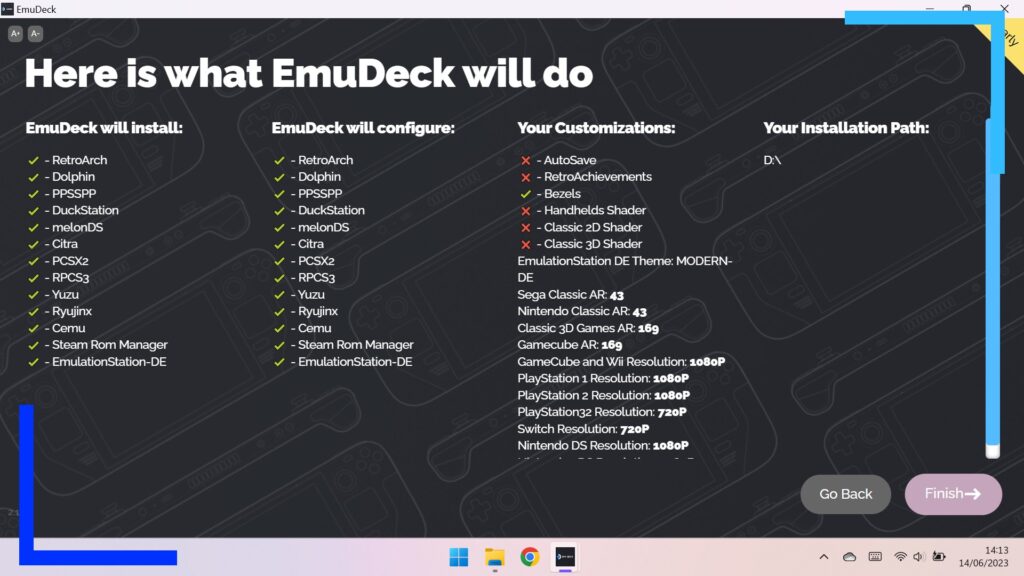
At the end of the process you’ll be asked to confirm you’re happy with your choices. Read these through and if you’re not happy or you’ve missed something, use Go Back to cycle back through to make the changes you want.
If everything looks good, click Finish and EmuDeck will take some time to grab the necessary files it needs before installing everything per your specifications.
If it takes a while, don’t panic, that’s normal.
Once this part is finished that’s EmuDeck installed on the ASUS ROG Ally. Way easier than you thought, right?
Step 5: Locating the Emulators
With EmuDeck installed, you’re probably wondering where all your emulators are. You can find all of these through the following path:
This PC > OS (C:) >Users > Your Username > EmuDeck > EmulationStationDE >Emulators
Inside the Emulators folder you’ll find even more folders, each of which has a different emulator name. Inside each of those folders you’ll spot the main launcher files. You can also use those files to create desktop icons to make accessing them all the more easy.
All images captured on an ASUS ROG Ally.