
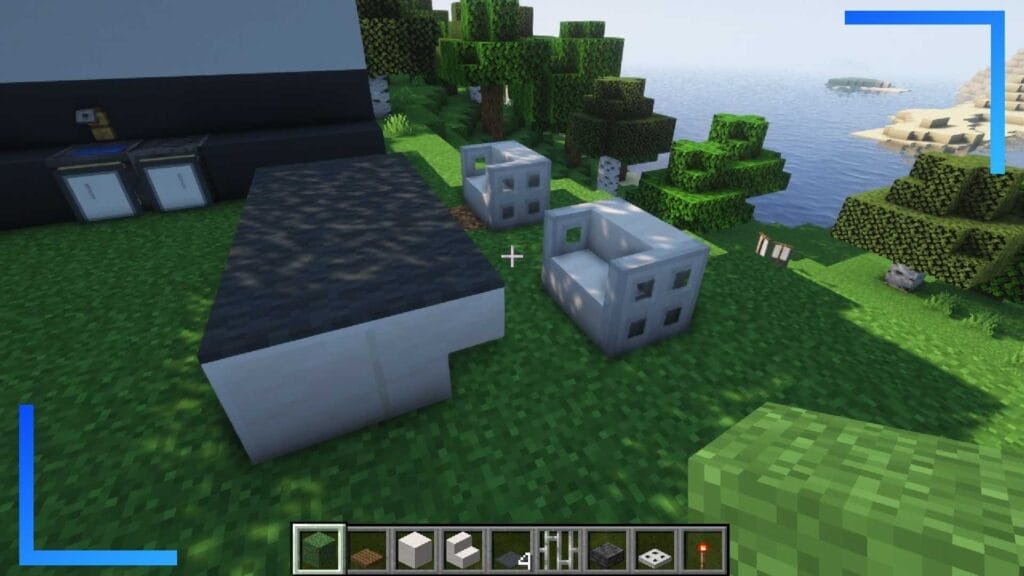
As you probably know, houses are the most common builds in Minecraft. I swear I’ve built more houses than I can count! And along with those hundreds of house builds, come hundreds of kitchen designs.
In this guide I’ll cover how to build this stylish room in Minecraft and how to build individual appliances like an oven, fridge, or cupboards, and we’ve also got complete step-by-step pictures so you won’t get lost.
Build a Fridge
Items needed
- Piston: 2
- Redstone Block: 2
- Armor Stand: 2
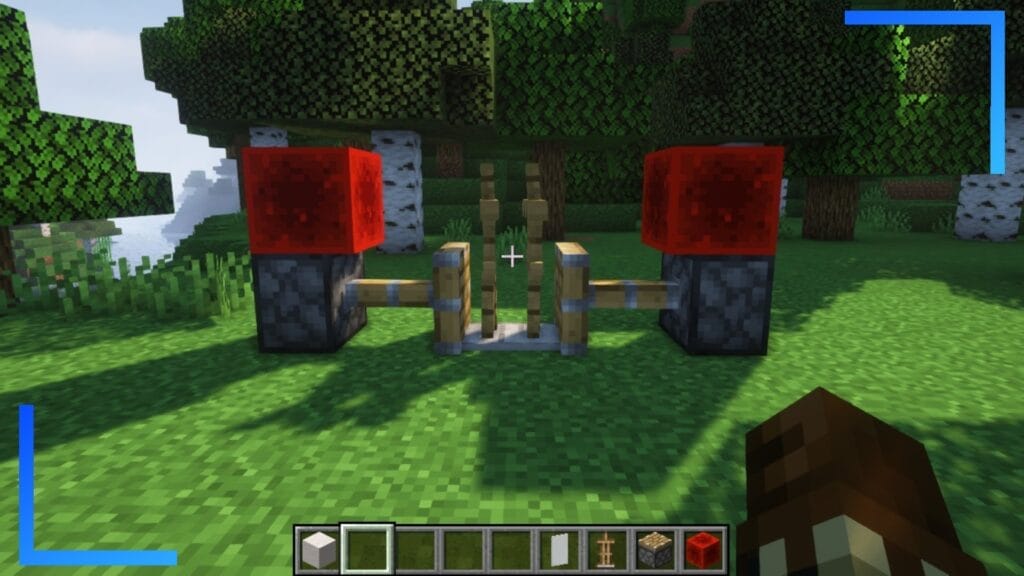
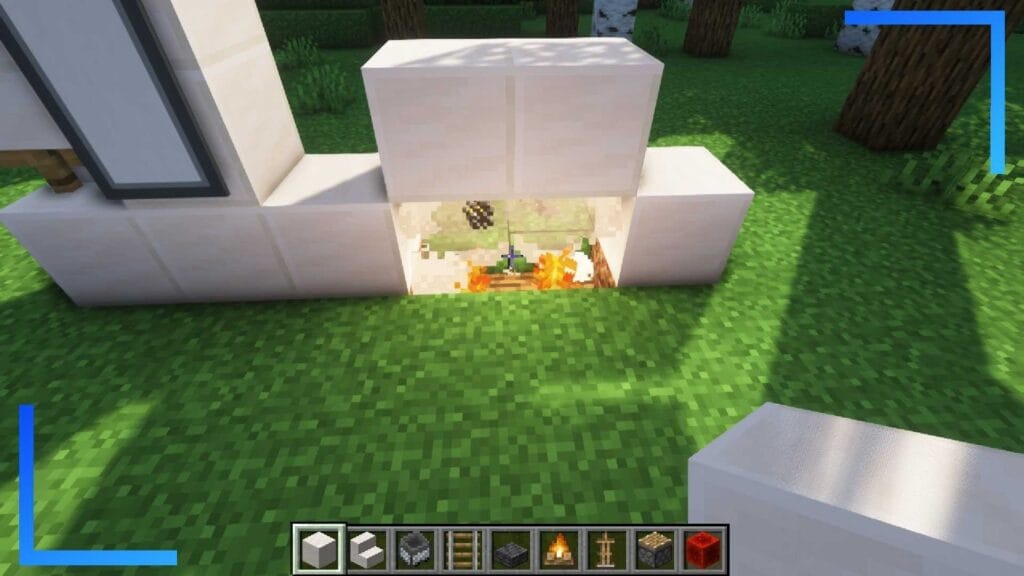
Let’s start this kitchen build by placing two Armor Stands sideways with their backs facing one another, and a one-block separating them.
Next, place a Piston facing each of them on the furthest left and right sides. Now place a Redstone Block on top of each Piston and both of the Armor Stands will be pushed on top of each other and occupy the one-block space.
This handy trick is going to make our refrigerator ice taps. It’ll make sense in a minute. Promise.
Items needed
- Quartz Block: 5
- Quartz Stairs: 1
- Piston: 1
- Redstone Block: 1
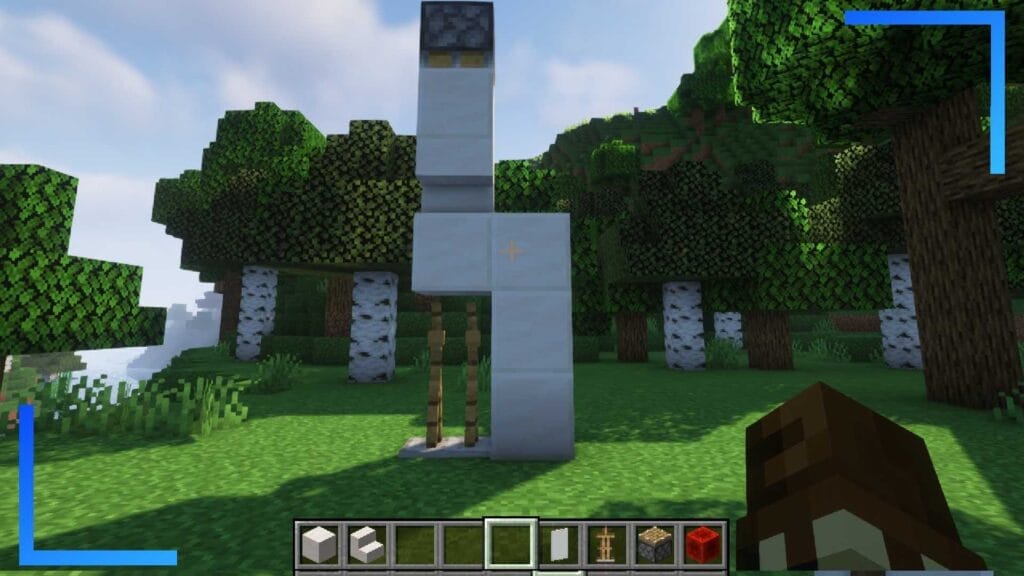
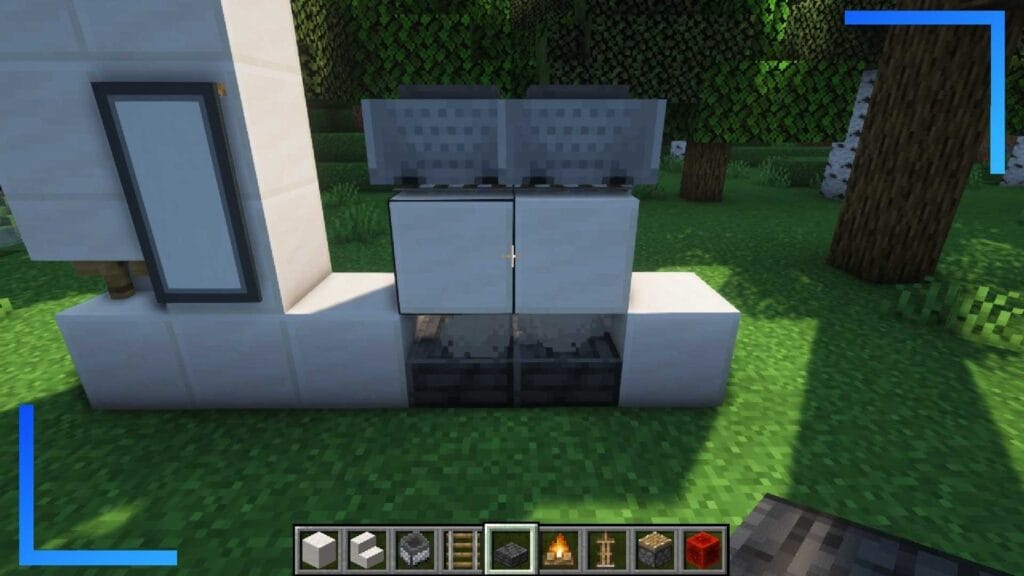
To the right of the Armor Stands place down a three-high column of Quartz Blocks.
Coming off the uppermost block, place another Quartz Block to the left of it. On top of that block drop down a single Quartz Stair upsidedown. Finally, place a final Quartz Block on top of the stairs.
Now for the fun part! Place a Piston facing down on top of the upper Quartz Block in the left column. Next place a Redstone Block above the Piston and watch as it forces all the blocks below downward.
As you may have noticed, it’s still not in the correct position. It’s all good, let’s fix that by placing another Quartz Block on top of each of the columns. Now place the downward-facing Piston and Redstone Block again on top of the left side and it’ll push the left side of the column all the way down.
You should now be looking at something that’s identical to the image above. If you are, you’re good to continue.
Items needed
- Loom: 1
- White Banner: 1
- Light Gray Dye: 1
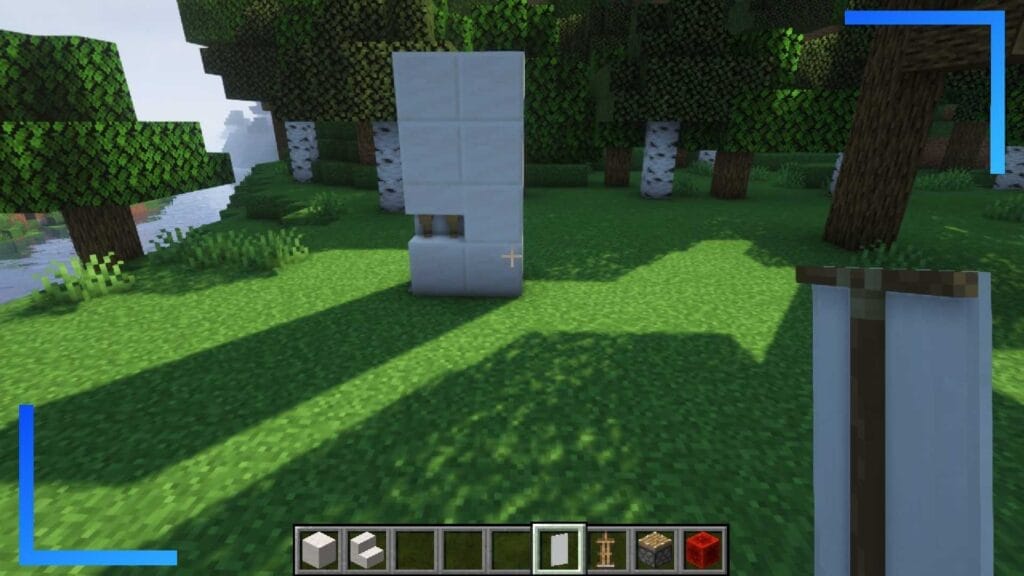
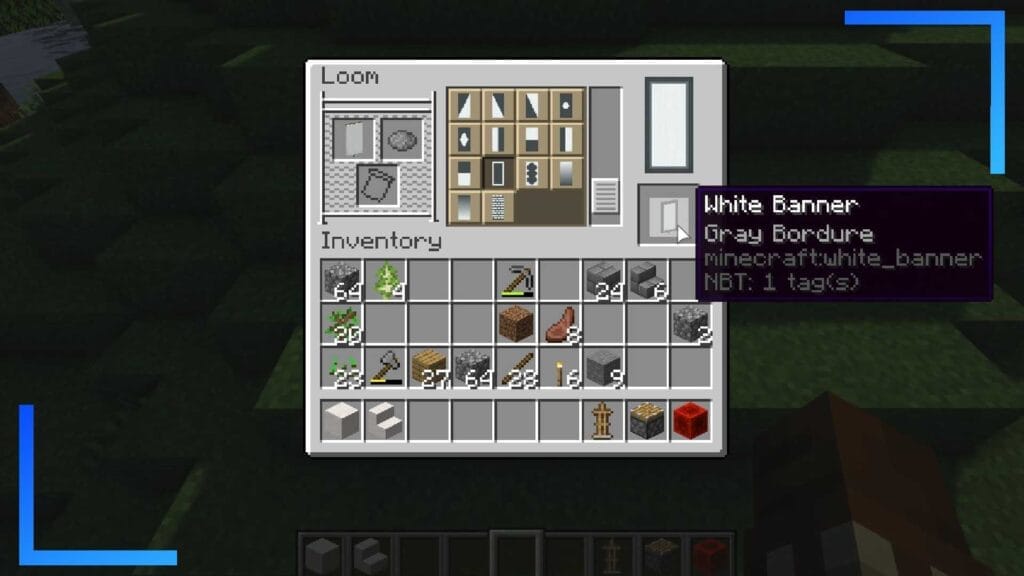
For this next part we’re going to add a stylish panel to our fridge. First up, grab a Loom, White Banner, and one Gray Dye.
Head over to the Loom and insert all the items. We want to give this Banner the Gray Bordure style, which is kind of like the outline of a rectangle.

Once you’ve built your fridge panel banner, whack it onto the right column to complete your Minecraft fridge.
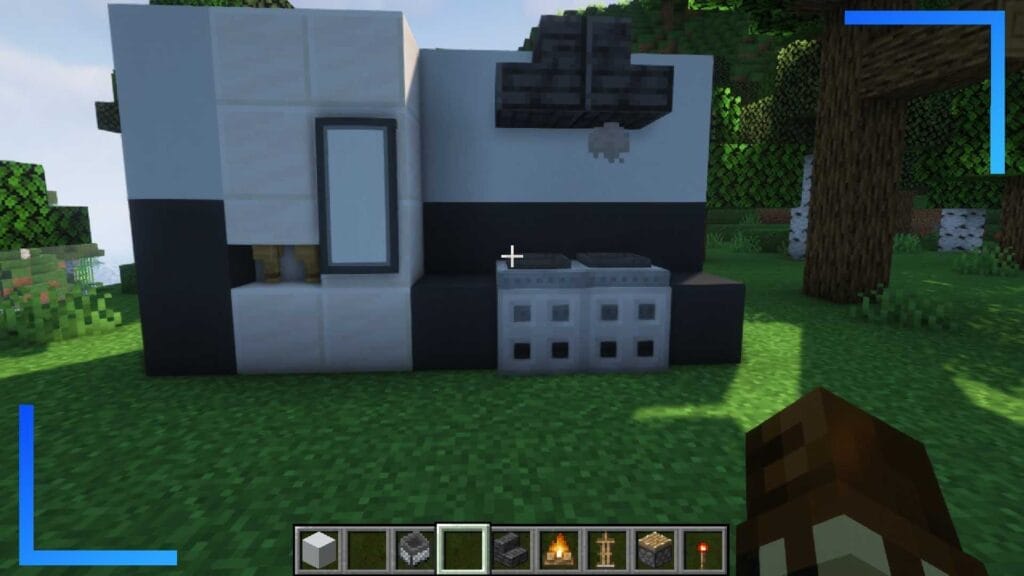
Build an Oven
Items needed
- Quartz Block: 4
- Campire: 2
This is another one that’ll make sense the more you build. Let’s begin by digging up a two-by-one hole that’s one block deep. In the aforementioned hole, place two Campfires.
To the left and right side of the hole place one Quartz Block. Next, place two more Quartz Blocks with a one-block gap above the Campfires.
Items needed
- Polished Deepslate Slabs: 2
- Rail: 2
- Minecart with Hopper: 2
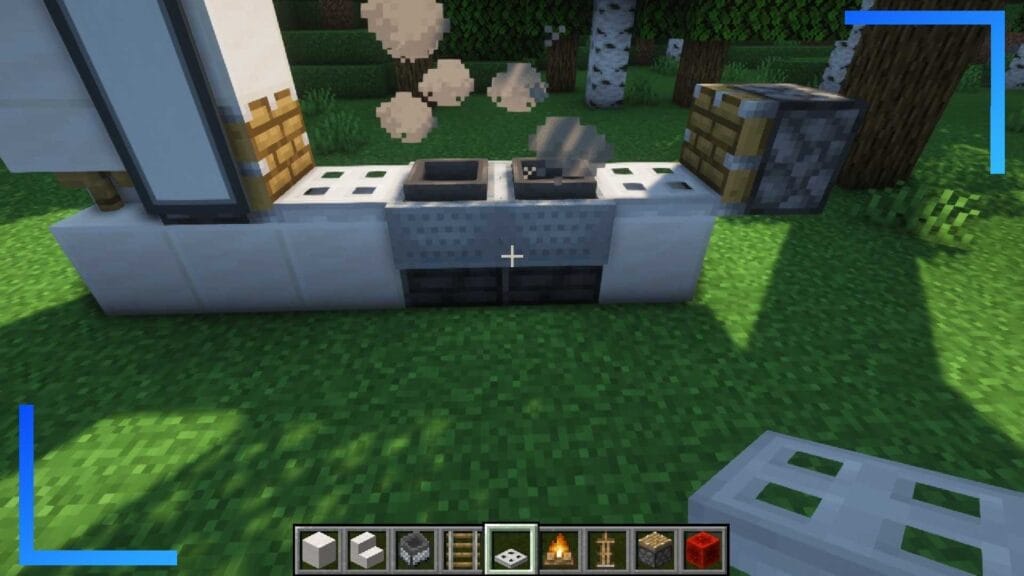
Grab your Polished Deepslate Slabs and whack them directly over the Campfires. This will cover the Campfires but the smoke will still be able to pass through, creating the illusion of a smoking stove without the fire. Cool, right?
Now for more neat tricks. Set the two Rails on top of the two-wide Quartz Blocks you just placed. Dump the Minecarts with Hoppers on the Rails, then mine up the Quartz Blocks below them.
What should happen is the Minecarts will plummet down to the ground and sit on top of the Polished Deepslate Slabs.
Items needed
- Iron Trapdoor: 2
- Piston: 2
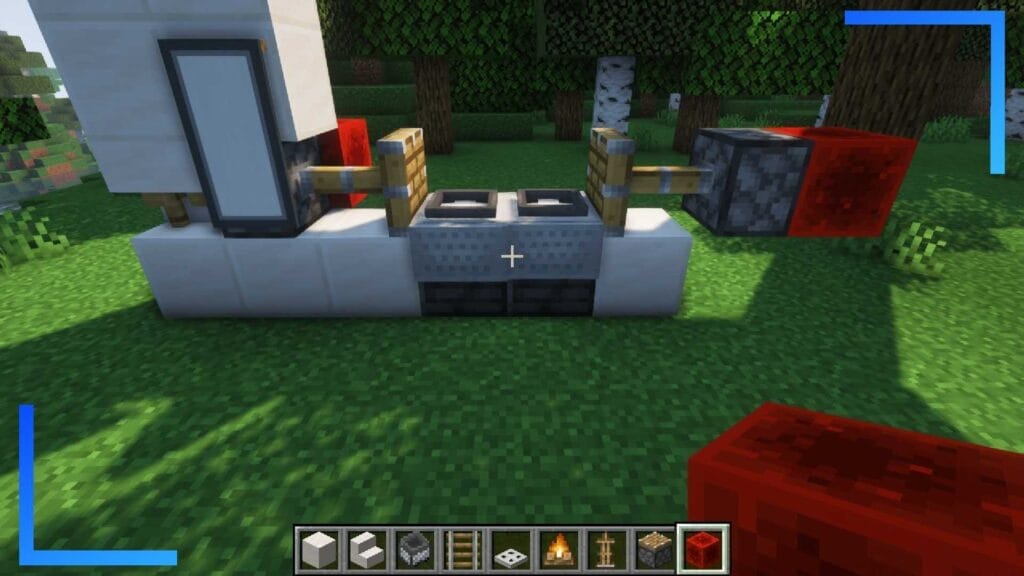
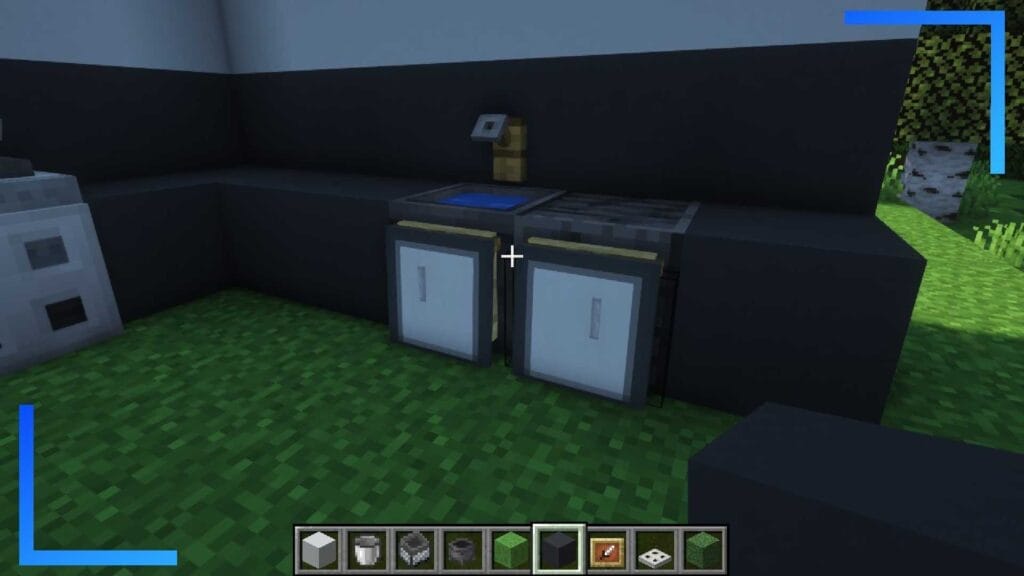
Now it’s starting to look like an oven. For the final part grab two Iron Trapdoors and place each of them to the left and right of the Minecarts.
Items needed
- Redstone Block: 2
Add Pistons behind each of the Iron Trapdoors and Redstone Blocks to activate the Pistons. The Iron Trapdoors will now be pushed into the Minecarts to round this part out.
Items needed
- Redstone Torch: 2
It almost looks like an oven. Almost. So let’s add some finishing touches.
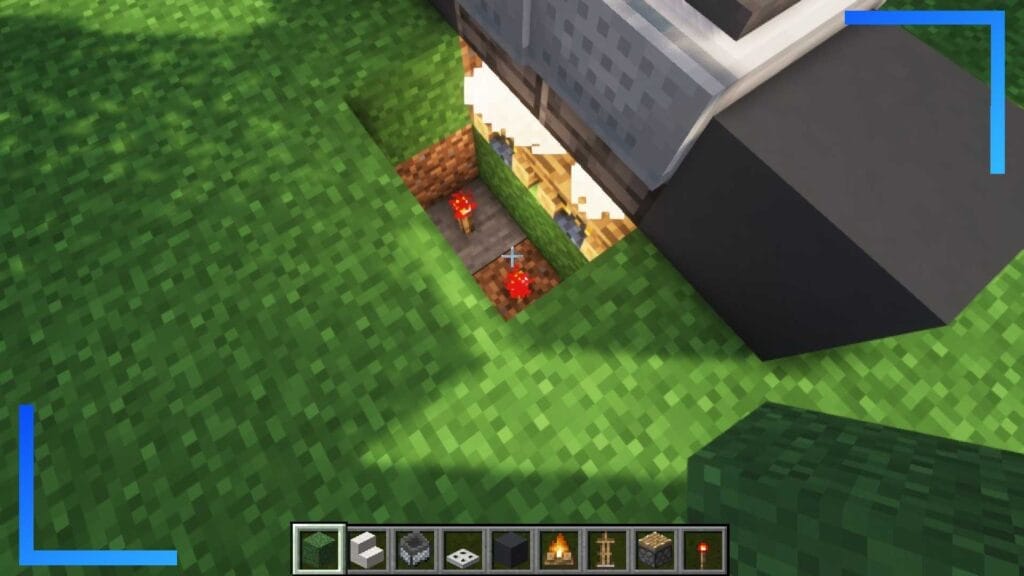
Grab two Redstone Torches and two by one hole that’s two blocks deep. At the bottom of this hole, place the two Redstone Torches side by side.

Items needed
- Iron Trapdoor: 2
Place dirt blocks above the torches to cover the hole, and to finish, place two Iron Trapdoors facing the oven. Because we placed the Redstone Torches down, this will send a signal to the Iron Trapdoors that make them automatically open and attach to the front of the oven to complete our look.
Items needed
- Polished Deepslate Stairs: 2
This is completely optional, so feel free to skip this part. I won’t be offended. Much.
To make a hood for our oven, just grab two Polished Deepslate Stairs and plonk them facing outward, two blocks above the oven and your oven build is now fully complete.
Build a Sink
Items needed
- Cauldron: 1
- Iron Trapdoor: 2
- Item Frame: 2
- Polished Deepslate Block: 1
Stupid ideas are the best part of Minecraft, especially in situations like this when they actually work really well.
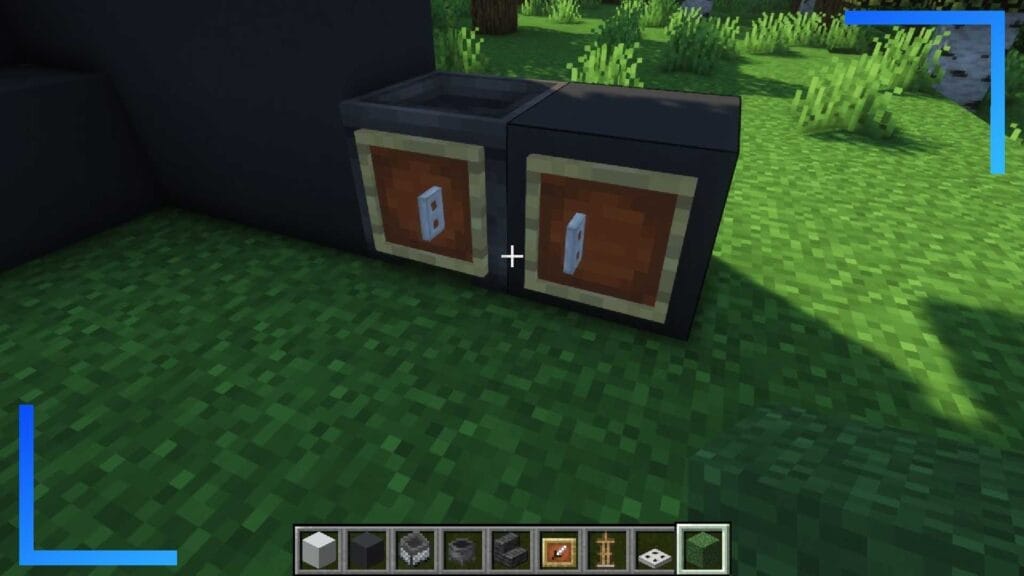
Place the Cauldron with a Polished Deepslate Block next to it. On both the Cauldron and the Polished Deepslate Block, add Item Frames to their front.
Grab yourself two more Iron Trapdoors and add one to each Item Frame. The idea here is to keep turning the item in the frame until it looks like those in the image above – one Iron Trapdoor on the inside of the left Item Frame, and one on the inside of the right Item Frame.
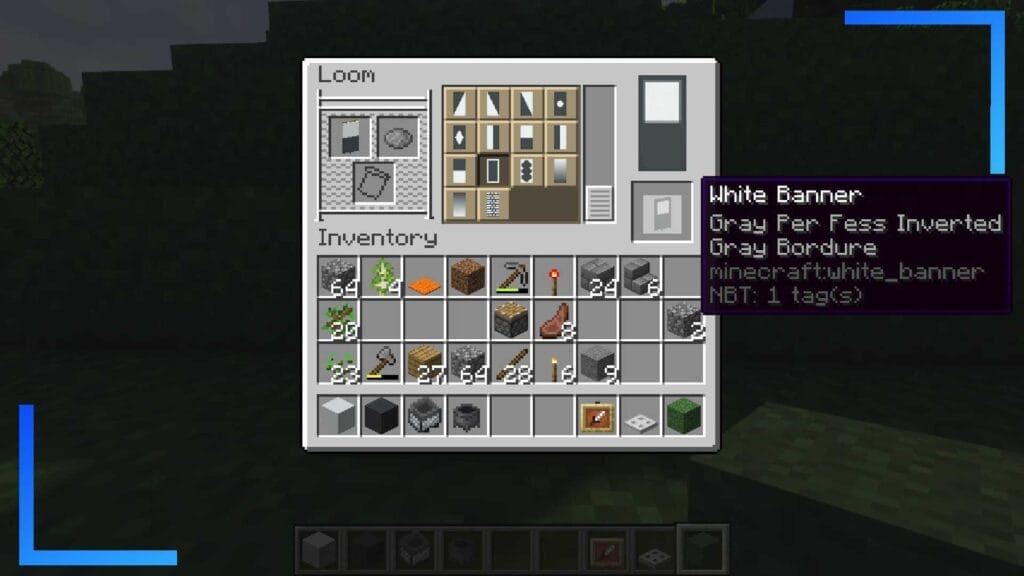
Items needed
- Grey Banner: 2
- Light Gray Dye: 4
We’re going to need two of these banners. Once you’ve added the ingredients to the Loom, add the patterns Gray Per Fess Inverted and Gray Bordure to each of the banners.
Items needed
- Tripwire: 1
- Bucket of Water: 1
Take your newly-made Banners and place one on the Cauldron and one on the Polished Deepslate Block. What you’ll find is because the Banner dips into the floor, the design we made now makes the blocks look like cupboards.
When they’re in place, fill the Cauldron with a Water Bucket and add a Tripwire above the sink to look like a tap.
Build a Dining Table
Items needed
- Smooth Quartz Block: 4
- Smooth Quartz Stairs: 4
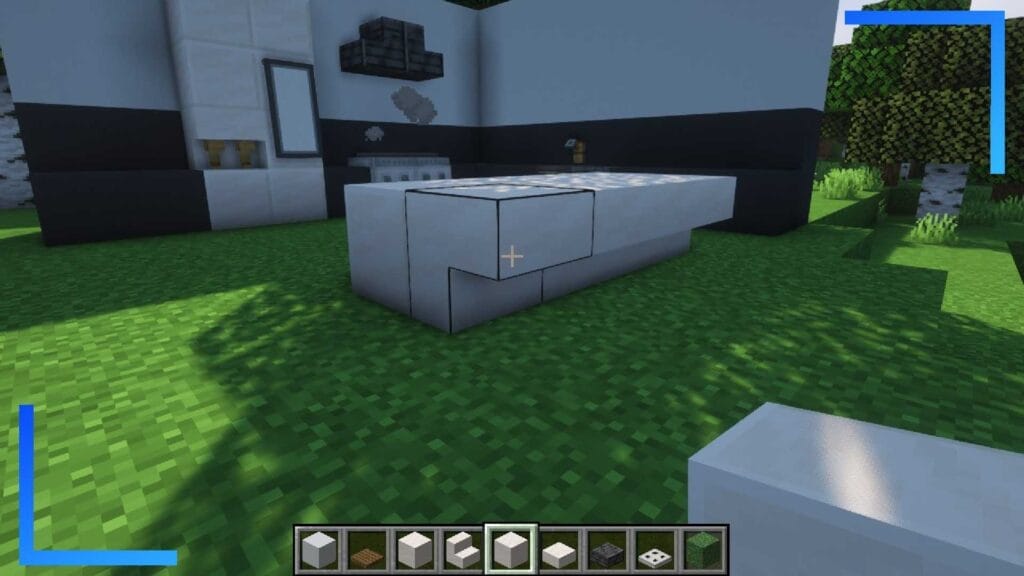
This is a nice and easy build. Drop down a row of four Smooth Quartz Block and four upsidedown Smooth Quartz Stairs facing outward behind them.
Items needed
- Smooth Quartz Stairs: 2
- Iron Trapdoor: 4
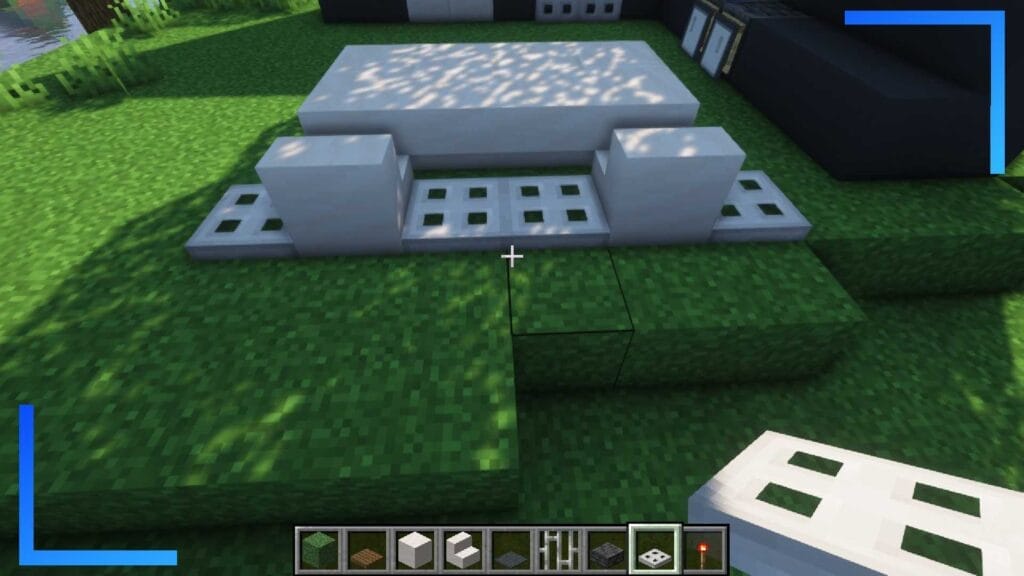
A question for you: Do you want the chairs to be right up against the table or one block out? If it’s the latter, be sure to move the Stairs out as we go.
Parallel with the Smooth Quartz Stairs, place two more Smooth Quartz Stairs at the end of the table as shown in the screenshot above.
Next, place an Iron Trapdoor on the left and right sides of each of our chairs.
Items needed
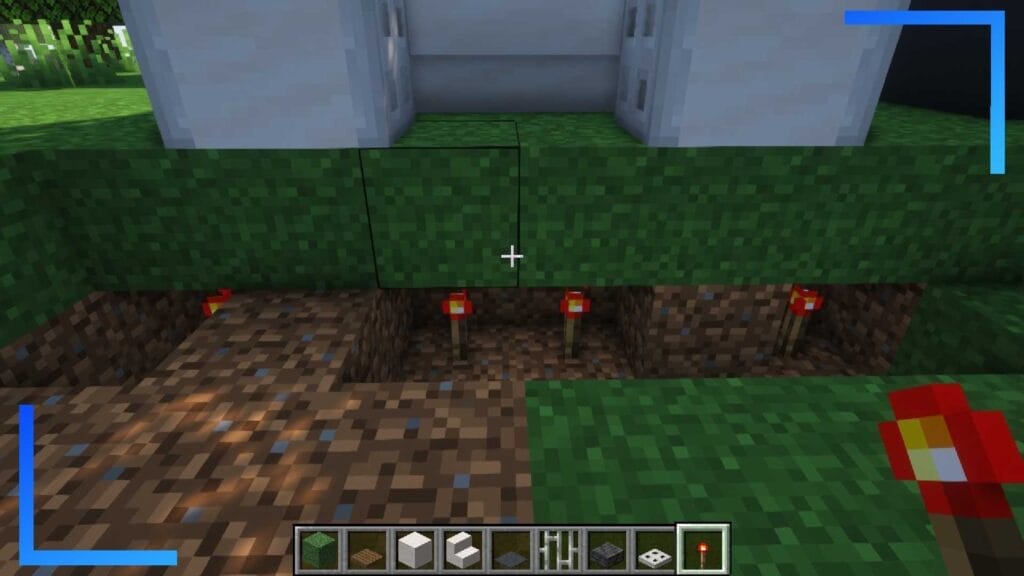
- Redstone Torch: 4
To make the Iron Trapdoors contract and look more chairlike, simply place Redstone Torches two blocks below each of the Iron Trapdoors and they’ll pop right up.
Items needed
- Light Gray Carpet: 8
All that’s left to finish the dining table build is to add Light Gray Carpet to the top of the table.
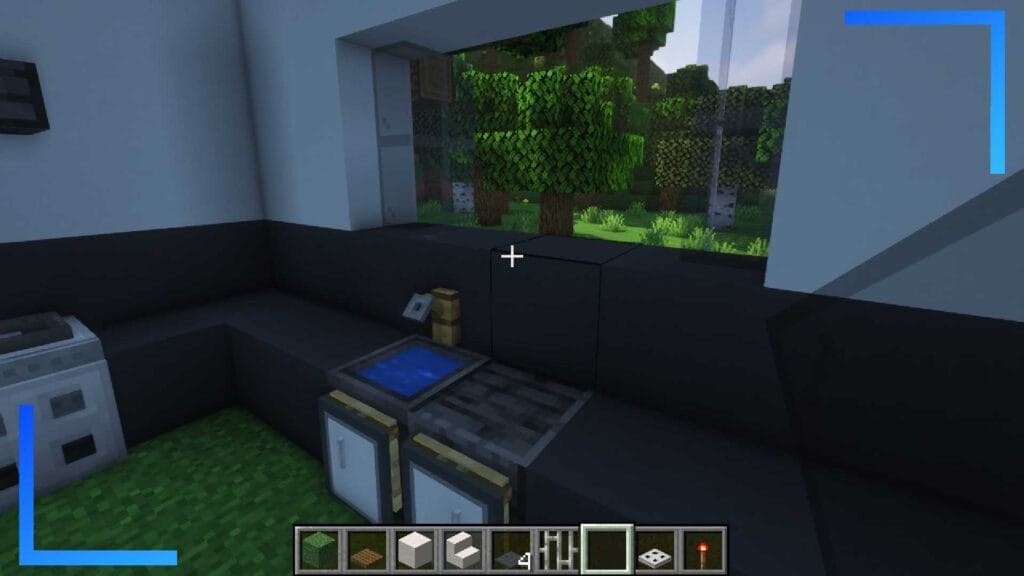
Throw in a Window
Items needed
- Black Stained Glass Panes: 8
Hear me out: Anyone can add a boring two-by-four window above the sink, so let’s do something a little different from everyone else.
Dig up the two-by-four hole above the sink as usual, but instead of completely filling it with Black Stained Glass Panes, only fill in the furthest left and right columns. Run around the other side and place two more panes aiming outward. This will create the illusion that the window has been left open and really helps to make a build feel more unique.
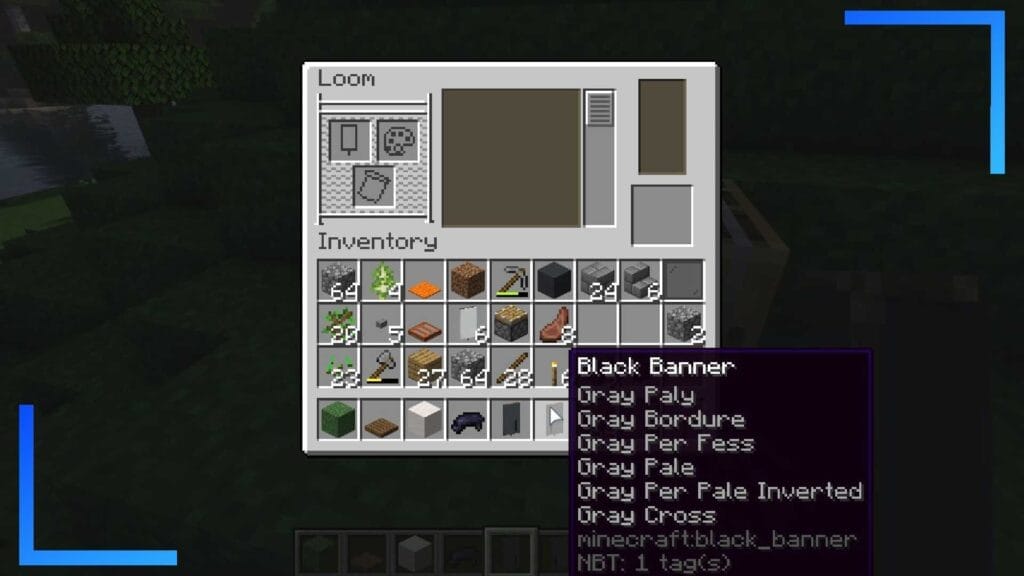
Build Cupboards
Items needed
- Black Banner: 4
- Light Gray Dye: 24
Feel free to adjust the recipe above to however many cupboards or cabinets you want to make.
One thing to keep in mind while building this, we’re making cupboard doors for each side of the cupboard. That means we want the handles on different sides depending on the door we’re making.
To switch the handle to the opposite side, change the Gray Per Pale Inverted pattern out for Gray Per Pale.
To make the four Banners we need, use the following patterns in the following order in the Loom.
- Gray Paly
- Gray Bordure
- Gray Per Fess
- Gray Pale
- Gray Per Pale Inverted or Gray Per Pale
- Gray Cross

Items needed
- Quartz Block: 8
With the four Banners in tow, place a two-by-four rectangle made from Quartz Blocks on the wall. Now just place the Banners on the upper block and they’ll resemble cupboards.
Bonus Tips
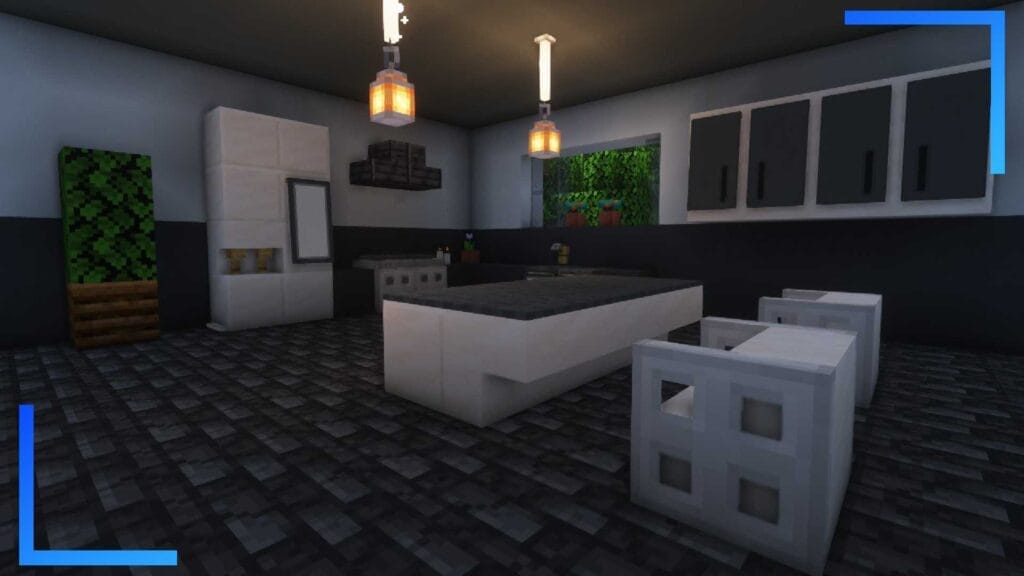
Your kitchen in Minecraft should now be taking shape. You’ve got the main appliances and furniture built, so let’s finish up with some neat housekeeping.
For the floor, I used Deepslate Tiles because they’re the best block, and for the walls, I used a mix of Gray and White Concrete.
If you want to jazz the place up, use Ender Rods with Lanterns dangling from them to create some ceiling lamps.
For some flowers, I placed two pots in the open window gap and added Mushrooms and two Oak Leaves on top of a Composter to build a makeshift plant.
By the way, if you’re wondering why the lighting looks so nice, that’s because I installed Minecraft mods on my Steam Deck to get things to look a little nicer. Minecraft isn’t natively on the Steam Deck, though, so be sure to follow my guide to getting Minecraft working on Steam Deck by clicking here.
And don’t forget, if you’re after more in-depth Minecraft guides, be sure to check out which mob gives the most XP, or if the Warden is whooping you, we’ve got a guide for that as well.
All images captured on Steam Deck hardware in Minecraft Java Edition.