When it comes to gaming, the Steam Deck rocks. Whether it’s current bangers or older titles from the PS2 or Wii U eras, the Steam Deck can do it all.
But how well do GameCube games run on Steam Deck? Really well. And best of all, playing GameCube games on Steam Deck is actually one of the easier things to set up.
How to Play GameCube Games on Steam Deck
The first decision you need to make is whether you want to install the GameCube emulator Dolphin via EmuDeck or as a standalone app.
If you install through EmuDeck you’ll get access to a host of other emulators, all of which will be preconfigured to work on the Steam Deck. If you decide to go with the standalone, you’ll need to go into the settings and configure everything manually, including the control scheme.
Personally, although EmuDeck adds a bunch of emulators you may not use, overall it’s a much simpler process to get things running. Plus it auto-installs Steam ROM Manager so you can instantly add individual games to the home screen without needing to install it yourself later on.
To get things started you’ll need to boot into Desktop Mode by holding down the Power Button and selecting Switch to Desktop when it appears on your screen.
You’ll also need to install a web browser like Chrome or Firefox from the Discover Store (the blue shopping bag icon in desktop mode).
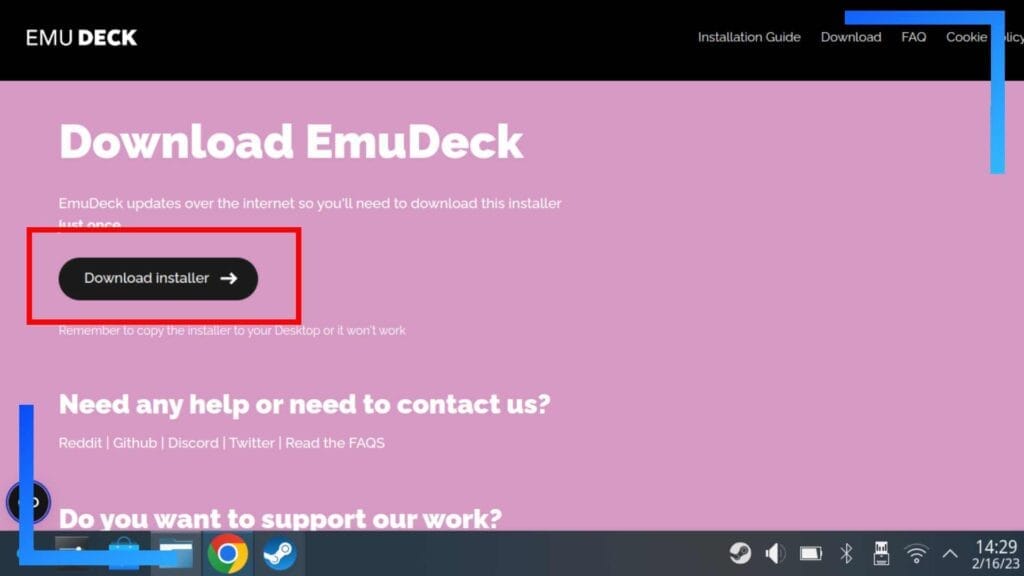
Once your browser of choice has finished installing, go to the EmuDeck website, click on Downloads, then hit Download Installer.
After the EmuDeck installer has downloaded, open up the Dolphin File Explorer (not to be confused with the emulator Dolphin) and go into your Downloads folder. You’ll see the EmuDeck installer right there. Use the right trigger to click on the file twice and the installation process will begin.
The installation process is super straightforward. The decisions all come down to what you want, where you want to install EmuDeck to – the internal storage or an SD card – and what type of settings you’d like on retro emulators.
Installing EmuDeck will also create a host of folders that can be used by the emulators you’ve installed so you don’t have to do it yourself later. Handy, right?
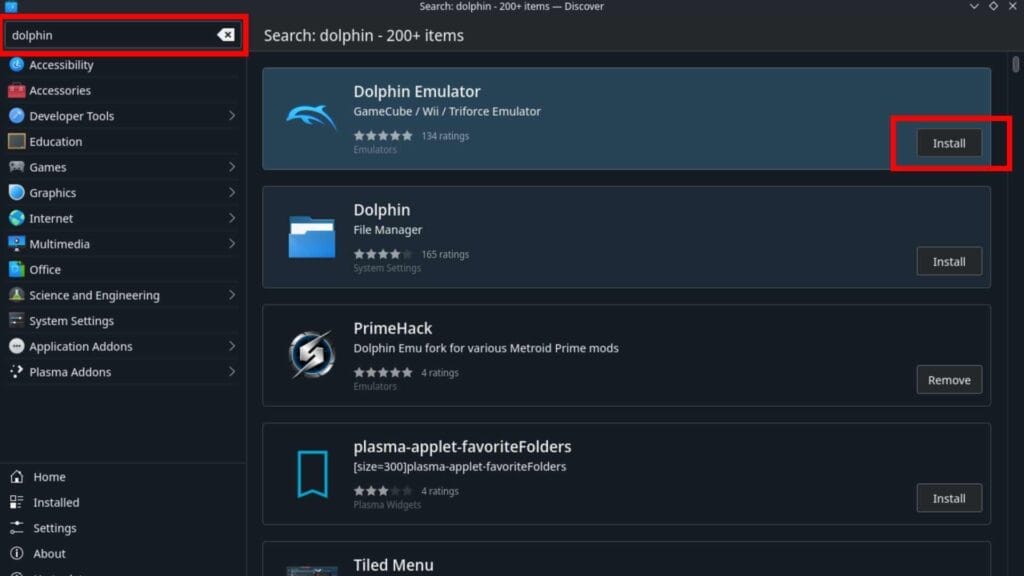
If EmuDeck isn’t your thing, you can find the Dolphin emulator in the Discover Store.
Once open, type “Dolphin” into the main search bar located at the top left of the screen, then when Dolphin shows up on the right side, hit the Install button.
Just keep in mind, there are two Dolphins on the Discover store. Confusing, I know. The image above shows you which one you need, though. If it says “File explorer,” that’s the wrong one. Grab the one that says “GameCube.”
After a few short moments, the Dolphin emulator will be installed. If you want to launch it now, you can find it in the Start Menu (the blue and white icon in the bottom left corner of the screen) in All Applications, under ‘D’.
Best GameCube Settings on Steam Deck
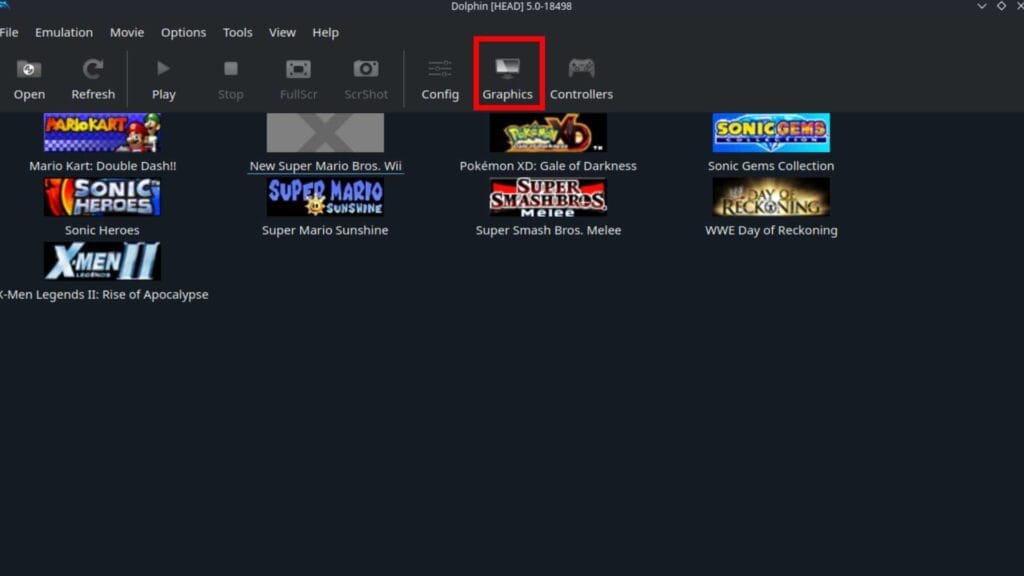
Although EmuDeck configures the important stuff, it’s still worth knowing what you should be looking for. Especially if you want to ever hook up your Steam Deck to a TV.
The main focus is to always have it set to 16:9. This will fill up most of the Steam Deck screen, and when you connect to the TV, it’ll scale the image correctly for most titles.
Below is how I’ve got my version of Dolphin set up and I strongly recommend sticking to these settings if you’re new to the Steam Deck or Linux in general. They’re tried and tested and you won’t go wrong.
| Basic | |
| Backend | Vulkan |
| Adaptor | AMD Custom CPU |
| Aspect Ratio | 16:9 |
| Start in Fullscreen | On |
| Shader Compilation | |
| Hybrid Ubershaders | On |
| Compile Shaders Before Starting | On |
Does Dolphin Need a GameCube BIOS?
Nope! Dolphin does not need a BIOS file to run. You can install a BIOS yourself if you want, but I’m yet to run into anything that really requires one.
We’re at a point in time now where consoles like the Steam Deck can brute force their way through the GameCube library, so the need for a BIOS isn’t all that important to performance.
How to Add GameCube Games to the Home Screen
You could, hypothetically, run Dolphin from the main Gaming Mode home screen, but that’s long-winded and more effort than is needed. Plus if you’ve got a bunch of ROMs, surely you want to show them off.
To add individual games complete with custom artwork to the main Steam Deck, you’ll want Steam ROM Manager.
This program is installed alongside EmuDeck, so if you opted for a standalone install of Dolphin, you’ll need to grab it from the Discovery Store.
One thing to note: Steam ROM Manager requires Steam to be exited so it can write the files to your Steam directory. So when you get the pop-up asking you to close Steam, don’t panic, that’s normal.
Open up Steam ROM Manager either through the start menu or by clicking on the EmuDeck Icon on your desktop. Exit Steam if you haven’t already and the program will open.
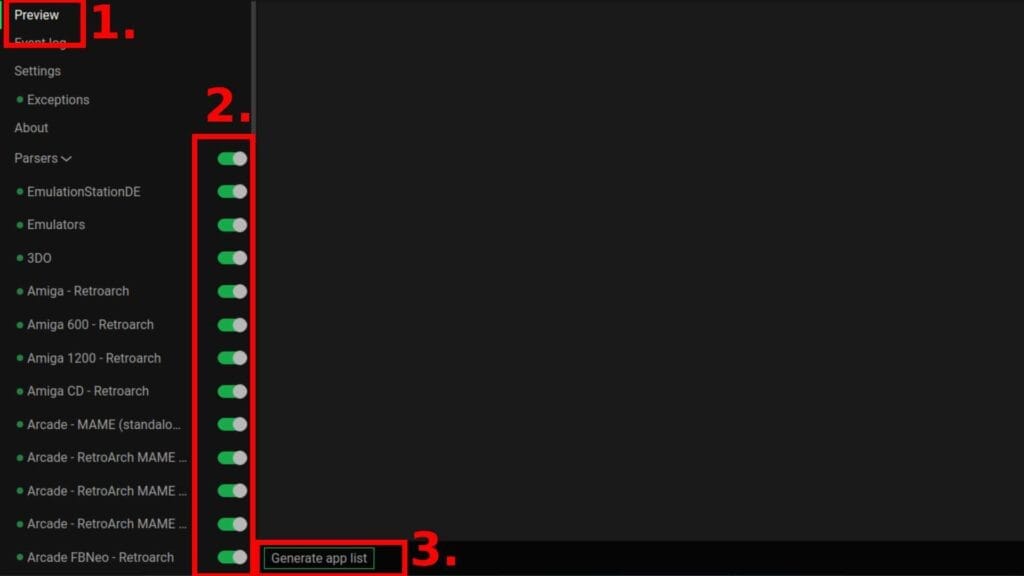
Now, there are a lot of options here and it’s easy to feel overwhelmed. Thankfully, you can ignore most of them. You only really have to worry about paths and the like if you’re going to play Xbox 360 games on Steam Deck. For GameCube games, you only need to know the basics.
On the left-hand side are a bunch of green buttons (2). Click those buttons to toggle what systems are added to your Steam library. I prefer to have them all ticked so when I add ROMs to my Steam Deck, Steam ROM Manager is ready to pick them up and add them when I run it. The choice is completely yours, though.
When everything you want is ticked, click on Preview (1). This will take you to a different area with the option Generate App List (3) along the bottom of the screen. Hit that and Steam ROM Manager will scan all your ROM folders, add them to the list to be written to Steam, and download all the covers and artwork to make them look as stylish as possible.
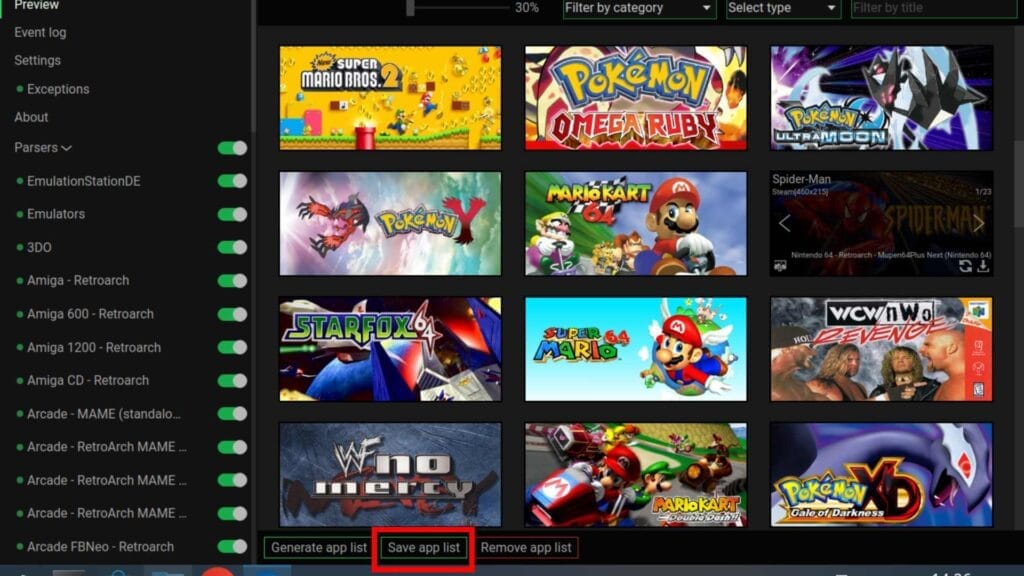
The above image shows what it looks like if you have multiple ROM folders.
When you’re happy with how everything looks, click on Save App List and Steam ROM Manager will save all the different games to your Steam library so you can open them with one click when in Gaming Mode.
How to Automatically Download Cover Art
Dolphin will automatically give games an image if an image is present. The problem? They’re low resolution and look pretty rubbish. You can totally fix this, though.
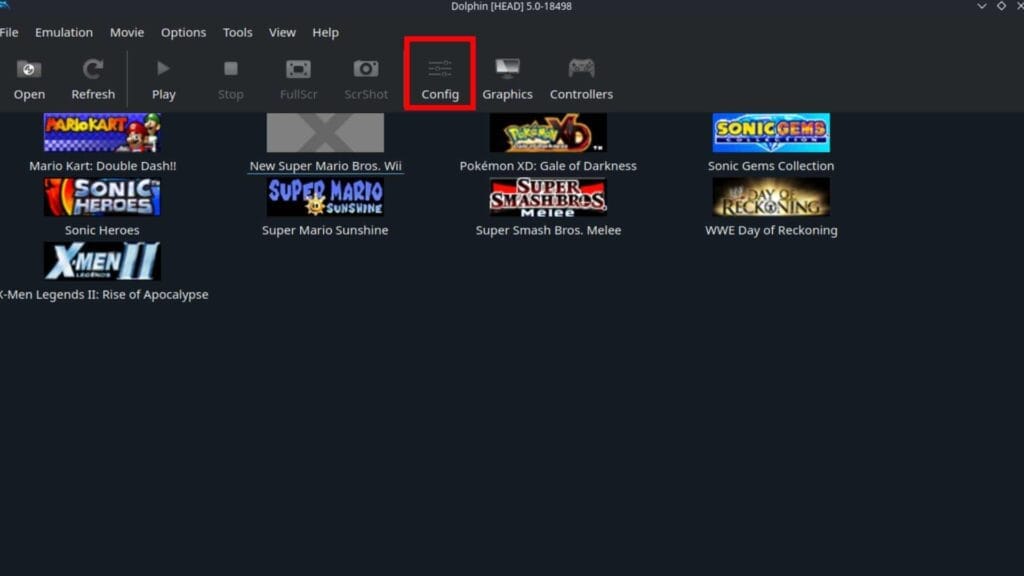
Open up Dolphin and along the main settings bar will be a box labeled “Config.” Click on that to open up that part of the settings menu.
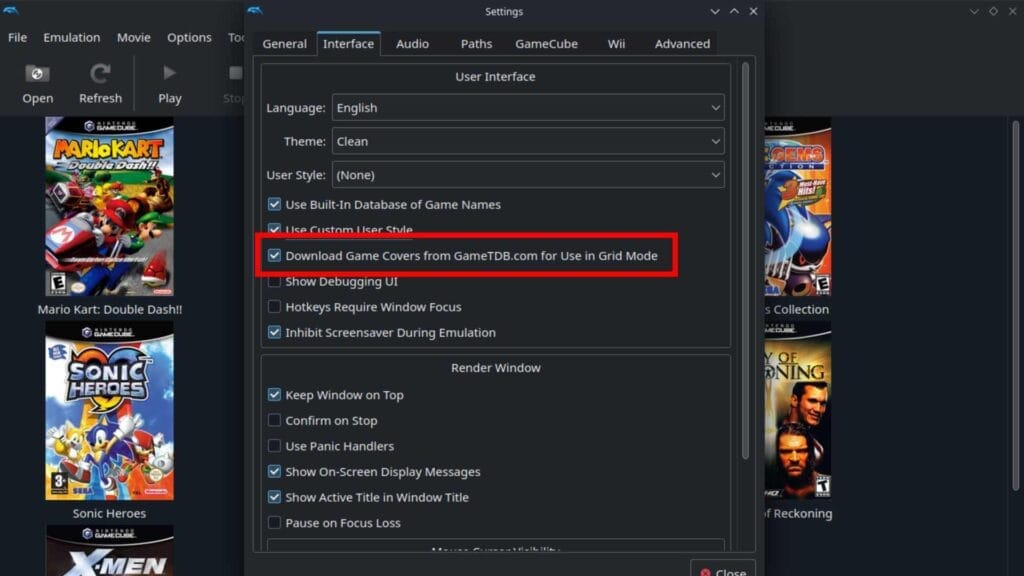
Next click on Interface. Here you’ll find a host of different options. What we want is the tickbox marked “Download Game Covers from GameTDB.com for Use in Grid Mode.” Click on that option with the right trigger and all of your games behind it should change.
If they don’t, click on View from along the toolbar at the top of the window, then select Grid.
Now all your games will automatically download covers for use in the main Dolphin app and will no longer look like a distorted low-quality PNG. Hurray!
How to Get GameCube ROMS (Legally)
The only legal way to get GameCube ROMs is to rip them yourself. To do this, you’ll need a computer with a disk drive and a CD ripping software like CleanRip.
Believe it or not, the GameCube uses DVDs, albeit mini DVDs, meaning you can whack them into a computer and back them up really easily.
The Dolphin Wiki has a full guide on this, but the premise is fairly simple: Put the game in, load up the program, then hit the button to copy it to your hard drive or an SD card.
All images captured on Steam Deck