Want to relive the golden era of gaming by playing PS2 games on the ASUS ROG Ally? Below is an in-depth step-by-step guide to getting PCSX2 up and running in the simplest way possible.
You’ll also learn what settings I use to get the most out of the Ally while still keeping the battery life decent. Let’s dig in!
Download PCSX2 on the ASUS ROG Ally
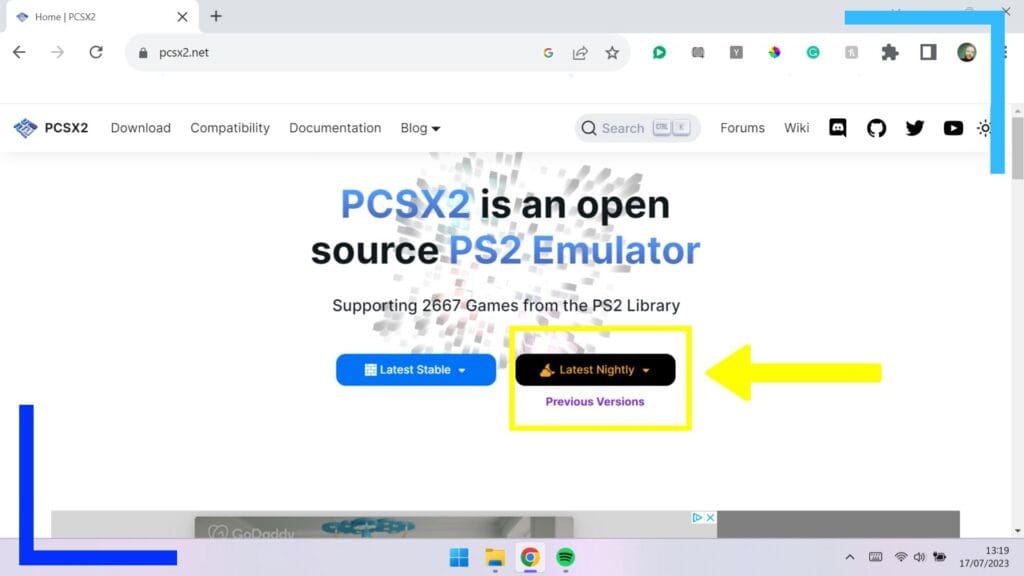
Start off by loading up the ASUS ROG Ally and heading to the PCSX2 homepage on your browser of choice. I used Chrome for this, but feel free to go with whatever works for you.
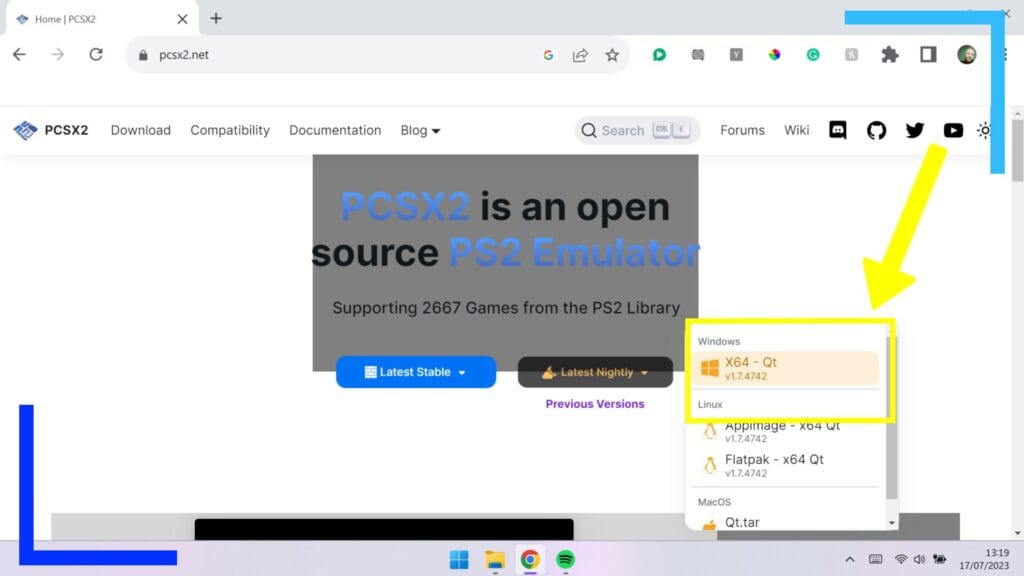
Now comes the important part. There are two choices here: Stable or Nightly.
The Stable version has the fewest bugs but the interface is, to put it bluntly, ugly and harder to navigate. It’s also missing certain features found in the Nightly offering. So for this guide, I recommend going with Nightly.
Click on the Latest Nightly then from the drop-down box select the X64 version for Windows. Upon clicking the X64 version, a download will appear. Once this is complete, close the window.
Step 2: Install PCSX2
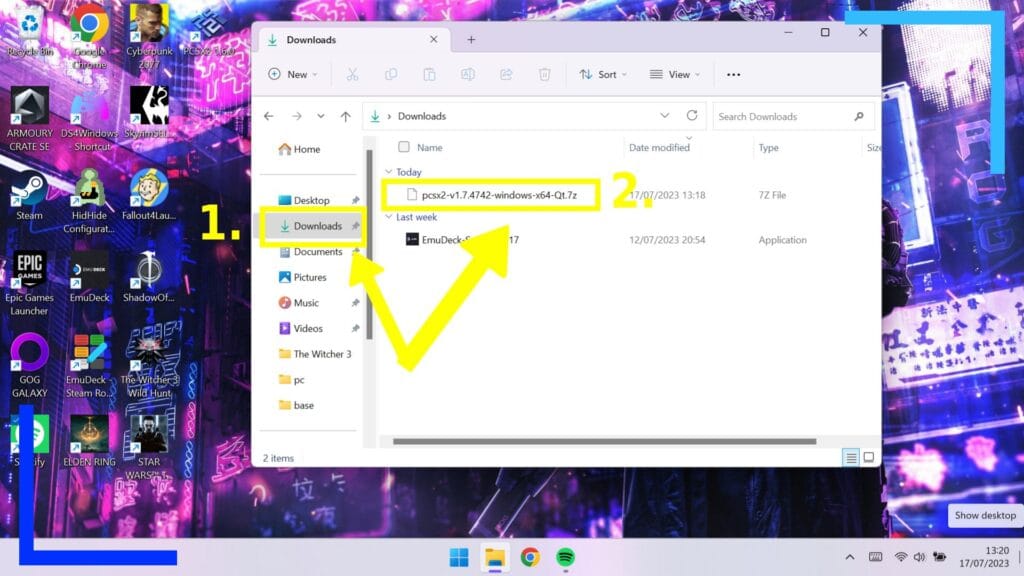
Open up the Windows File Explorer (the yellow folder icon) and head into the Downloads folder (1.).
Due to the file we downloaded being in a 7Zip format, the default Windows file extraction app won’t be able to extract it. I recommend going with WinRAR as the easiest solution to this problem. It’s free and during setup you can specify it to only work with RAR or 7Zip files, meaning the default Windows extraction tool will still handle everything else.
Once that’s installed, use the right trigger to click on the file we downloaded (2.).
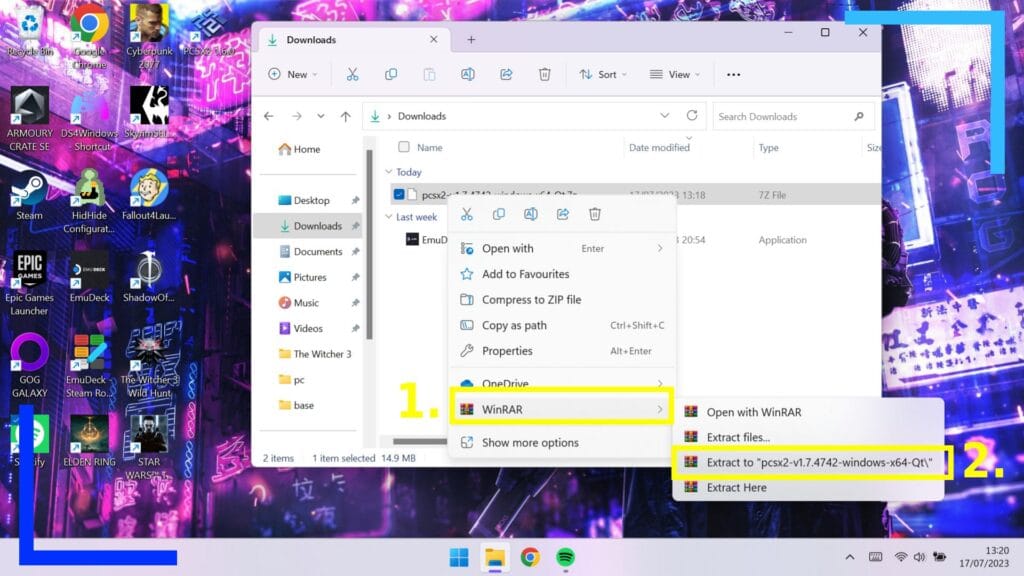
From the submenu that appears, click on WinRAR (1.) first, then from the second menu select Extract to (2.). This will extract the files we need and place them into their own folder.
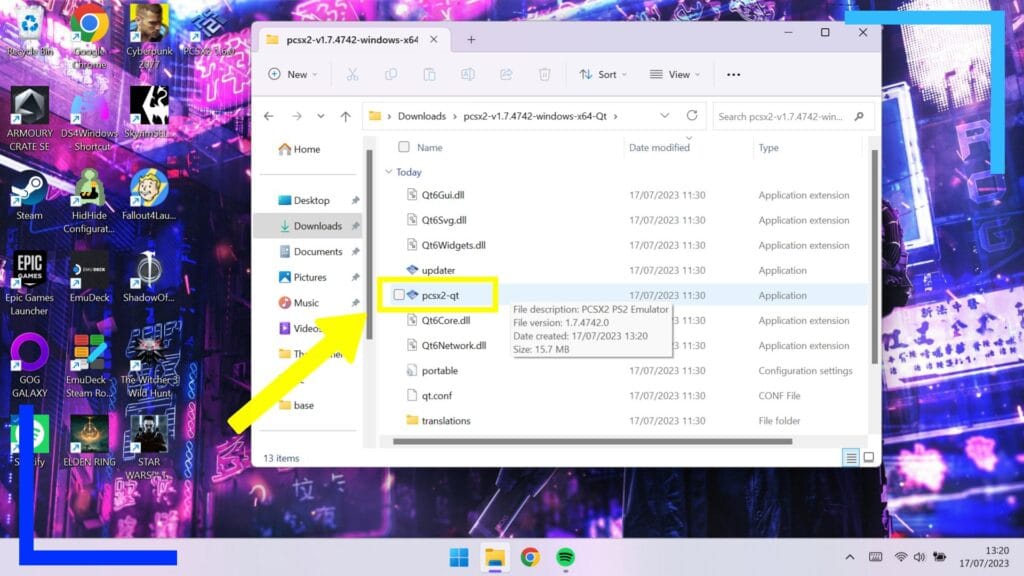
After that’s finished installing head inside the newly-created folder and you should spot a bunch of files. What we’re after is the main launch file PCSX2-QT.
Click on this file twice and PCSX2 will load for the first time.
Note: If you want to create a desktop shortcut, the PCSX2-QT file is what you want to use.
Step 3: PCSX2 First-Time Setup
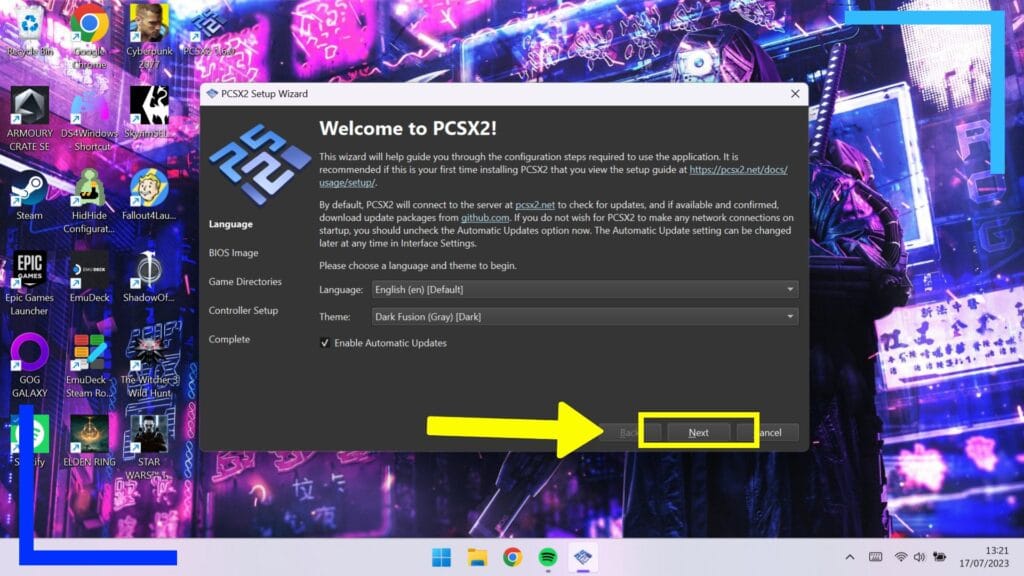
This next section is important as it’ll set up both PCSX2 and the ASUS ROG Ally controls. Do not skip anything here as it’ll save you a headache later on.
Read through the first screen and when you’re done, click on Next.
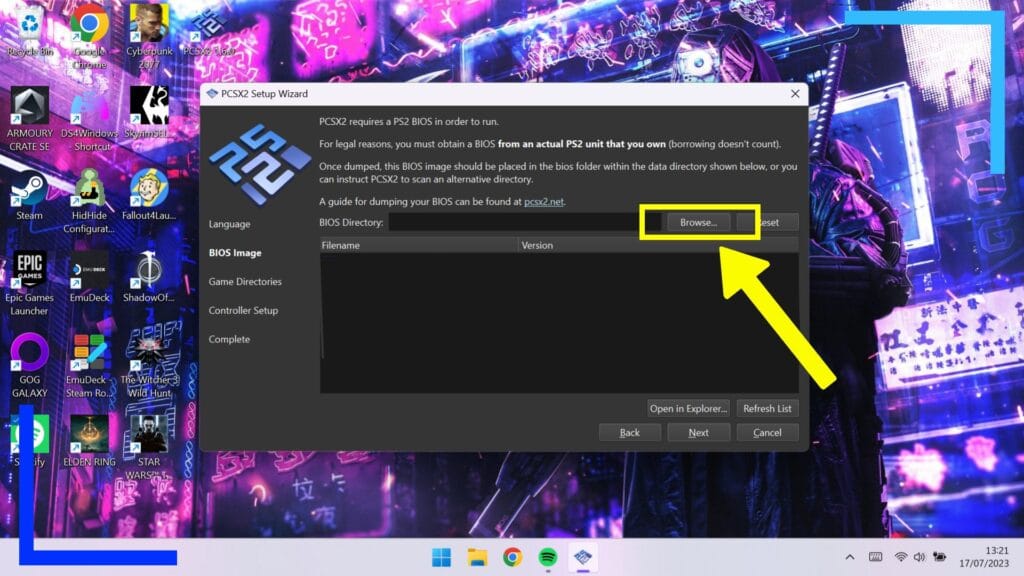
The first big setting is to set your BIOS path. This will let PCSX2 to act like a PS2 and won’t work without it.
For obvious reasons, I can’t share where to download the PS2 BIOS from, but eHowTo has a guide on dumping it yourself if you fancy it.
Once you’ve got it, place it in a folder then click on Browse and navigate to the folder with the BIOS or BIOSes in.
Note: PAL ROMs only work with a PAL BIOS and NTSC ROMs only work with an NTSC BIOS.
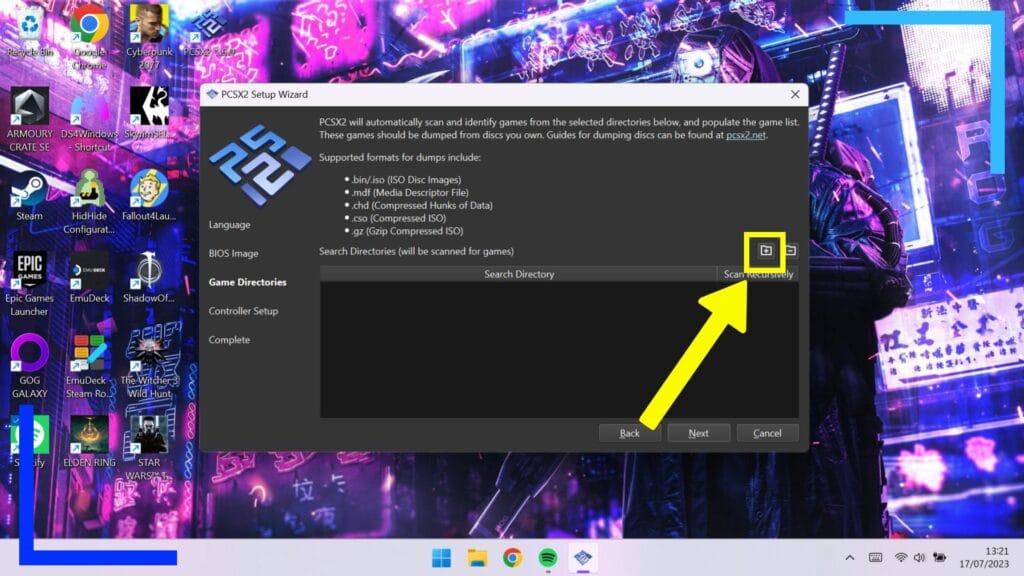
The next problem to solve is how to add your ROMs to PCSX2. Thankfully, it’s done during the first-time setup for ease.
When you reach this screen, click on the plus icon (+) and just like you did with the BIOS, locate your ROMs folder and select it.
Your ROMs should appear now in the main window. If they don’t, make sure you’ve entered the ROMs folder and haven’t set it as a layer above.
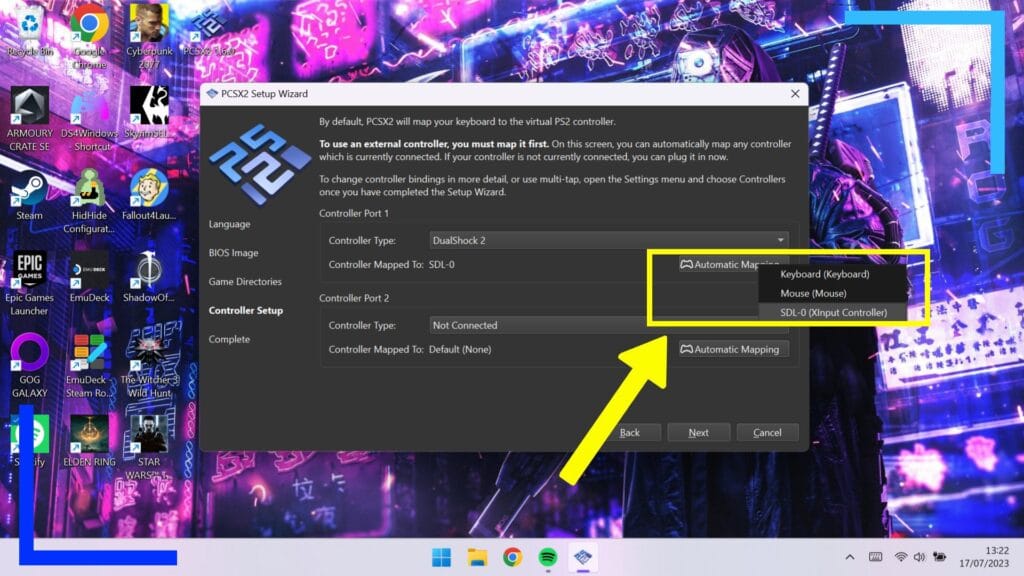
The rest of this process is straightforward, but it’s worth highlighting the above screen. This is how you’ll get the ASUS ROG Ally controls to work within PCSX2 and act as a PS2 controller.
Click on Automatic Mapping then from the menu that appears, select SDL-0 (Xinput Controller). That’s the ROG Ally controls, so by clicking on this, you’ll have all the buttons mapped to the controller without needing to do anything. Pretty helpful, right?
Step 4: How to Create a PS2 Memory Card in PCSX2
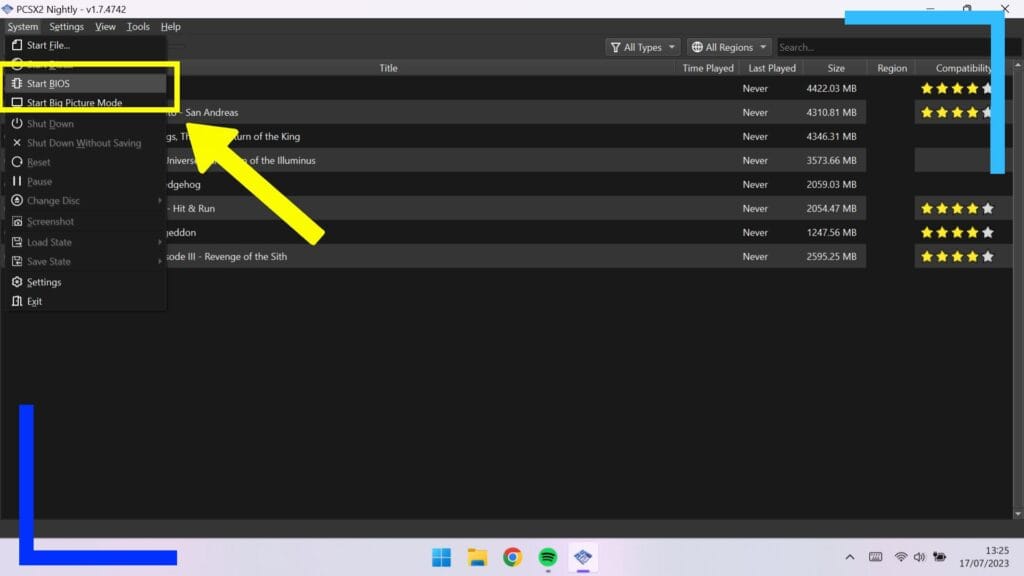
Don’t skip this. PCSX2 works like a real PS2, meaning you save your games in the same way you normally would – on a PS2 memory card. It’s a virtual memory card, sure, but the process in-game is the same.
You could use save slots, but any time the Nightly build gets an update, those saves could become incompatible, so always use the memory card option.
To set up a PS2 memory card in PCSX2, click on Settings from the top menu then hit Start BIOS.
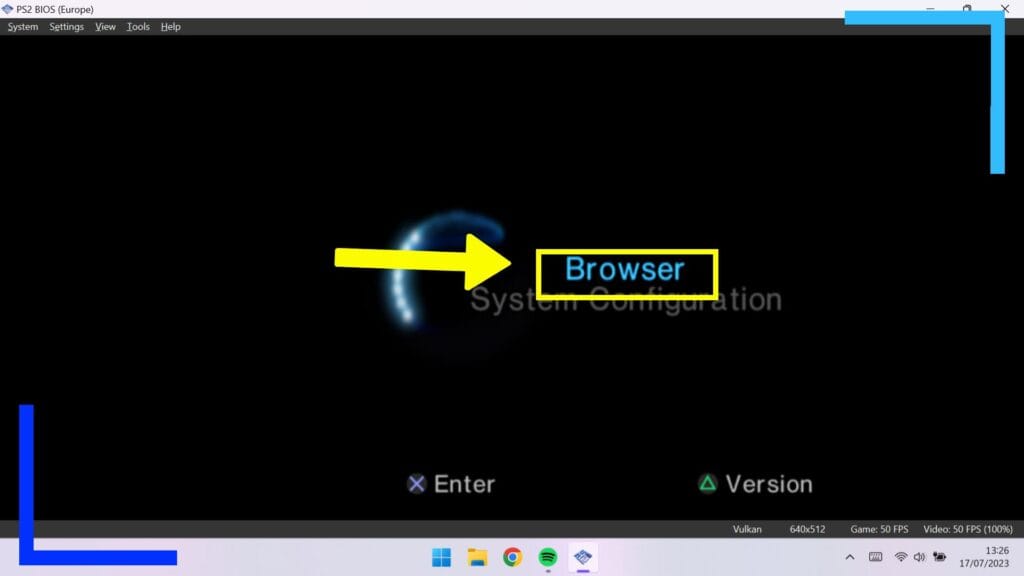
You’ll now be thrown into what is essentially a PS2 without a disc in. Is the nostalgia kicking in yet?
From the main screen, click on Browser.
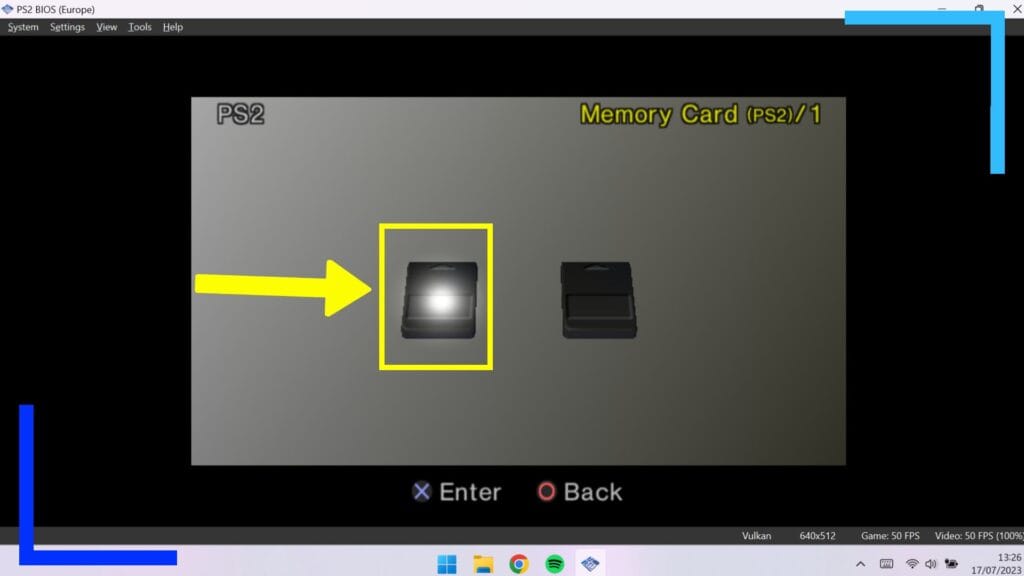
You’ll next see two memory cards. You can set both up now if you want, but I’ve been making do fine with just the one.
Click on the left memory card and you’ll be asked do you want to format it. Select Yes and the memory card will be created and is now ready to be used in-game.
To close this window without completely exiting PCSX2, click on System then select Shutdown. This will close the emulation window while leaving the main PCSX2 app open.
Note: You may need to pull up the quick access menu with the left button and change the controls from Desktop to Gamepad for the above to work.
Step 5: Best PCSX2 Graphics Settings
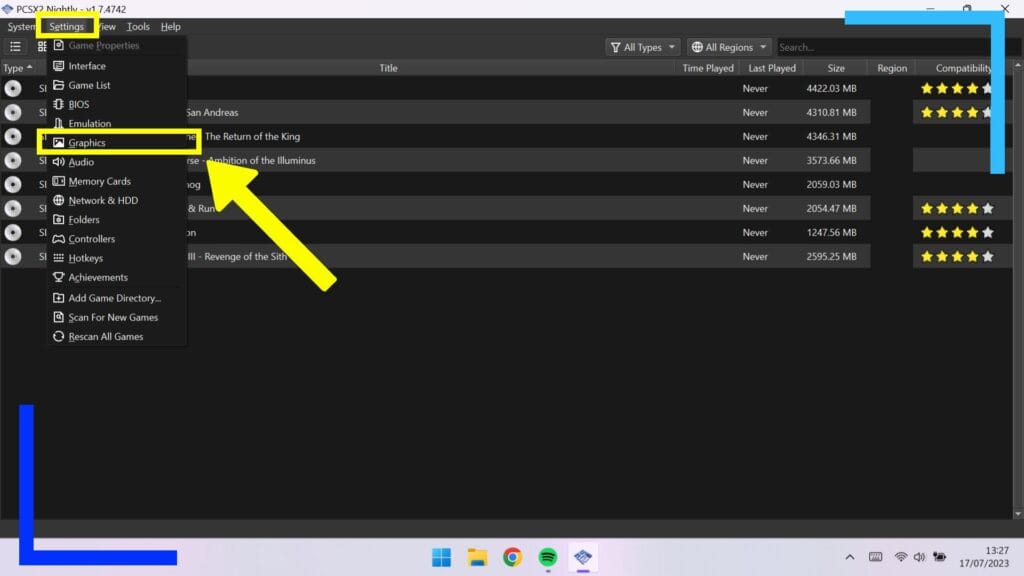
Now for the fun stuff. Let’s get the best graphics possible.
Tap on Settings then midway down the list should be Graphics. Click on that now.
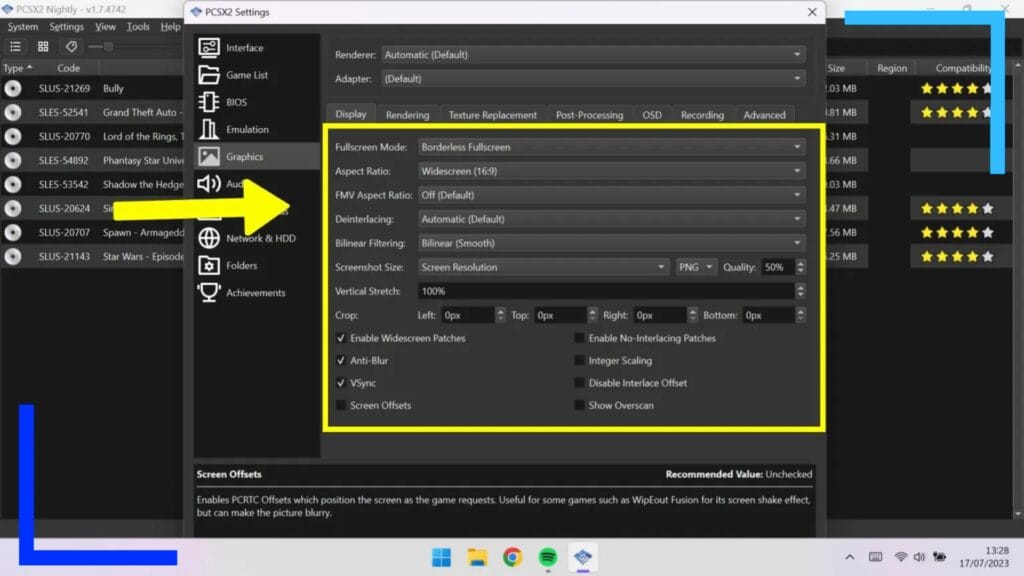
A new window will now pop up. Most of the settings here aren’t worth changing, so let’s break down what you need to know.
The most important one is to change the Aspect Ratio to Widescreen (16:9). This should, for most games, let them fill the entirety of the ASUS ROG Ally’s screen.
I’d also suggest making sure the following options are enabled:
- Enable Widescreen Patches.
- Anti-Blur.
- VSync.
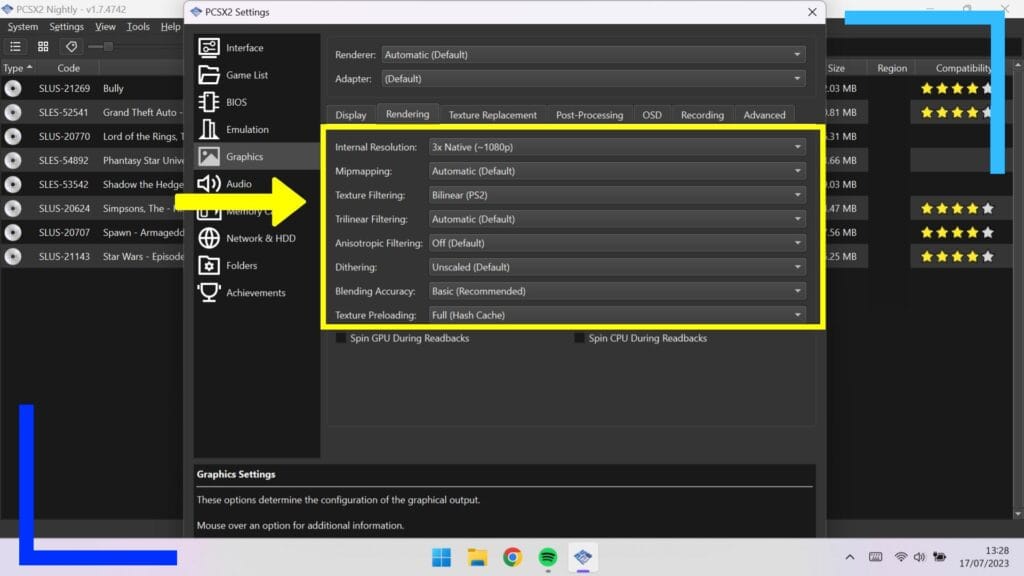
Once that screen is all set up, don’t close this window. Instead, click on Rendering.
In here there’s a setting labelled Internal Resolution. Click on this and from the dropdown box, select the option for 1080p.
Why 1080p? Although you can push the Ally higher, there’s no visual benefit. The ASUS ROG Ally’s screen is only capable of up to 1080p, so anything higher is a waste of power and battery life.
Do feel free to up this if you’re using the ASUS ROG Ally in docked mode, though.
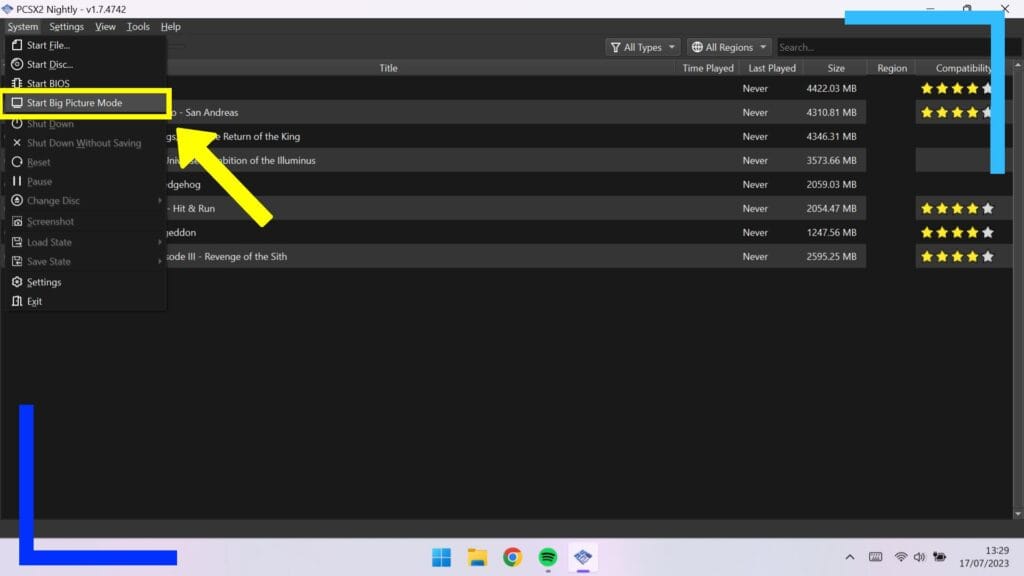
Close the Graphics window and that’s PCSX2 fully set up on the ASUS ROG Ally. The only thing left to do now is to make sure the app automatically goes into fullscreen when you launch a game.
To get this up and running, just hit System then tap on Start in Big Picture Mode. This will launch you into a more simplistic and easier-to-use version of PCSX2 and when you click on a game to launch it, the app will fill the entire screen. Nice!
And if you’re wondering what PCSX2 looks like in action, check out my ASUS ROG Ally running the emulation app below.
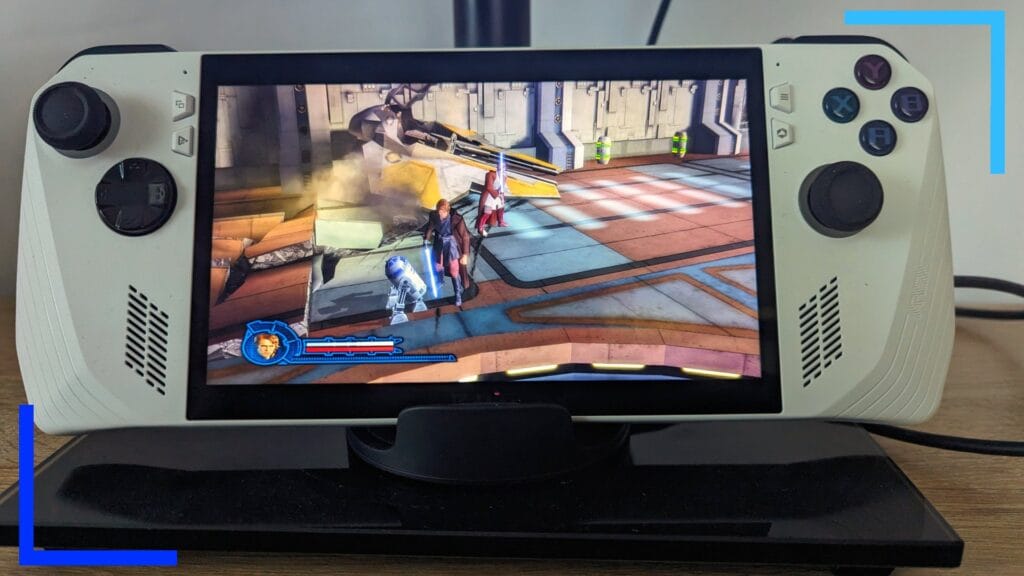
All images and photos captured by Wesley Copeland.

