The Steam Deck is the best way to play 3DS games. If you want to play 3DS games and make them look the best they can, the Steam Deck is the way forward.
It’s the sheer power of the Deck that makes the experience so satisfying. In fact, it’s so powerful you can even install Windows on a Steam Deck. And if it’s capable of running Windows, just imagine how great 3DS games will look with fullscreen scaling with resolution boosts.
Step 1: Make a Choice Between EmuDeck or Citra

You’ve got two choices when it comes to playing 3DS games on Steam Deck: Either go with EmuDeck, a one-for-all solution to install loads of different emulators including Citra, or go with the standalone version of Citra.
Basically, the end result is the same for either choice: You’ll end up with the same version of Citra installed. But if you plan on playing multiple different emulators on Steam Deck, EmuDeck will save you time in the long run as it’ll install everything you could possibly need in one go.
EmuDeck also installs Steam Rom Manager, a program that lets you add specific ROMs to Steam so they’ll appear on the home screen in Gaming Mode.
We’ve got a full installation guide for EmuDeck that we recommend following if that’s the path you’d like to take. Do be warned, however, EmuDeck is more involved and will take longer to set up than the standard Citra option, so if the standalone Citra version is more your thing, read on for how to install it.
- Decide if you want EmuDeck or just Citra
Note: We recommend going with EmuDeck for overall ease
Step 2: Installing Citra
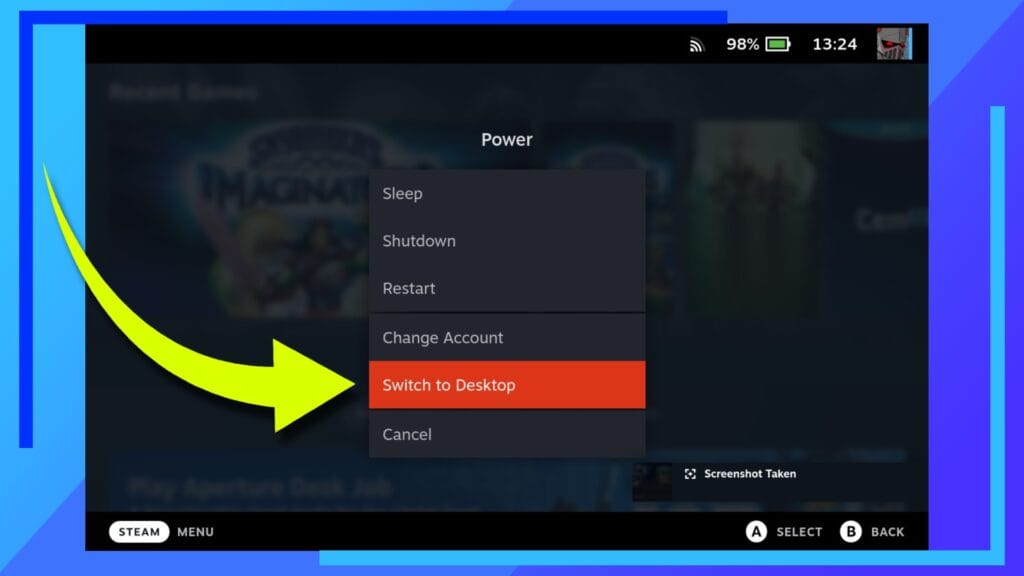
Start by heading to desktop mode on the Steam Deck. There are two ways to do this. Option one is to hold down the power button located along the top of the Steam Deck for a few seconds until a menu appears then select Switch to Desktop.
Alternatively, press the Steam button found at the bottom-left of the screen then hit Power followed by Switch to Desktop.
After a few moments the Steam Deck will boot itself into desktop mode (the mode that kind of looks like Windows but is actually Linux).
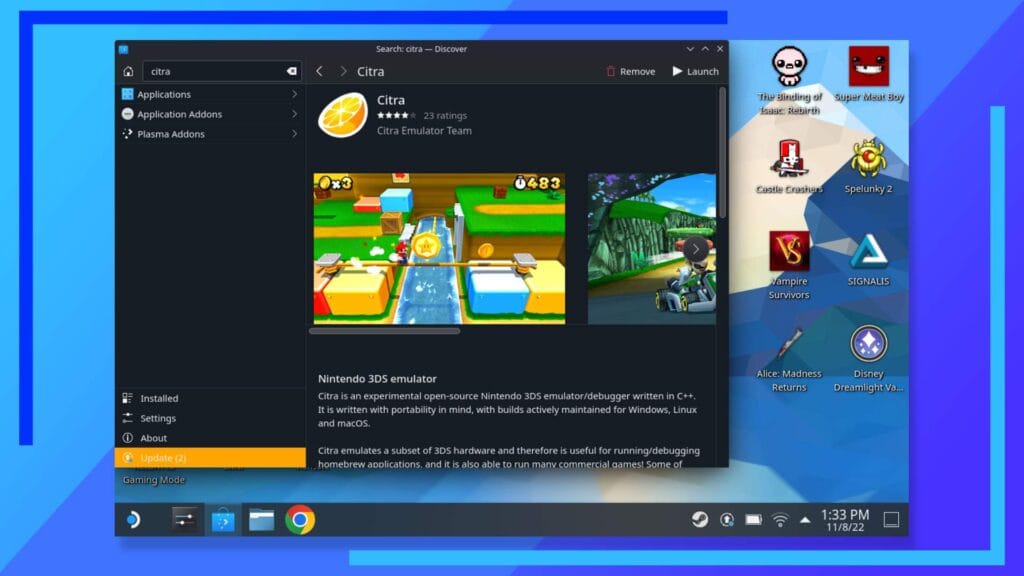
In desktop mode look to the bottom-left of the screen. There should be a shopping bag icon. Click that to open the Discover store.
The Discover store is where you go to find standalone (or Flatpak) versions of different software that’s capable of running on the Steam Deck. And yes, you’ll be using it a lot over time.
In the search bar type Citra and let Discover find it for you. If the keyboard doesn’t pop up, hit the Steam Button and X to bring it up that way. After that, with Citra found, hit Install and Discover will install the software to the Steam Deck.
- Head to the Discover store in desktop mode and install Citra
Step 3: Configuring Citra
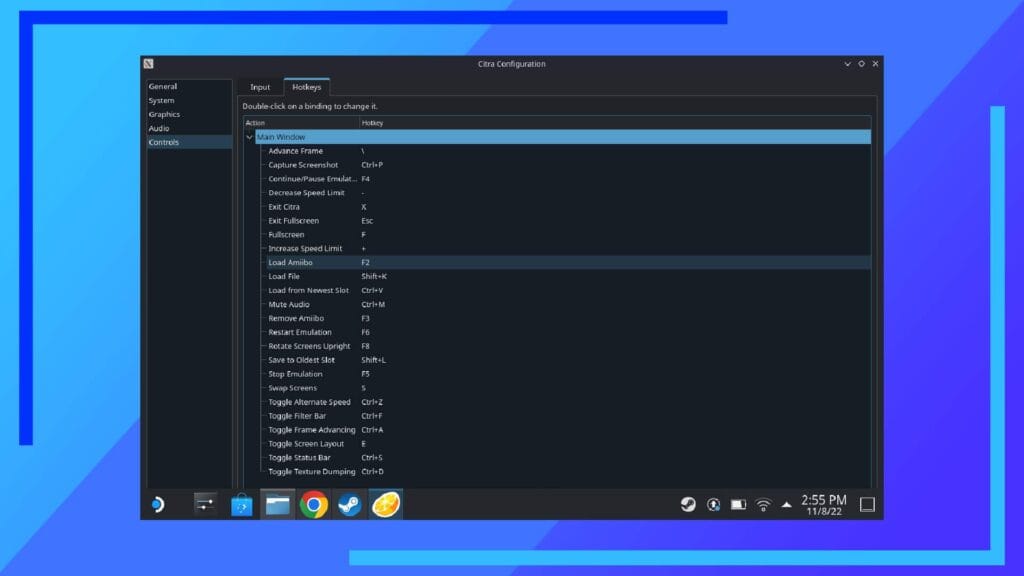
Now that Citra is installed, there are a few things worth knowing about. The first is that while there is a Steam Deck controller layout available to download, you may want to head into the emulator and reconfigure the different buttons to your liking.
Open up Citra and select Emulation from along the top. From here, click Configure.
Doing so will bring up a list of different options. For now, click on Controls and change any of the settings to something more comfortable or create a new controller layout in Gaming Mode and map the keyboard keys to specific Steam Deck buttons.
While you’re here we’re also going to make Citra look a little nicer. On the left of this window, where it says Graphics, click on that tab. Under Renderer there’s a drop-down box. Click on that and change the resolution to 3x Native (1200×720). This will let Citra run all 3DS games at three times the resolution they would be on the original 3DS hardware. And believe us, every game looks better on the Steam Deck with this setting selected.
Lastly, if you’ve gone the EmuDeck route, you should already have a folder selected in the main Citra window. If not, double-click where it says Click and navigate to where your games either are, or will be, located. Setting this up now means whenever a game is found in the folder, upon loading Citra it’ll be shown.
Step 4: AES Keys
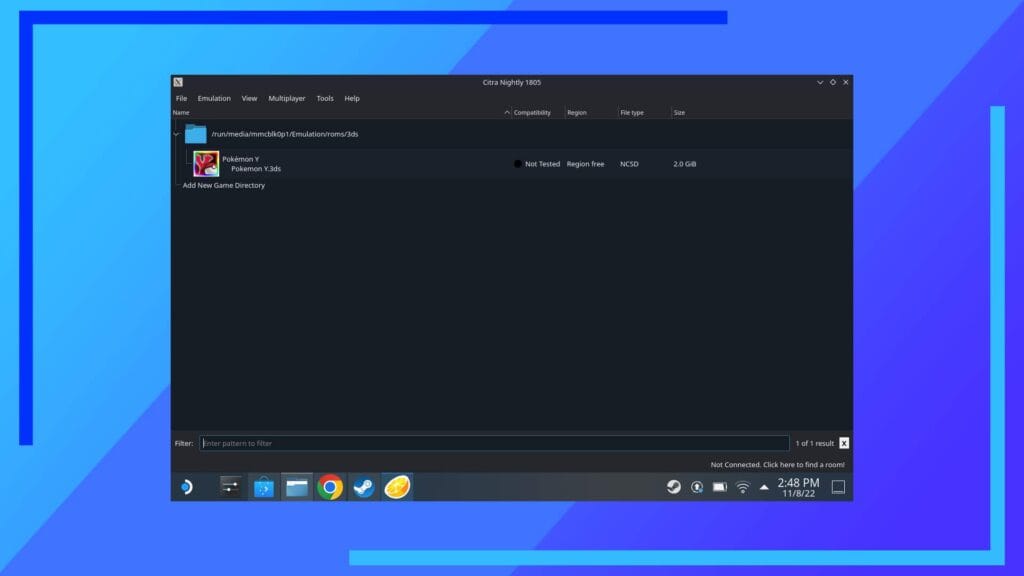
To run encrypted 3DS games, you’re going to need to get the relevant AES keys from your 3DS console.
We obviously won’t cover the illegal way to acquire these keys, but if you’re looking to legally dump them from your console, the Citra website has a guide to doing just that.
Once you’ve got your keys, that isn’t the end of it. You’ll next need to transfer them over to the Steam Deck. We recommend Warpinator for ease, and while you’re transferring the AES keys across now would be a good time to transfer your game dumps across too.
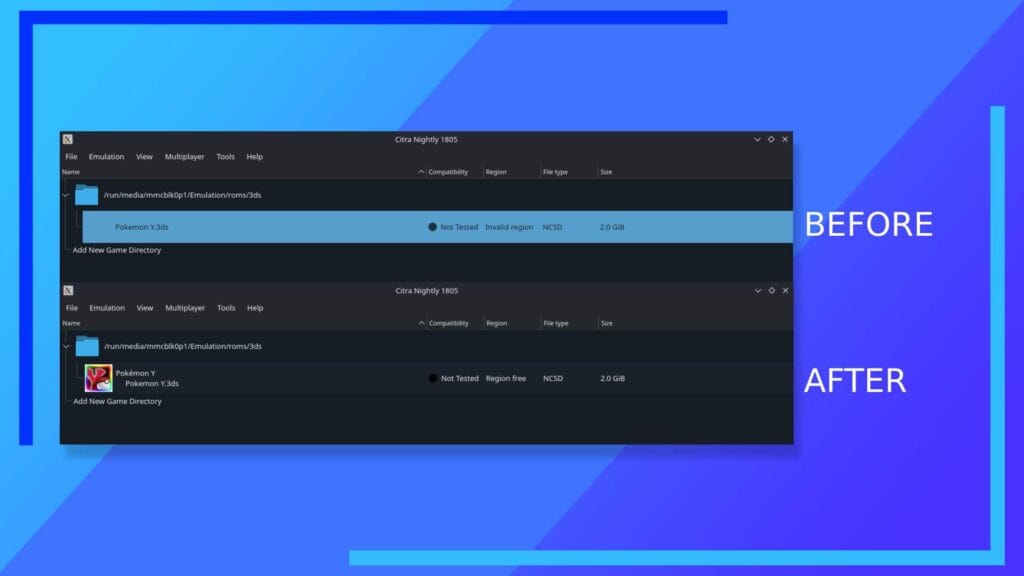
After the transfer is complete, find your AES keys and rename the text file to “aes_keys.txt”. This is case-sensitive as well so make sure it looks exactly like that.
Next, while using the Dolphin file explorer, move the AES keys file to the following folder path: Home > .var > app > org.citra_emu.citra > data > citra-emu > sysdata
When you’re inside the sysdata folder, that’s where the keys go.
The next time you load up Citra, the program should find the keys itself and any games that didn’t have an icon before should now have a little picture next to them meaning they can now be played.
Common Troubleshooting: If you find Citra still says your games are encrypted, chances are either the AES keys are wrong or have been dumped incorrectly, the file name of the AES keys file isn’t right, or the AES file is in the wrong place.
With that, you’re finished and ready to go off and play 3DS games in the most stunning way possible.
How Is 3DS Emulation on Steam Deck?
Simply put, the results are astounding. The 3DS is a brilliant console but it’s limited by the now-dated hardware compared with the Steam Deck. Plus after playing on the Deck for so long, the 3DS screen feels tiny now.
It’s not just the bigger screen that Steam Deck takes advantage of, though. The extra power inside the Deck allows it to run games at a higher resolution – resulting in crisper games and faster load times.
How to Dump 3DS Games
The one drawback of (legally) playing 3DS games on the Steam Deck is that you’ll need to jailbreak your 3DS. Even though gizmos like the GB Operator can let you use Game Boy games on other systems, the only way to dump 3DS games is to own a modded 3DS console.
To backup or dump your 3DS games on a hacked 3DS, which is entirely legal, you’ll need to download and install Godmode9 first.
- Turn off your 3DS console
- Take out the SD card and plug it into a PC
- Copy the file GodMode9.firm from the zip you downloaded to the following path on your SD card: /luma/payloads/
- Now copy the whole gm9 folder from the zip file and place it in the root of your memory card (the first place that opens when you open the SD card on a PC)
- Safely eject the SD card and transfer it back to the 3DS console
Now that Godmode9 is installed, it’s time to boot up the 3DS and dump some games.
- With the start button held down, press the power button. Keep start held down and the console will boot into Godmode9
- You should see C: GAMECART – click the A button on it
- Click the A button on TitleID.trim.3ds
- After clicking the A button, you should get the option Copy to 0:/gm9/out – click on that now
Your 3DS file should now be saved directly to the gm9 folder. Now it’s just a case of powering down the console, transferring the SD card back to a PC, and then copying the .3DS file over to the Steam Deck. Easy, right?

