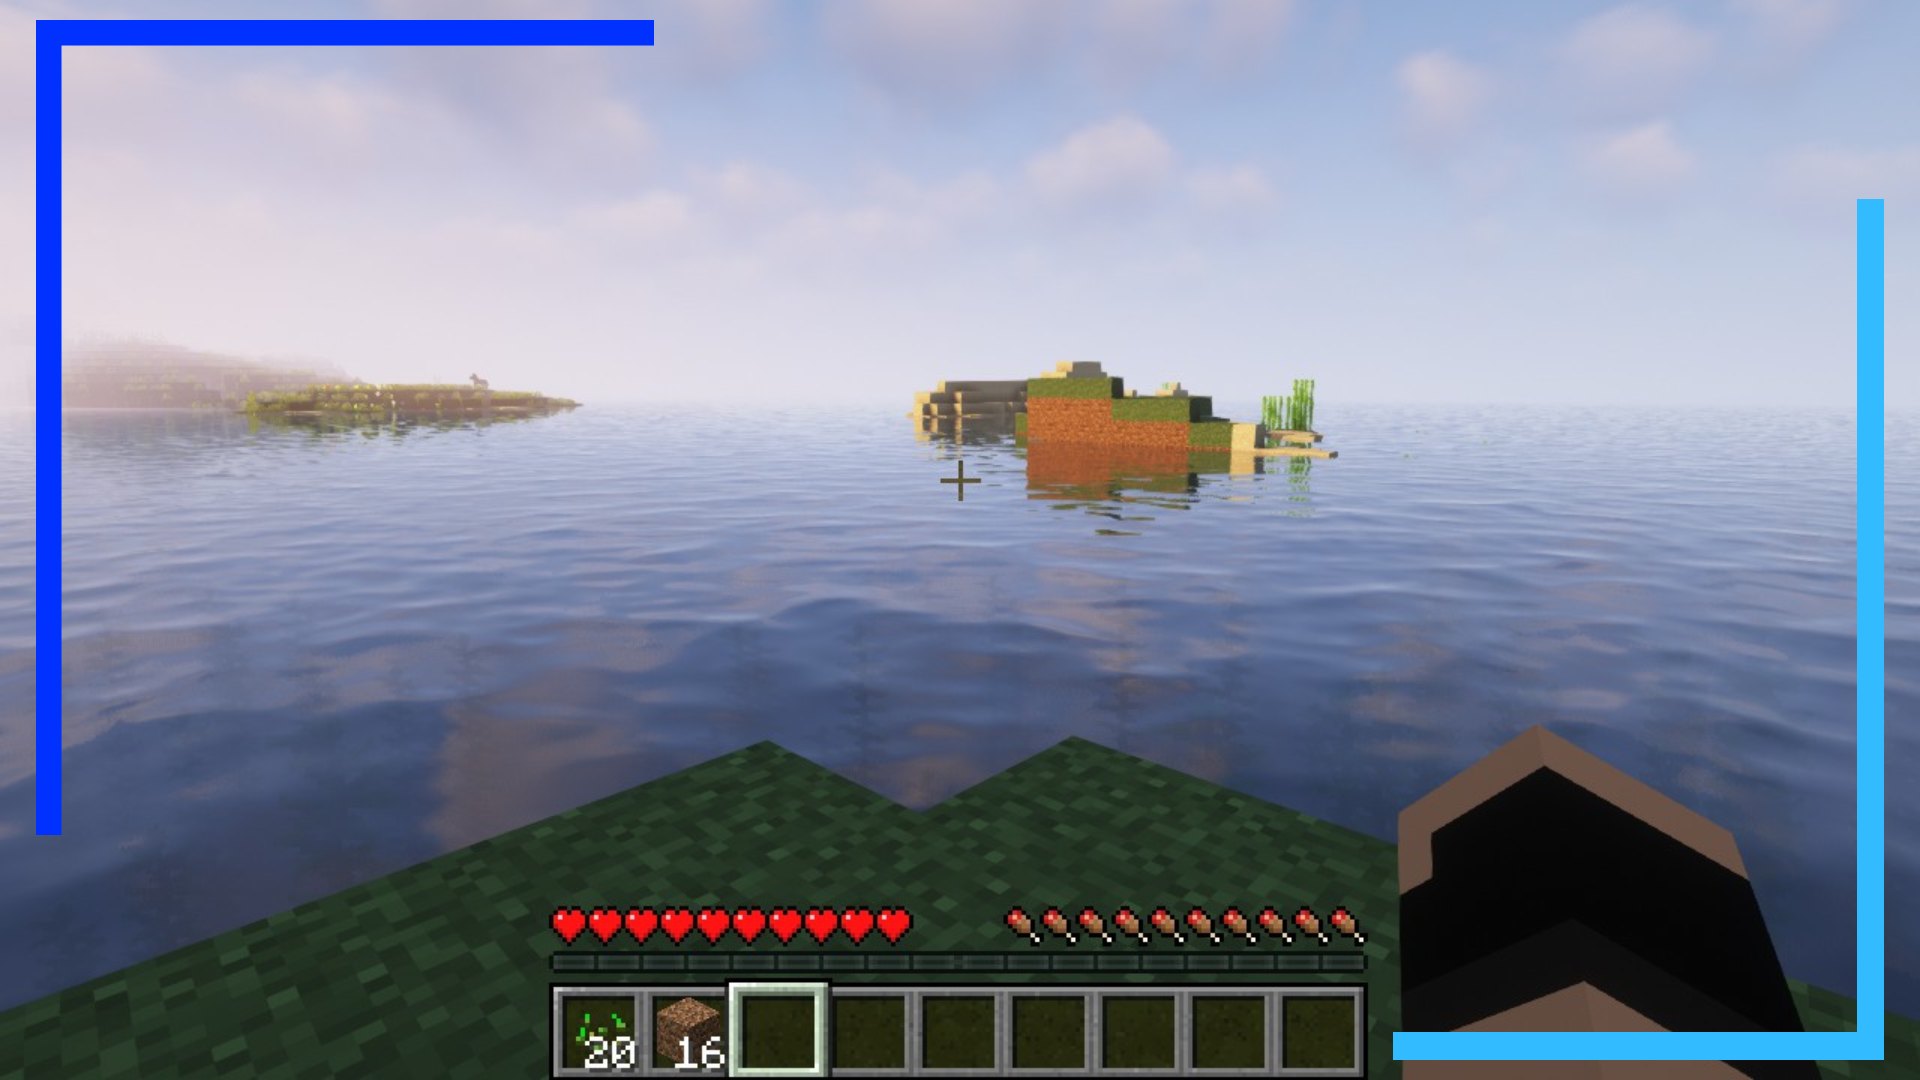
Believe it or not, Minecraft mods and shaders run surprisingly well on the Steam Deck. I’ve been using Prism Launcher and Fabulously Optimized and they both run between 50 to 60 frames per second on Steam Deck. Not bad, is it?
If you’re worried that installing Minecraft mods on Steam Deck may be complex, don’t. It’s all quite straightforward. And hey, if I can do it, you can too.
If you’ve already used Prism Launcher to install Minecraft on Steam Deck, feel free to skip straight to step six. If you haven’t installed it yet, though, I’ll walk you through the installation process to make things even easier. And if you’re ever after a way to make quick XP, be sure to check out my guide to what Minecraft mob gives the most XP.
Step 1: Boot into Desktop Mode
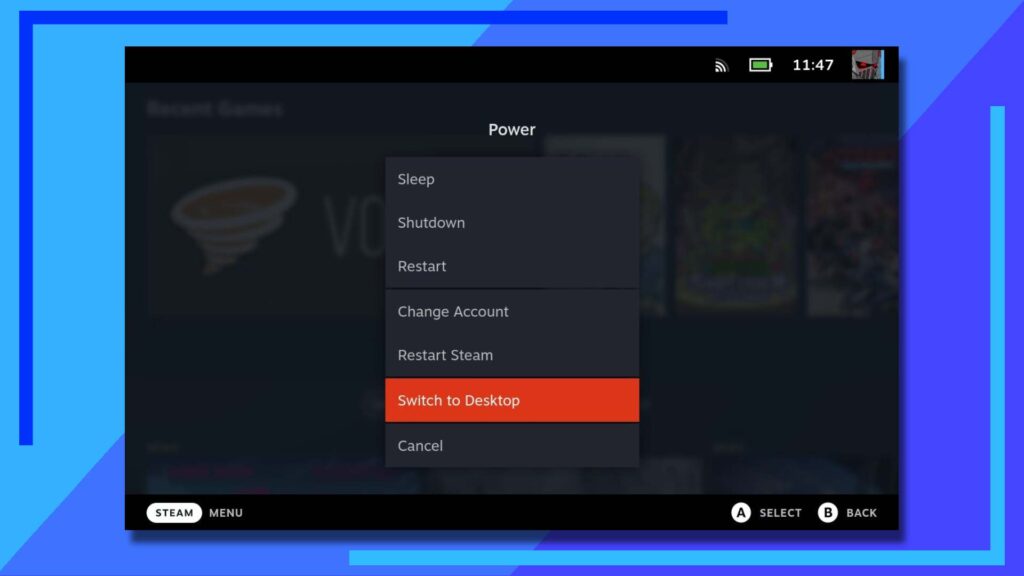
As with most of my guides, everything begins in Desktop Mode. To enter this mode, hold down the Power Button until a menu appears in the center of the screen. From here, click on Switch to Desktop and the Steam Deck will boot into the mode we need.
Step 2: Open the Discover Store
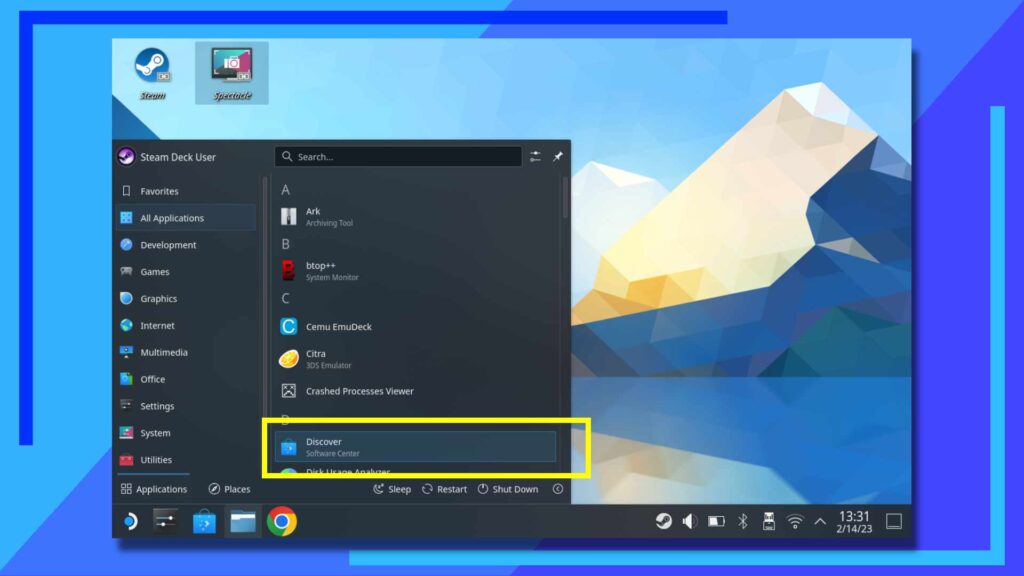
Once Desktop Mode has finished loading, use the right trackpad to move the mouse then the right trigger to click on the Start Menu icon in the bottom-left corner of the screen (the blue and white Steam Deck logo).
Go into All Applications and scroll down to the ‘D‘ section where you’ll find Discover. Click on Discover and the app will open up.
Step 3: Install Prism Launcher
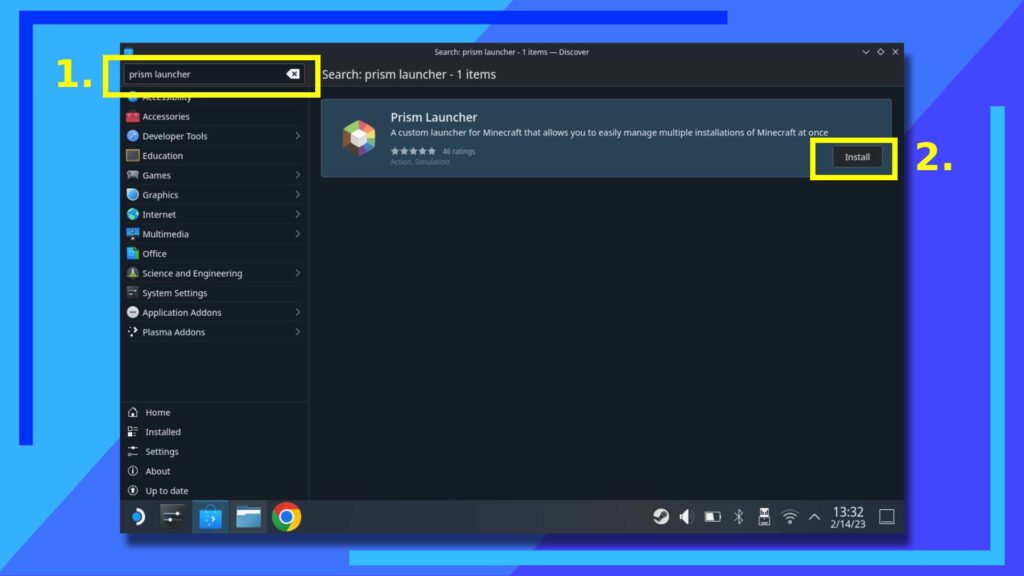
Once the Discover Store opens, in the top-left search box (1) type in “Prism Launcher” with the on-screen keyboard. Upon clicking the right trigger, Discover will search for the Prism Launcher installer.
On the right side of the screen, in the Prism Launcher box, will be an install button. Hit Install and Prism Launcher will be installed onto the Steam Deck. Easy stuff so far, right?
Step 4: Open Prism Launcher
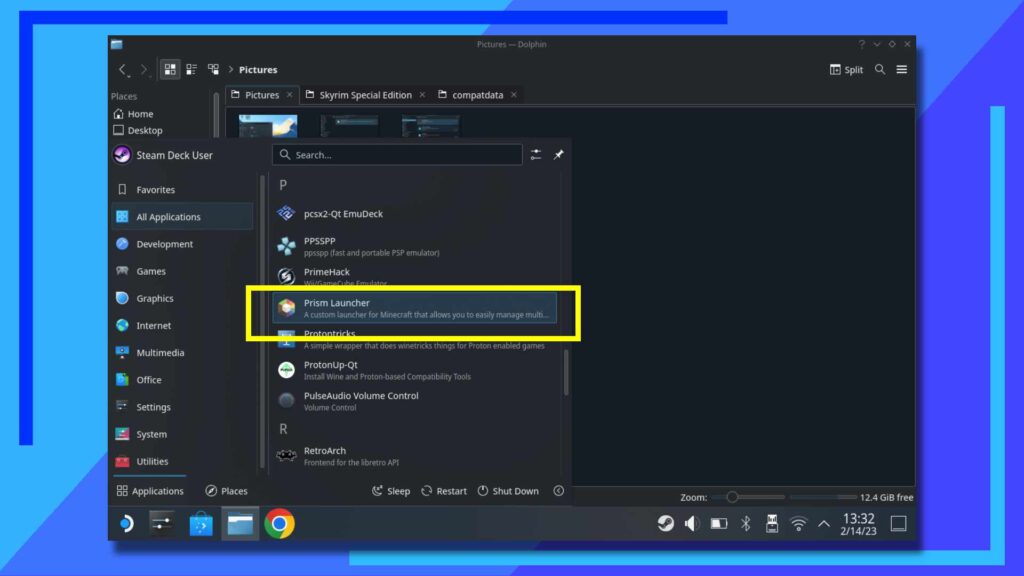
Once Prism Launcher has finished installing, close Discover and head back into the Start Menu. Go back into All Applications then scroll down to ‘P‘ and click on Prism Launcher once to open it.
Step 5: Add a Minecraft Account
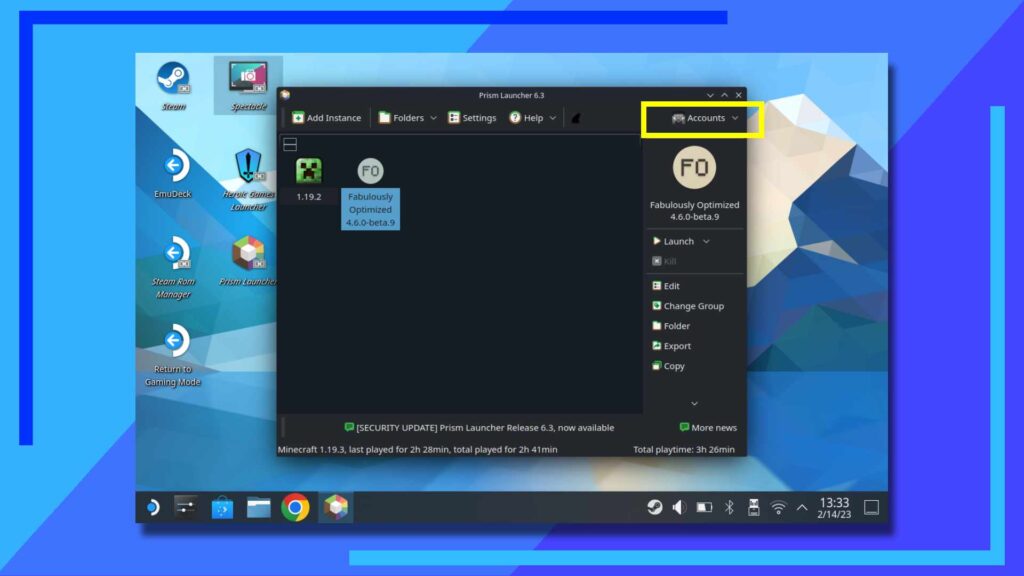
You’ve now successfully installed Prism Launcher on Steam Deck, but there are a few more things we need to do to get it working correctly.
For this next part, let’s add your Minecraft account to Prism Launcher. This will let you access Minecraft Java Edition in a way that’s pretty much the same as it is on PC, only on Steam Deck.
Let’s kick this section off by clicking on Account near the top-right corner.
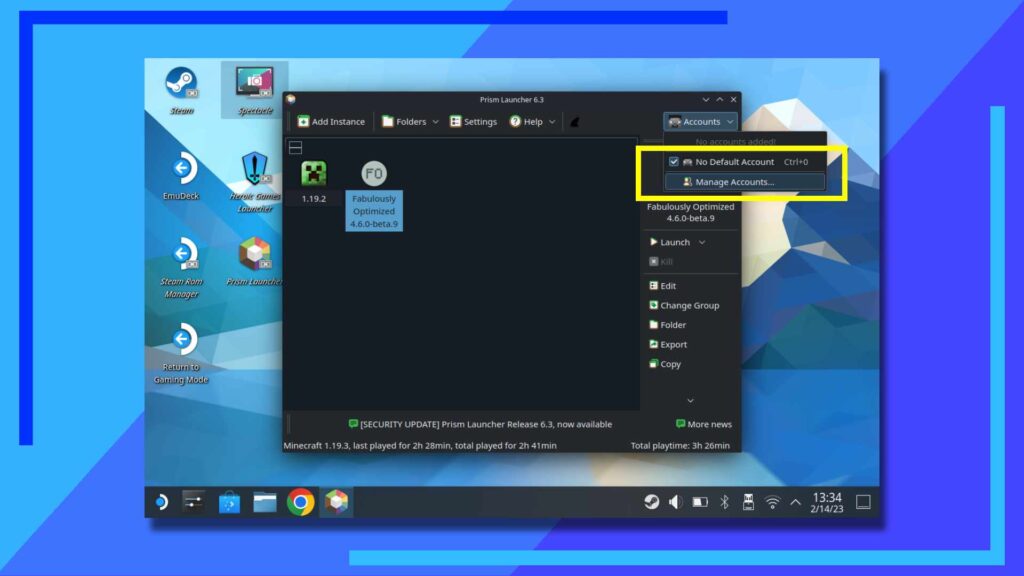
A new dropdown menu will appear, so let’s click on Manage Accounts.
From here follow the on-screen instructions to link your Minecraft account with Prism Launcher. This will be the same account you use to log into Minecraft.
As always, do not share this information with anyone.
One thing to note, you will need an Internet browser installed for this part as Prism Launcher needs to link itself with your Minecraft account so it can download different versions on your behalf.
If you don’t have a Minecraft account set up yet, you can find out more by clicking here to view the Minecraft account FAQ on the official website.
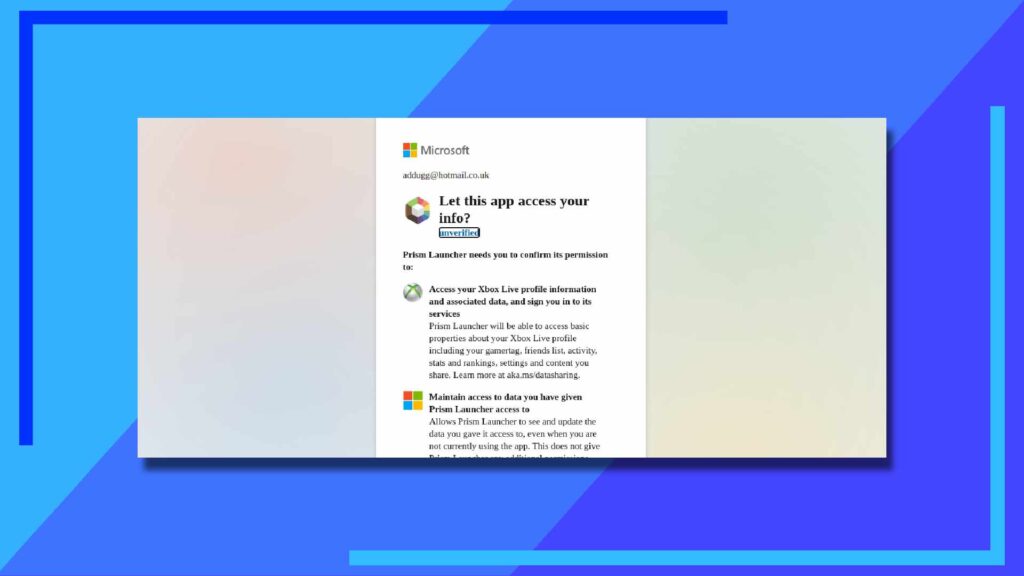
Once you’ve worked your way through linking up Prism Launcher with your Minecraft account, Prism Launcher will ask for permission to access your Microsoft account. Read what it has access to, and if you’re okay with that, click the button to complete the linking process.
If you ever want to remove Prism Launcher’s access from your account, follow the steps below:
- Open account.live.com/consent/Manage in a web browser
- Log in with your details
- Find Prism Launcher and click the Edit button below it
- Remove permissions by clicking on the Remove These Permissions button
Step 6: Change the Paths (Optional)
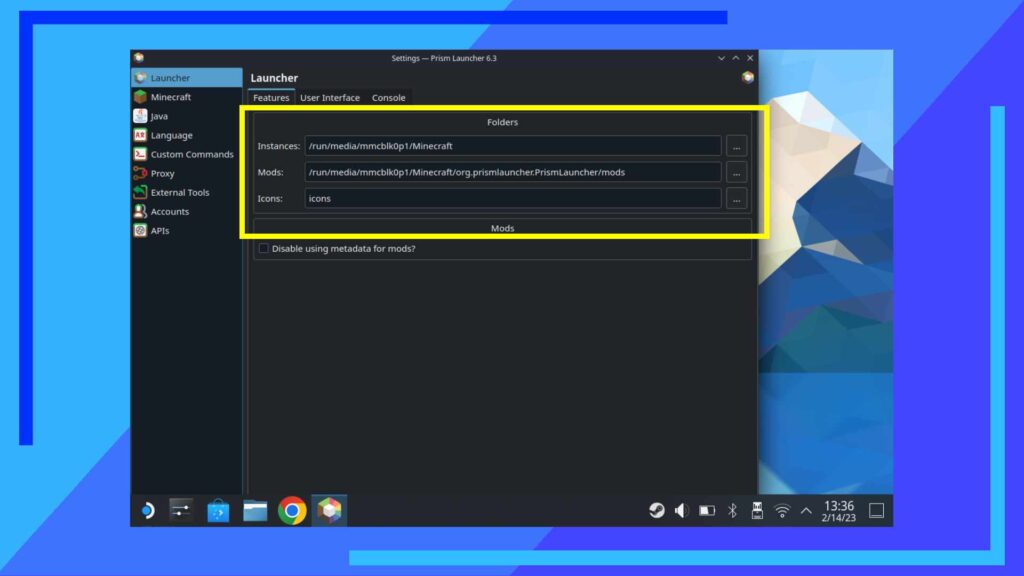
If you haven’t done this already and want to run Minecraft or its mods from an SD card, this is worth doing. That’s how I do it and it saves a lot of internal storage space.
Head into the Settings menu and under Launcher, you can click on the three dots button (…) and Prism Launcher will ask you where you want Minecraft or the mods installed.
For me, I went with the following path to keep things nice and simple:
/run/media/mmcblk0p1/Minecraft
Step 7: Add a New Minecraft Instance
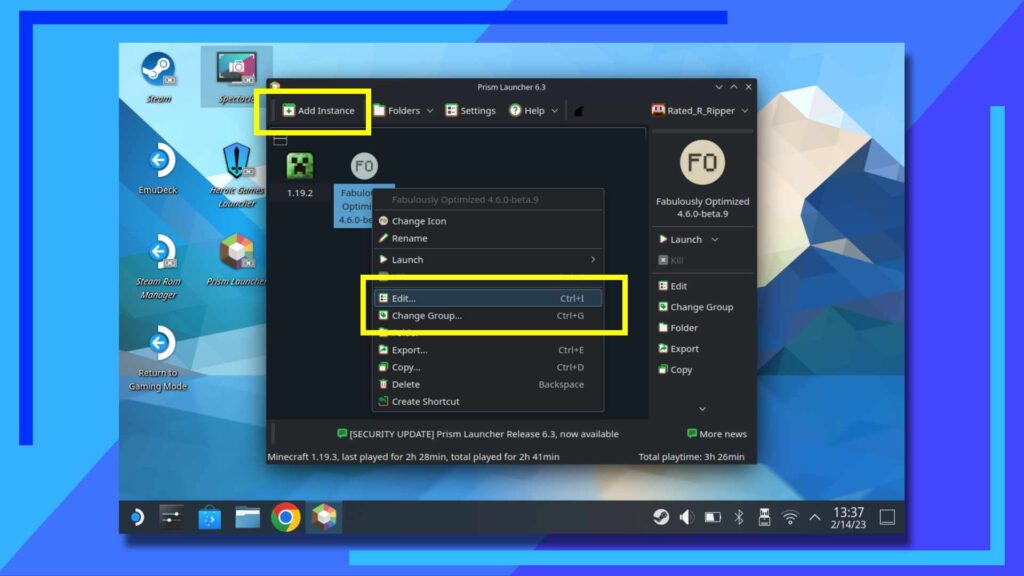
Now you’ve got Prism Launcher all set up, you’ll need to add an instance to work with.
Think of an instance as a version of Minecraft. Maybe you don’t want to play with Caves and Cliffs, or you want to play a beta, how about a version with older mod support? The choice is yours.
To get an instance up and running, click on the big Add Instance button. Feel free to have a look around at what options are available here and when you’re finished, let’s install Fabulously Optimized.
Why this version? That’s because although the Steam Deck is powerful, it’s not a high-end PC, so if you want to run shaders to make Minecraft look nicer, it’s worth using a version that’ll run even smoother than the base version.
I’ve been using Fabulously Optimized with mods and shaders on Steam Deck (shown in the image at the top of the page) and I’m running Minecraft at between 45 and 60 frames per second. And yes, it’s super smooth. Shockingly so!
When it’s finished being added, select the instance from the main Prism home screen and use the left trigger to click on the instance, then hit Edit.
Step 8: Add Mods to Minecraft on Steam Deck
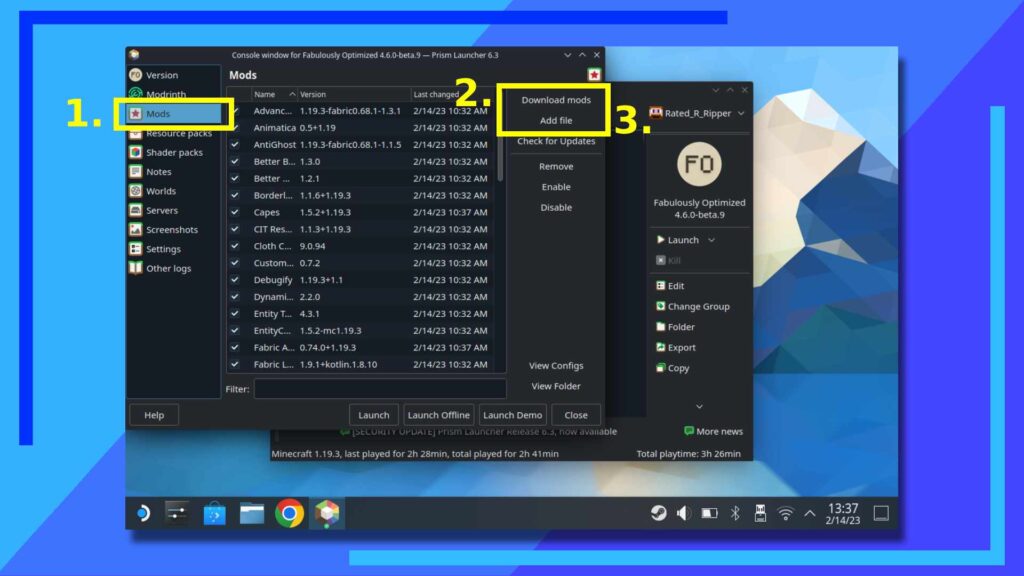
Fabulously Optimized will come with a host of mods turned on by default to help with performance and add controller support. Access these by clicking Mods (1) and feel free to untick the ones you feel you won’t need.
When you’re ready to move on, you can click on Download Mods (2) to download them from the Internet directly onto the Deck, or hit Add File to add any mods you’ve previously downloaded. That’s it! How easy was that?
All images captured on Steam Deck hardware.

