By default, to take a screenshot on Steam Deck you need to press both the Steam and R1 buttons at the same time. This way of doing things is fine, if not a little clunky.
If you want a much more fluid way of taking screenshots on Steam Deck, here’s how to change screenshot functionality to a different button.
Step 1: Load up the Steam Deck

Let’s start by powering on the Steam Deck as you normally would. One thing to note here, you’ll need to change the screenshot button on a per-game basis. There isn’t a one for all command, sadly.
When you’re ready to move on, find the game you want to change the screenshot button in and click the ‘A’ button on the Steam Deck. Doing this will bring up the menu in the next step.
Step 2: Click on the Controller Icon
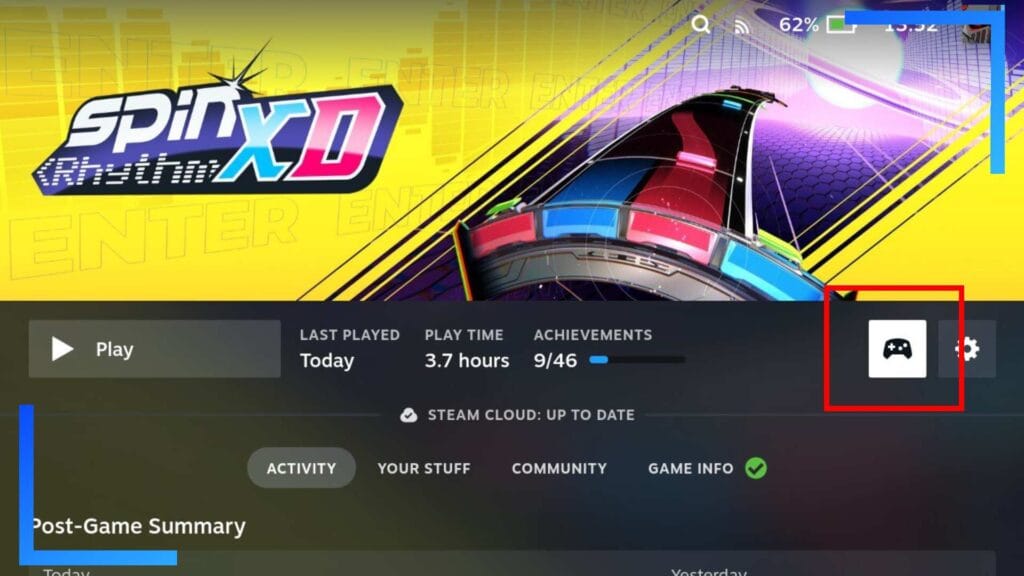
You should be faced with three main options: Play, controller layout, and the settings gear icon.
For now, click on the controller icon to open up the controller settings page.
Step 3: Click on Add Command
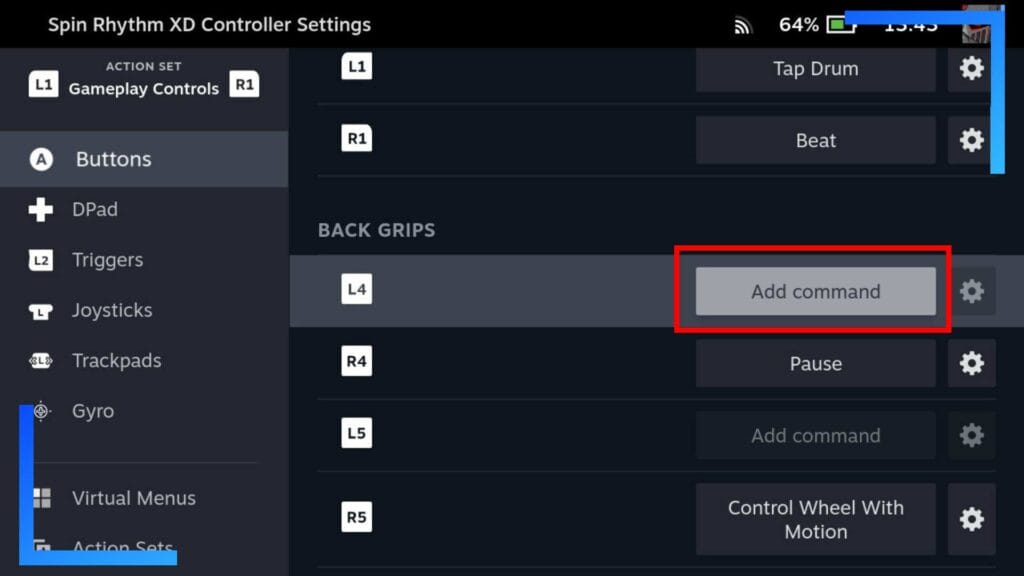
In the left-hand column are all the different buttons on the Steam Deck and the gyro function. You can remap the screenshot button to any button on the Steam Deck, so feel free to find the button you want if it differs from mine.
In this example, I’ll be mapping ‘screenshot’ to the L4 button on the back of the Steam Deck. Those buttons are seldom used, making them a great choice for extra functionality.
To do this, click ‘buttons’ from the left column, then navigate down the window on the right side until you find L4. Highlight ‘add command’ then click the ‘A’ button to proceed.
Step 4: Enter the Controller System Settings
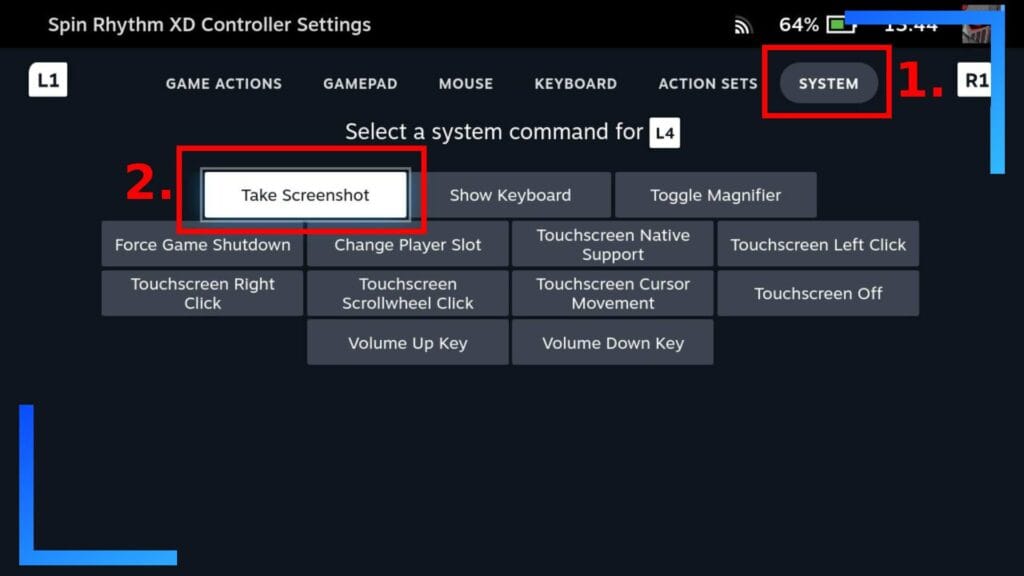
There are several options here, but what we want is the ‘Take Screenshot’ button. Click on that and it’ll map the screenshot function to the button you chose in the previous step. In my case, it’s L4.
That’s it! Just press the ‘B’ button to back out and your changes will be automatically saved.
One word of warning: Every game works differently. In my example, I used Spin Rhythm XD. In this game, the functionality doesn’t work on the main menu, but it does work in-game. Your best bet to is to boot the game up and test out the button to see what’s what and how it fares.
What Other Functions Can You Remap?
The ‘system’ menu has a bunch of handy features that are definitely worth familiarizing yourself with if you want to make your gaming life much easier.
- Take Screenshot
- Show Keyboard
- Toggle Magnifier
- Force Game Shutdown
- Change Play Slot
- Touchscreeen Native Support
- Soutchsceren Left Click
- Touchscreen Right Click
- Touchscreen Scrollwhell Click
- Touchscreen Cursor Movement
- Touchscreen Off
- Volume Up Key
- Volume Down Key
Most of the above can be accessed normally through the Steam Deck hotkeys but some of them are a bit clunky so it’s worth remapping some functionality.
For example, not everyone wants to awkwardly fumble for buttons while they’re playing to change the volume. With the above guide, you could change L5 and R5 to the volume up and down buttons if you wanted to.
Plus having to press the Steam button and R1 to use the magnifier alienates the people who need to use the function in the first place. By mapping it to a back button, you’ve instantly made the Steam Deck more accessible. And all it took was a few clicks of a button.