You just knew it was only a matter of time before Star Wars ships turned up in Starfield. If you’ve got the credits spare and want to create a solid Star Wars ship in Starfield, read on to learn how to build the N1 Starfighter.
Before We Start.
If you’ve seen the N1 Starfighter before, that’s because this guide is based on the work by u/Megatroidskittles11 on Reddit, although I’ve changed some of the parts to make the ship a solid C-grade end-game ship.
If the parts listed aren’t showing up for you in-game, go and make an outpost with a landing pad and ship modifier. Using that to build ships, instead of the specific shipbuilder on different planets, gives you access to most of the ship-building pieces. You won’t have everything available, but you’ll have most of them and all the parts we need to build this Star Wars ship in Starfield.
Step 1: Lay the Base.

Parts needed:
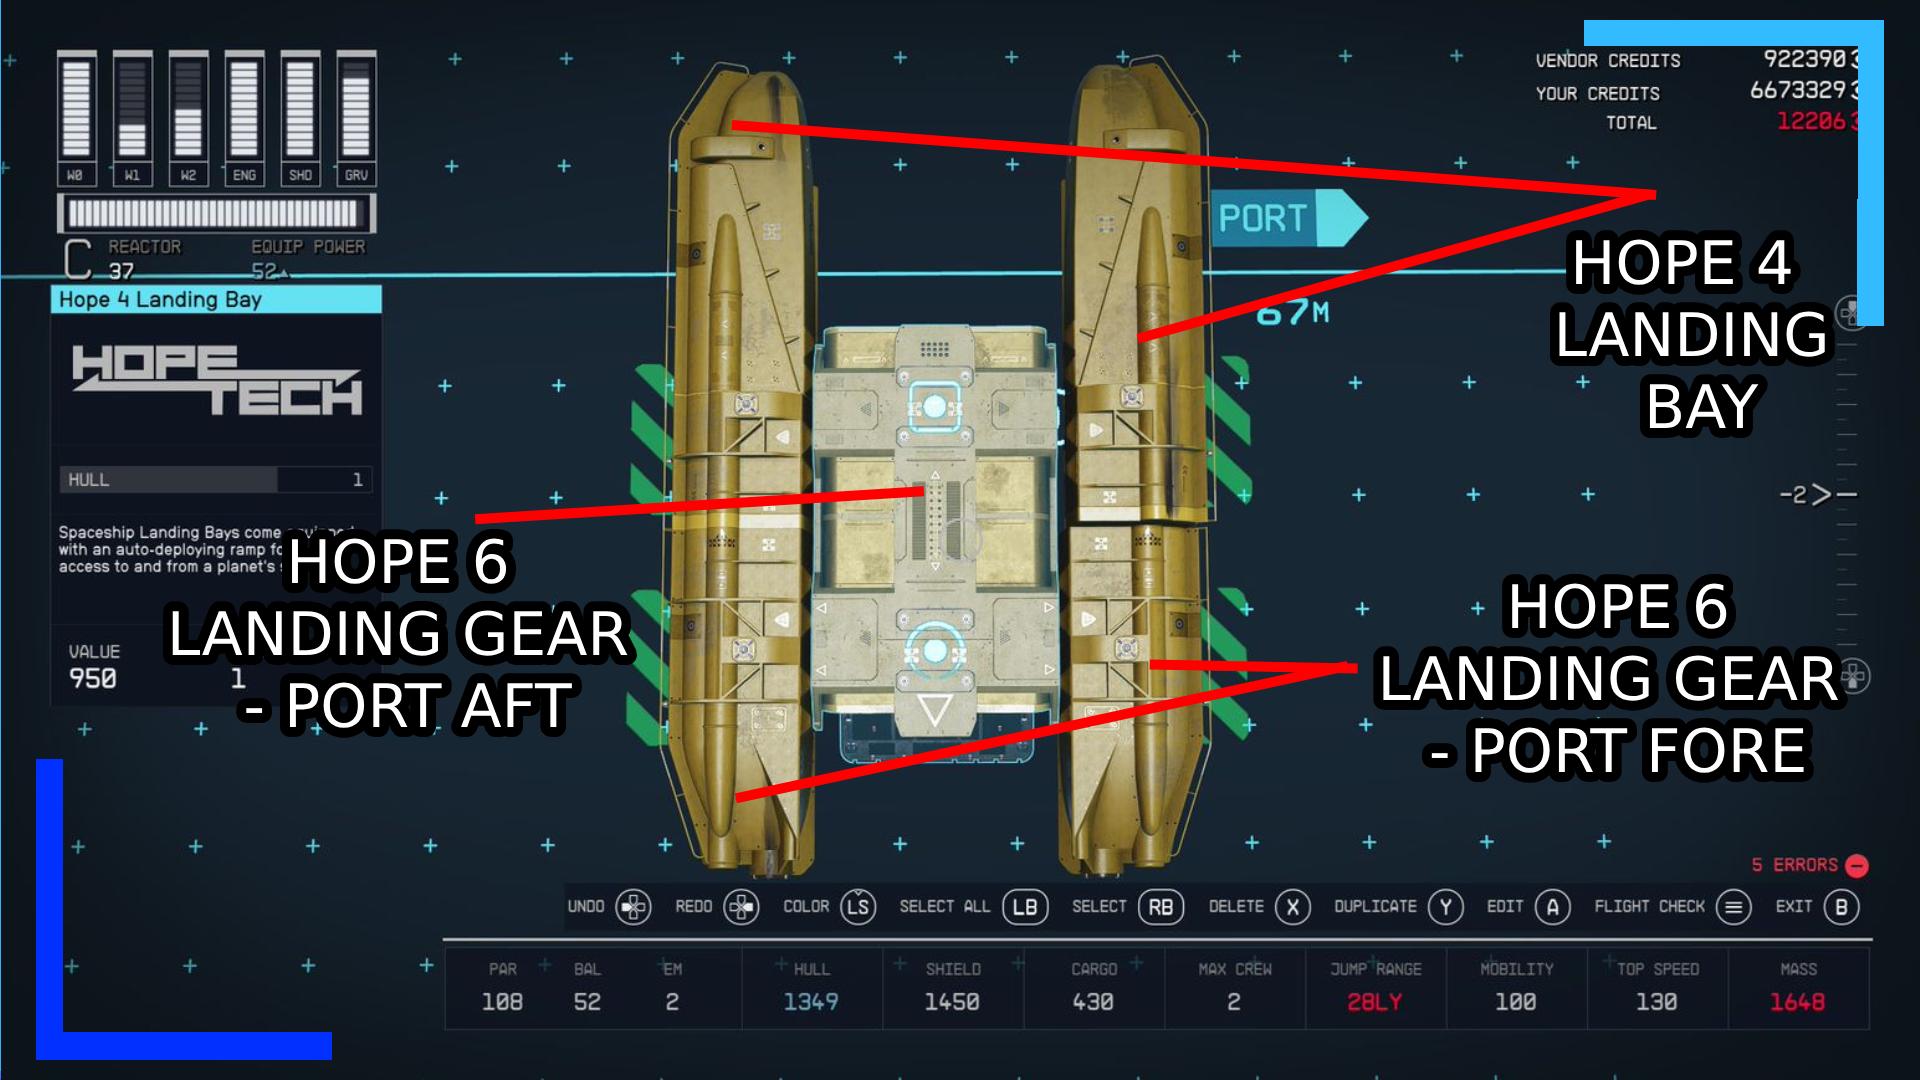
- Bay: Hope 4 Landing Bay (1).
- Gear: Hope 6 Landing Gear – Port Fore (2).
- Gear: Hope 6 Landing Gear – Port Aft (2).
Start by dropping down the Hope 4 landing bay in the center of the screen. Grab two Hope 6 landing gears (port fore) and slap them on both sides of the Hope 4 bay next to where the opening ramp is.
Next grab two more Hope 6 landing gears, this time the port aft variant, and whack them behind the current landing gears.
If at any point in this guide you need to grab a variation, highlight the piece in the menu and press right on the d-pad to switch it to a different version.
Step 2: Add The Armories.

Parts needed:
- Habs: Nova Galactic Armory 2×1 (2).
Grab two Nova Galactic armories in the two-by-one format and lay them on the landing bay so half of each armory is hanging over the edge of the bay.
Step 3: Add Drives and Power.

Parts needed:
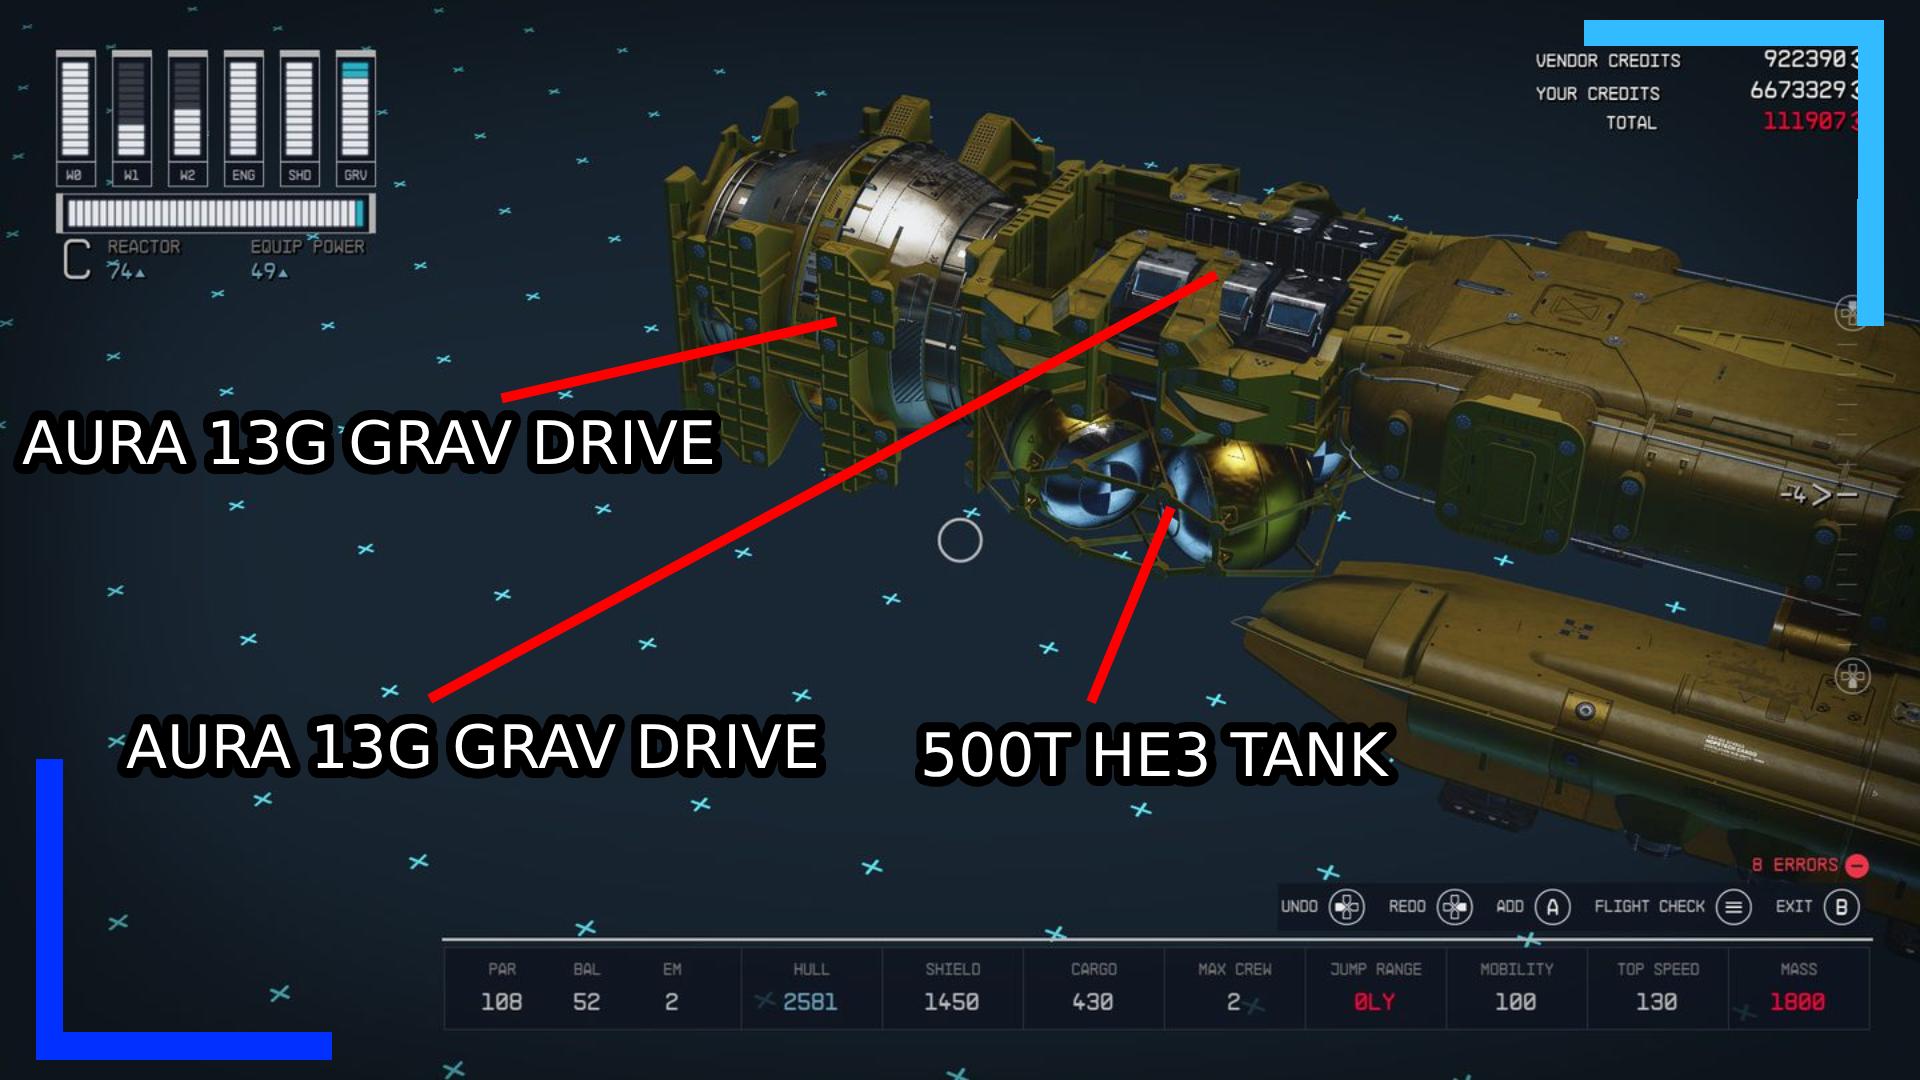
- Grav Drives: Aura 13G Grav Drive (1).
- Fuel Tanks: 500T He3 Tank (1).
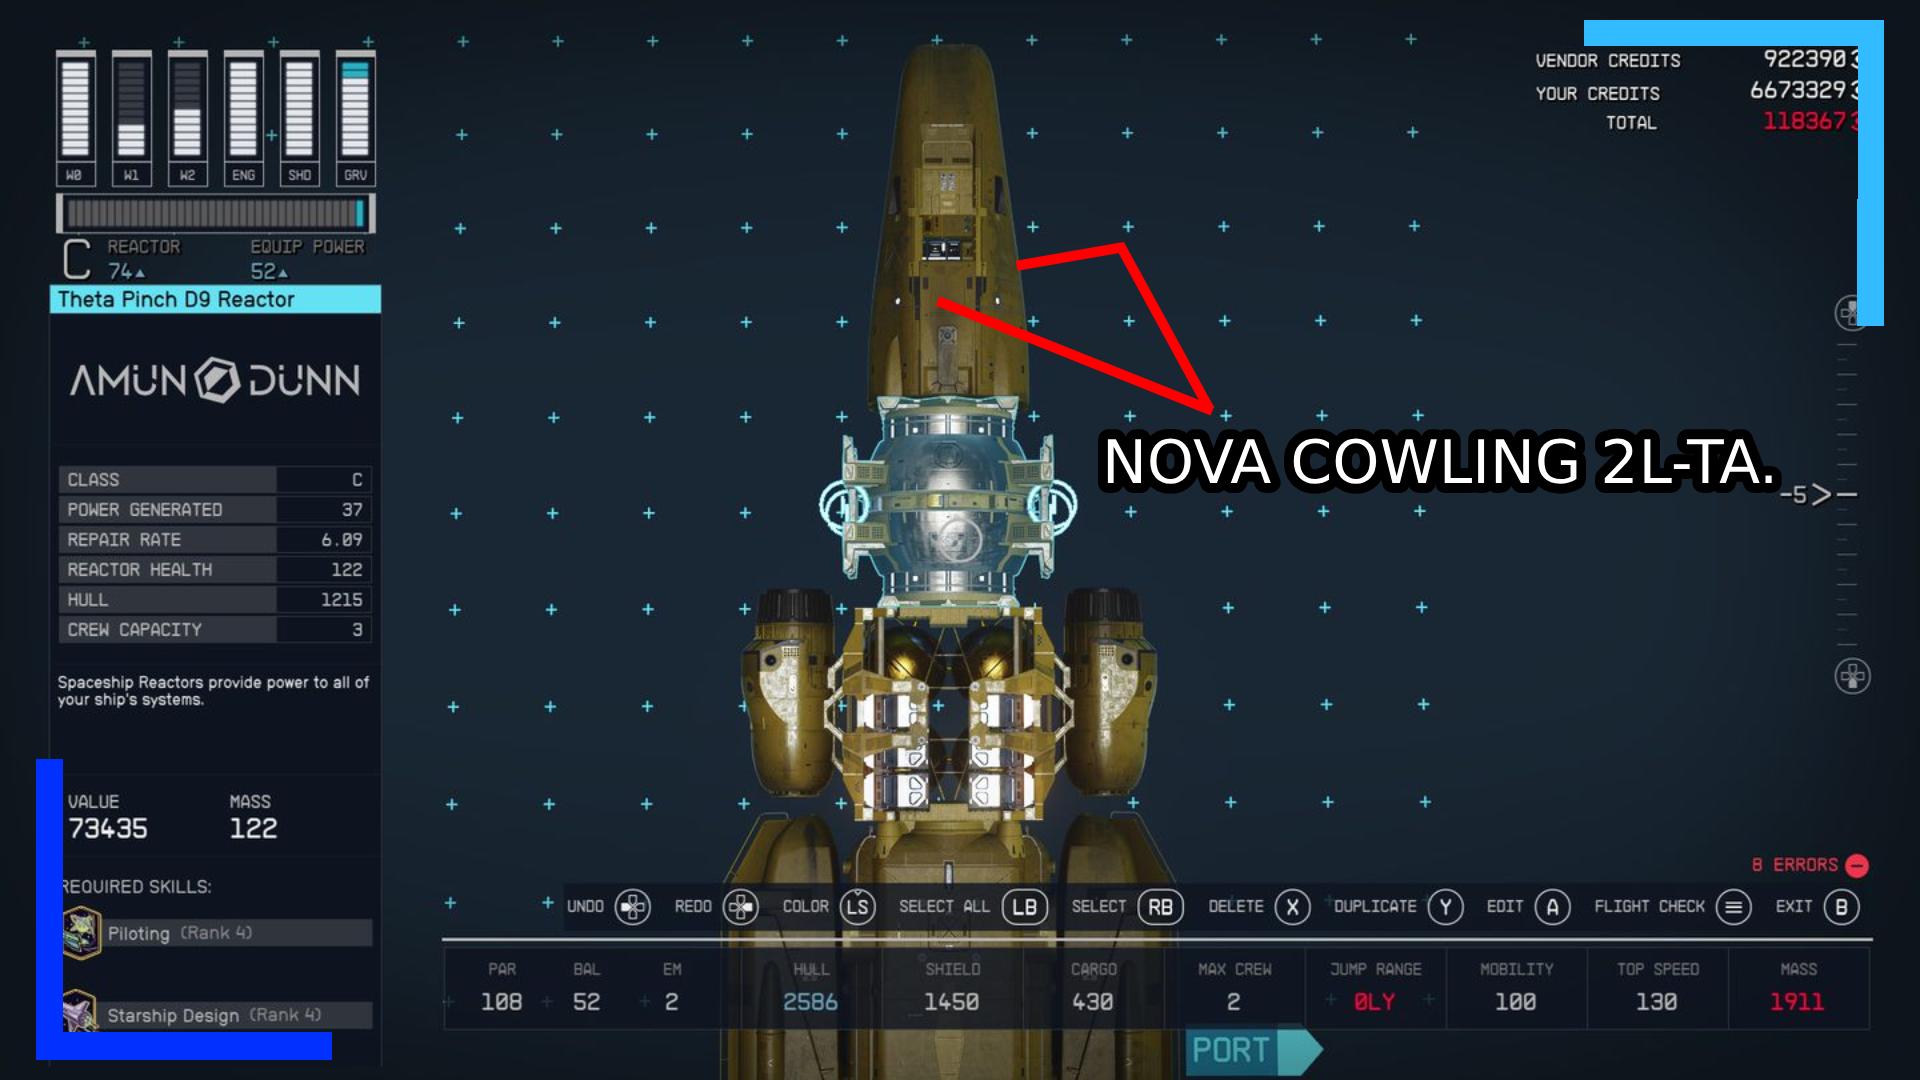
- Reactors: Theta Pinch D9 Reactor (1).
From the back of the upper armory, connect an Aura 13G grav drive. If you’re low on funds, feel free to switch out the parts in this step for versions you can afford.
Underneath the grav drive attach the He3 gas tank, then connect the Theta reactor at the back of both pieces.
Step 4: Add the Back.

Parts needed:
- Structural: Nova Cowling 2L-TA (2).
Now to add some style into the mix. Grab a Nova cowling and place it on the upper back of the Theta reactor. Now grab another Nova cowling, press the Y or triangle button to flip it, and place it underneath the previous cowling.
Step 5: Add the Cockpit, Docker, and more Engines.

Parts needed:
- Habs: Shroud Companionway 1x (1).
- Docker: Connect-Pro Docker – Top (1).
- Cockpits: Daimyo Cockpit (1).
- Engines: White Dwarf 1020 Engine (2).
For this next part place down a one-by-one Shroud Companionway on top of the back armory. In front of the companionway drop the cockpit. Next, grab the Connect-Pro docker and place that on the companionway.
To finish this part grab two White Dwarf engines and dump them on both sides of the gas tank. I’m sure it’s safe, don’t worry.
Step 6: Add more Coverings.

Parts needed:
- Structural: Nova Cowling 2L-TA (1).
- Structural: Nova Cowling 1L-SM (4).
- Structural: Nova Cowling 1L-SA (2).
On both sides of the companionway add a 1L-SM Nova cowling piece. Grab another two 1L-SMs and add one coming off each of the previous 1L-SMs.
Next, grab two 1L-SAs and attach them to the ends of the previous 1L-SMs to finish this line of stylish covers.
Pick a single Nova Cowling 2L-TA from the menu and place it in between the 1L-SMs and 1L-SAs.
Step 7: Begin Building the Wings.

Parts needed:
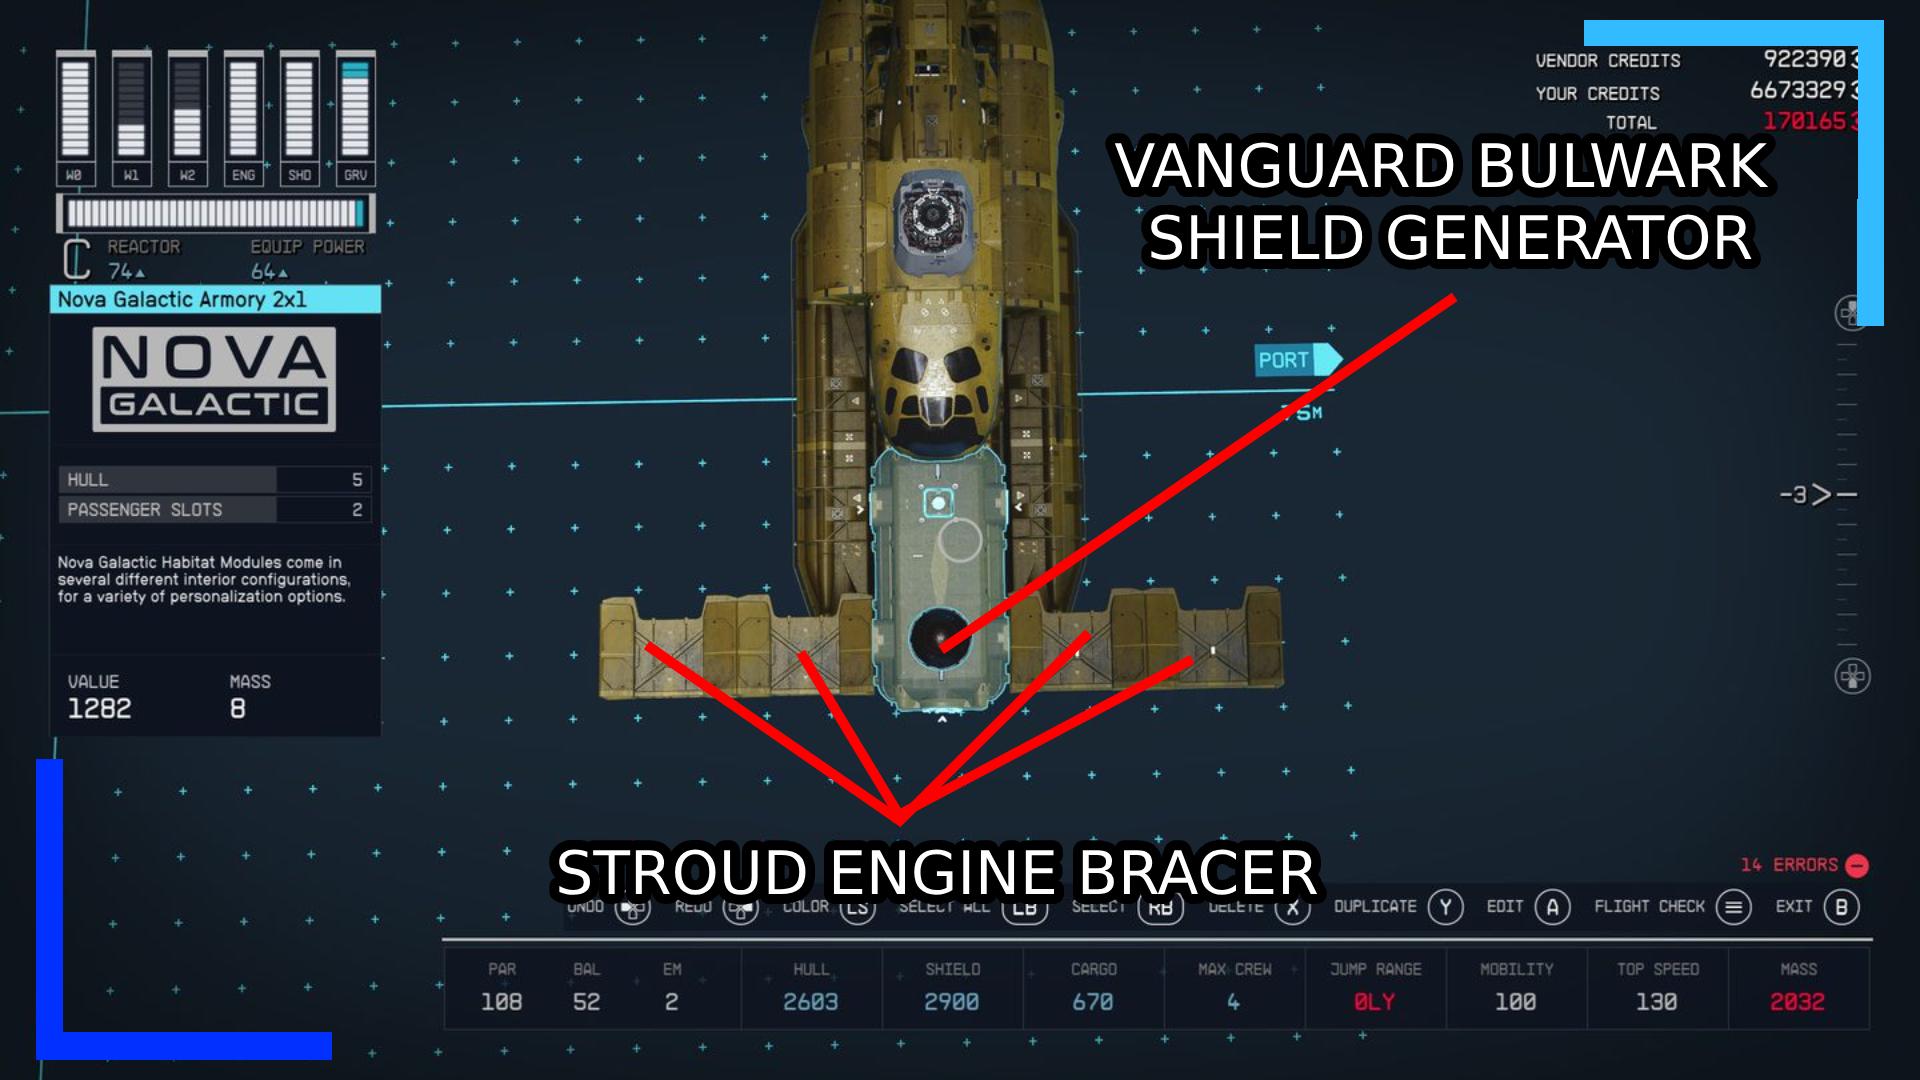
- Shields: Vanguard Bulwark Shield Generator (1).
- Structural: Stroud Engine Bracer (4).
Look to the front of the first armory. Drop in a Vanguard Bulwark shield generator to give it that adorable droid look, then pull out four Stroud engine bracers.
Add two connected bracers together on both sides of the armory to create a bridge of sorts.
Step 8: Drop in the Middle Engines.

Parts needed:
- Structural: Taiyo Mid Cap – Stbd Top (8).
For this next part, you’re going to grab eight Taiyo mid caps. Place a flipped cap coming off both ends of the bracers, then build a two-by-two makeshift engine with the remaining six.
Step 9: Build Out the Engines.

Parts needed:
- Engines: Supernova 2200 Engine (2).
- Structural: Taiyo Cowling Fore Top (4).
Pick up two Supernova engines and whack these on the backs of the Taiyo mid caps.
At the front of the mid caps, place a single Taiyo cowling, grab another, flip it, and place it underneath. Do this for both sides.
Step 10: Add the Finishing Touches.

Parts needed:
- Structural: Stroud Mid Bracer (3).
- Structural: Stroud Nose Cap E (1).
- Structural: Nova Wing Stdb (4).
We’re almost there! Add a single mid bracer connected to the front of the armory. To the left and right of this mid bracer, and another mid bracer to create a line of three.
In front of the middle mid bracer add a Stroud Nose Cap. Add a Nova Wing to both sides of the nose cap, then one on the furthest left and furthest right mid bracer to finish this N1 Starfighter build.
For weapons, everyone has their own personal preference. Thankfully, there are loads of spare slots in this build to mount them on. I went with lasers, railguns, and EM blasters, but feel free to go with what works for you.
Note: If you’re doing this on Steam Deck and finding it lags a lot, I suggest grabbing the mods listed here to improve performance greatly.

