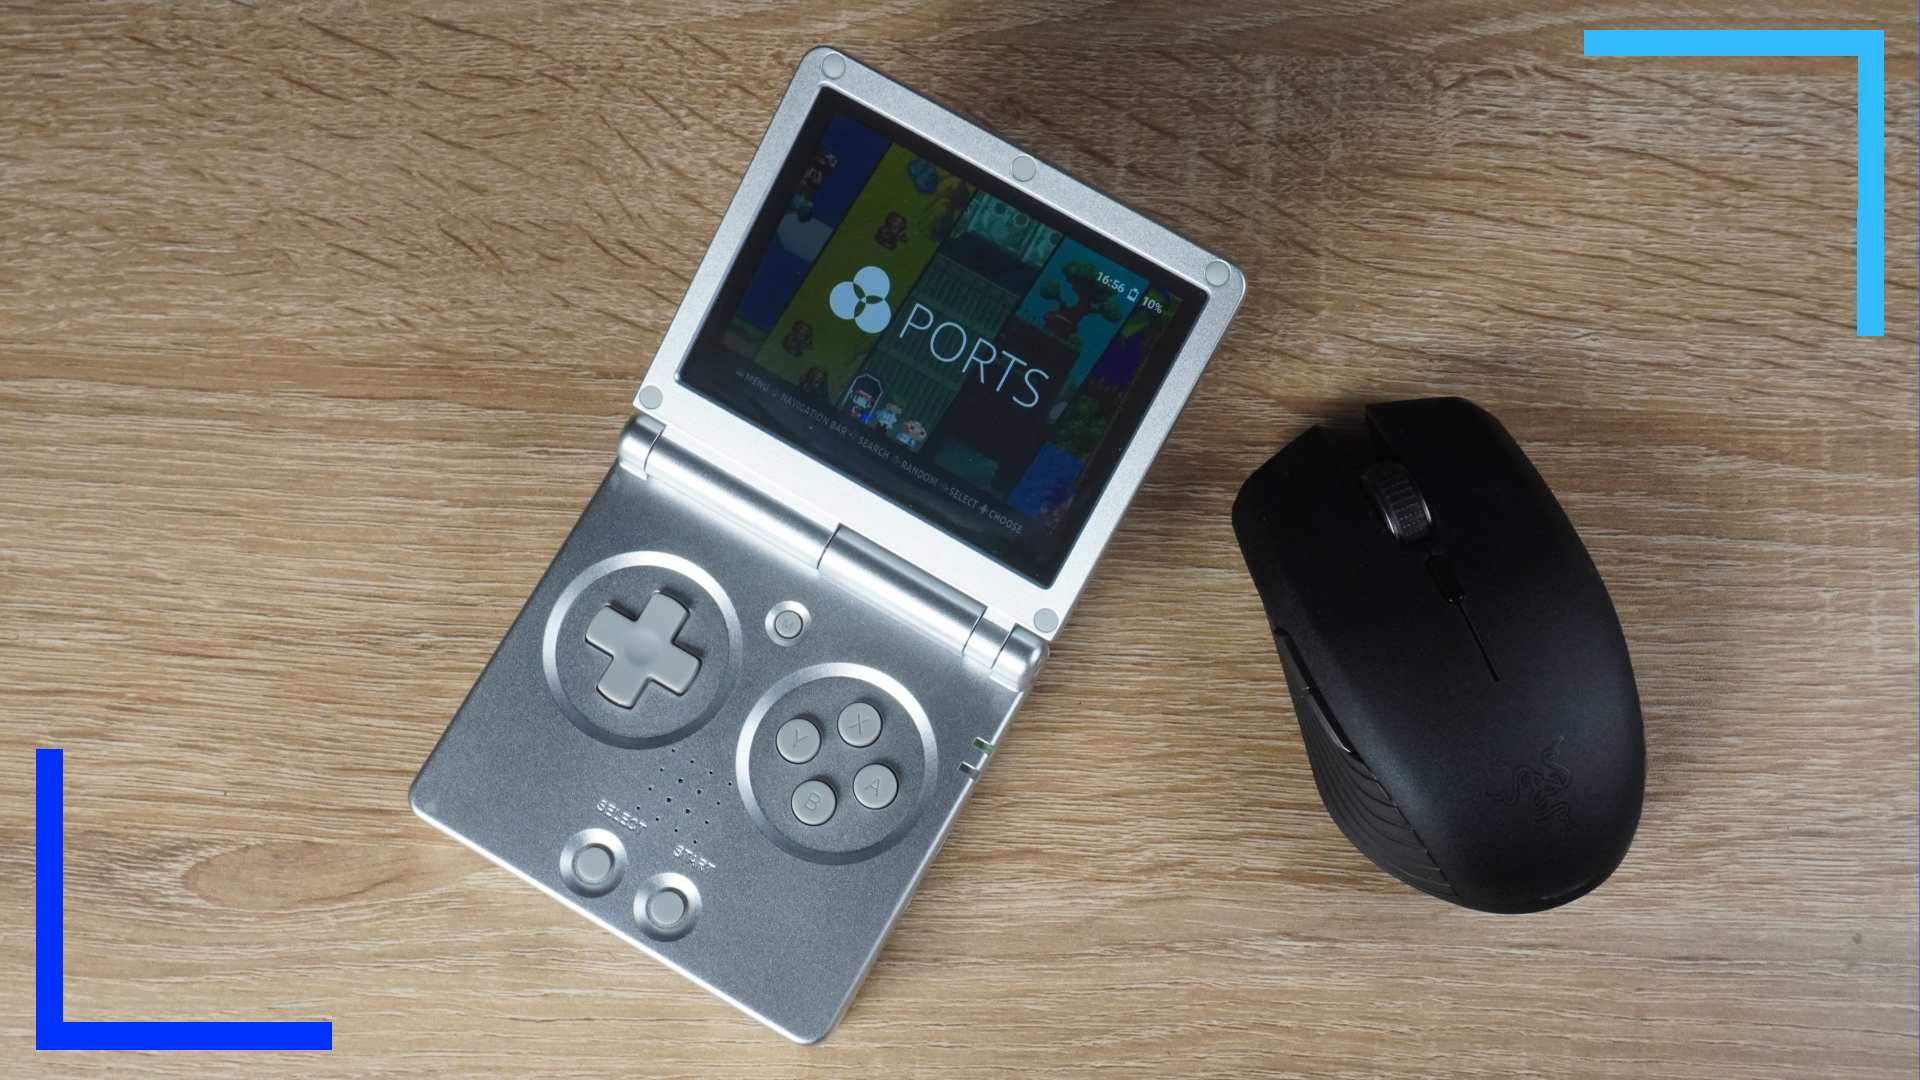
Almost every Anbernic review I’ve written has the same complaint: The stock operating system is painfully dull. Thankfully, custom firmware is here to rectify Anbernic’s biggest shortcoming.
My personal pick for Anbernic devices is the excellent Knulli. Not only is Knulli super-stylish, it’s also surprisingly simple to use, and any problems it does have can be fixed fairly simply.
I’ve got Knulli installed on both the RG35XXSP and the RG28XX and, honestly, there isn’t a better operating system out there.
Before We Start
But before we do anything, let’s take a moment to check that the device you’re looking to install Knulli on is on the compatibility list below:
- Anbernic RG35XX Plus (2024)
- Anbernic RG35XXH
- Anbernic RG35XXSP
- Anbernic RG40XX
- Anbernic RG28XX
- TrimUI Smart Pro
If you don’t see your device listed above, that means Knulli likely won’t work.
I’d also strongly recommend installing Knulli on a fresh SD card and keeping the SD card that came with the system, with the stock operating system on, separately.
That’s because if you want to go back to the stock version, the image you download from the Anbernic website will be for 16GB cards, and in many cases locks your card to just 2GB in available space. You can contact Anbernic directly to get the correct image size for your SD card, but that’s an extra step that can be avoided by using a different card entirely.
Step 1: Download the Correct Version of Knulli
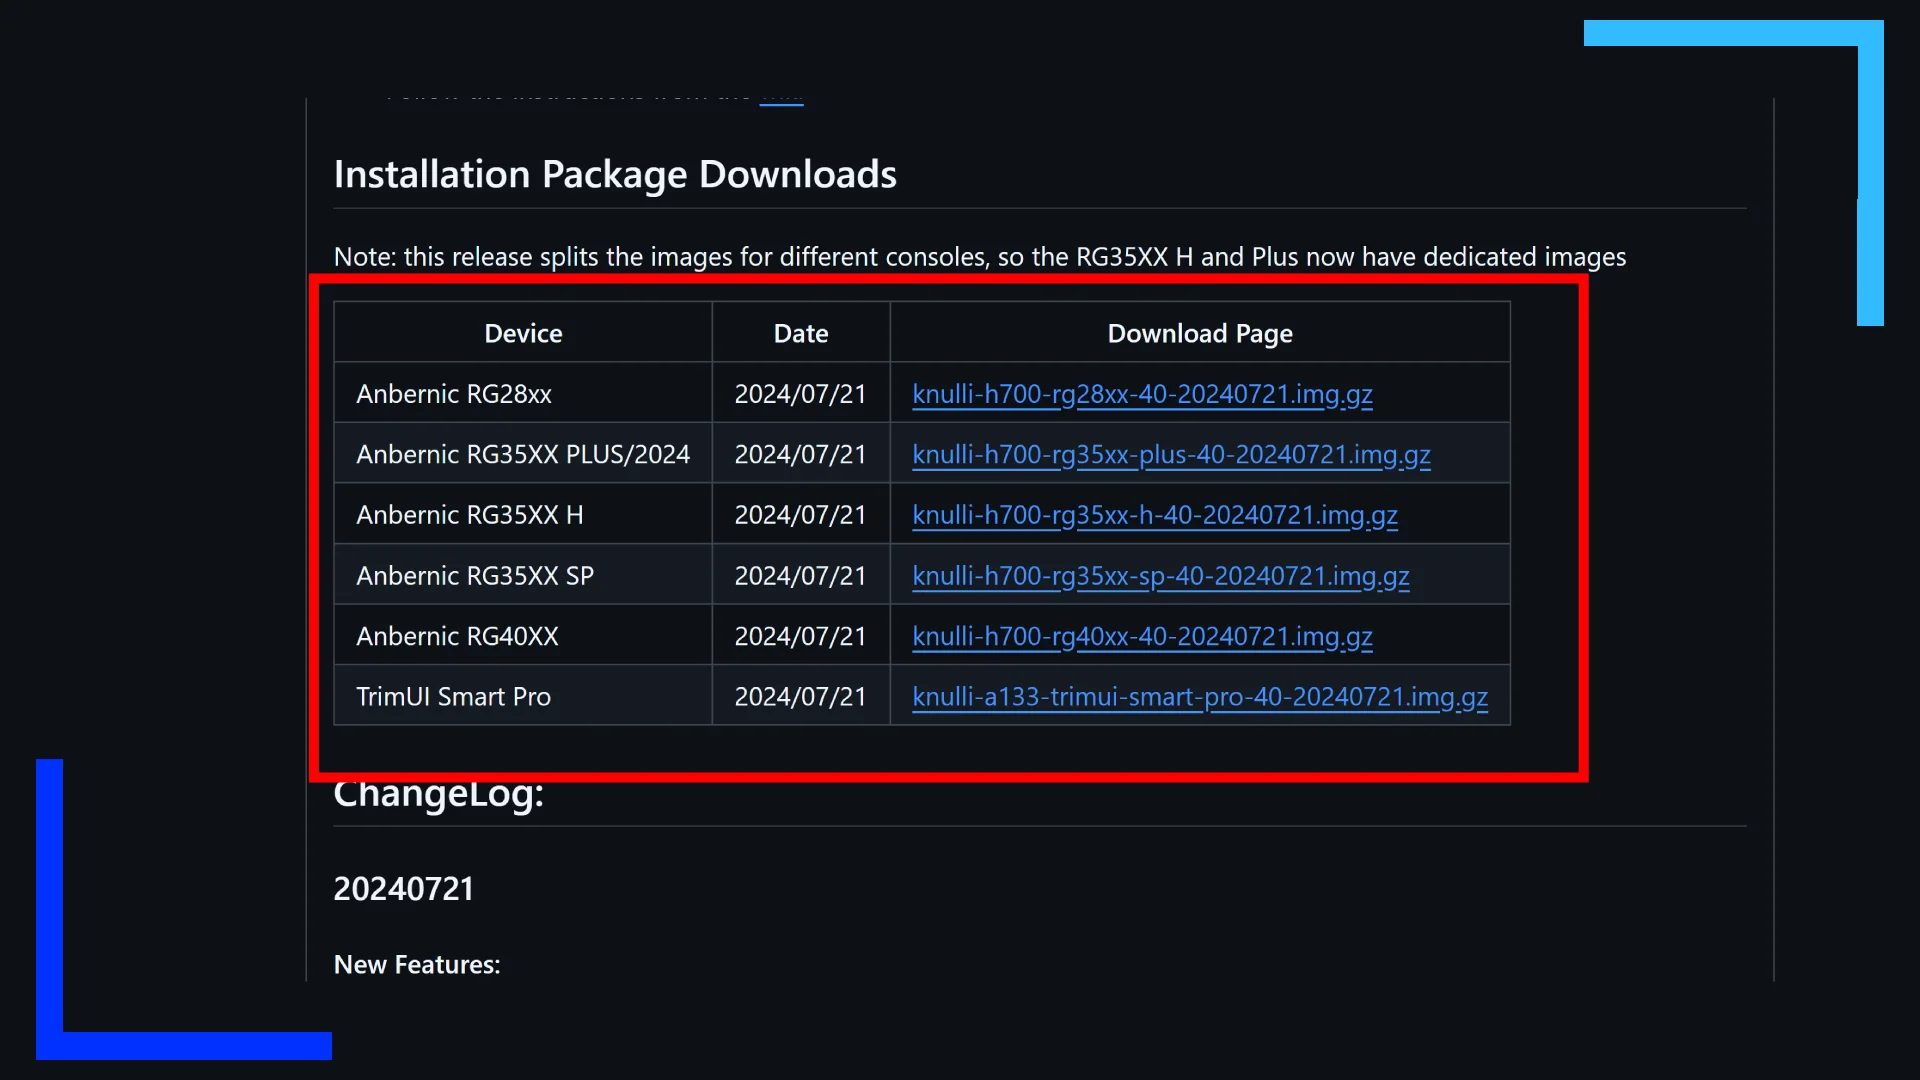
The first thing we want to do is download the correct version of Knulli for the device you’re using.
If you’re good to go, click here and a new window will open with the Knulli download page. Find the name of your device in the table, and click on the blue link to the right of the device name ending in “img.gz” to download the image file.
Step 2: Download an Imaging Tool (Optional)
To install Knulli onto an SD card, we’re going to need what’s known as an imaging tool. I used Win32 Disk Imager, but Rufus or similar should also work. Balena is also an option if you’re doing this on Linux.
Step 3: Extract the Image File
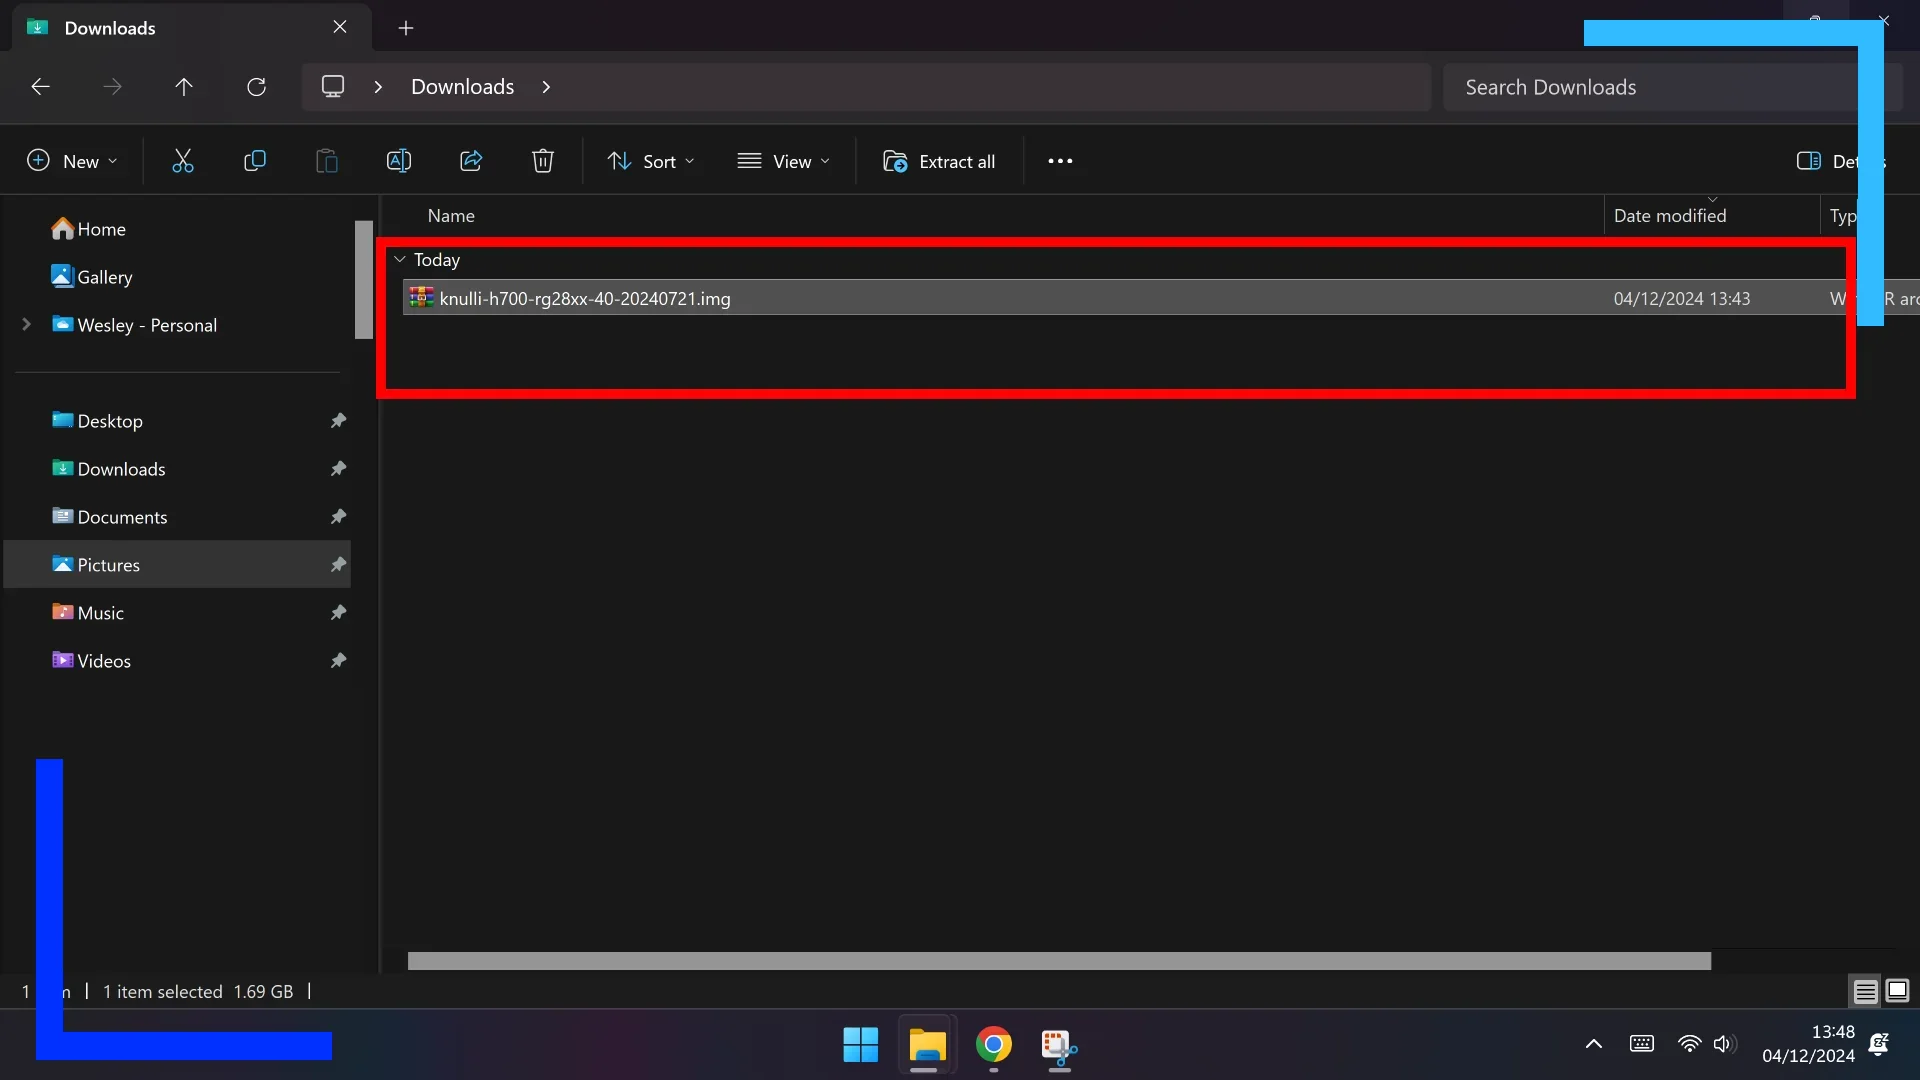
Head into your file explorer (the yellow folder icon in Windows) and click on Downloads. Inside will be the file we downloaded in step one.
Click on the “img.gz” file with the right mouse button (right-click) and select Extract to Name Of File. This will extract the image and dump it into its own folder.
Note: If you can’t extract the file, you may need to download WinRAR and use that instead.
Step 4: Write Knulli to an SD Card
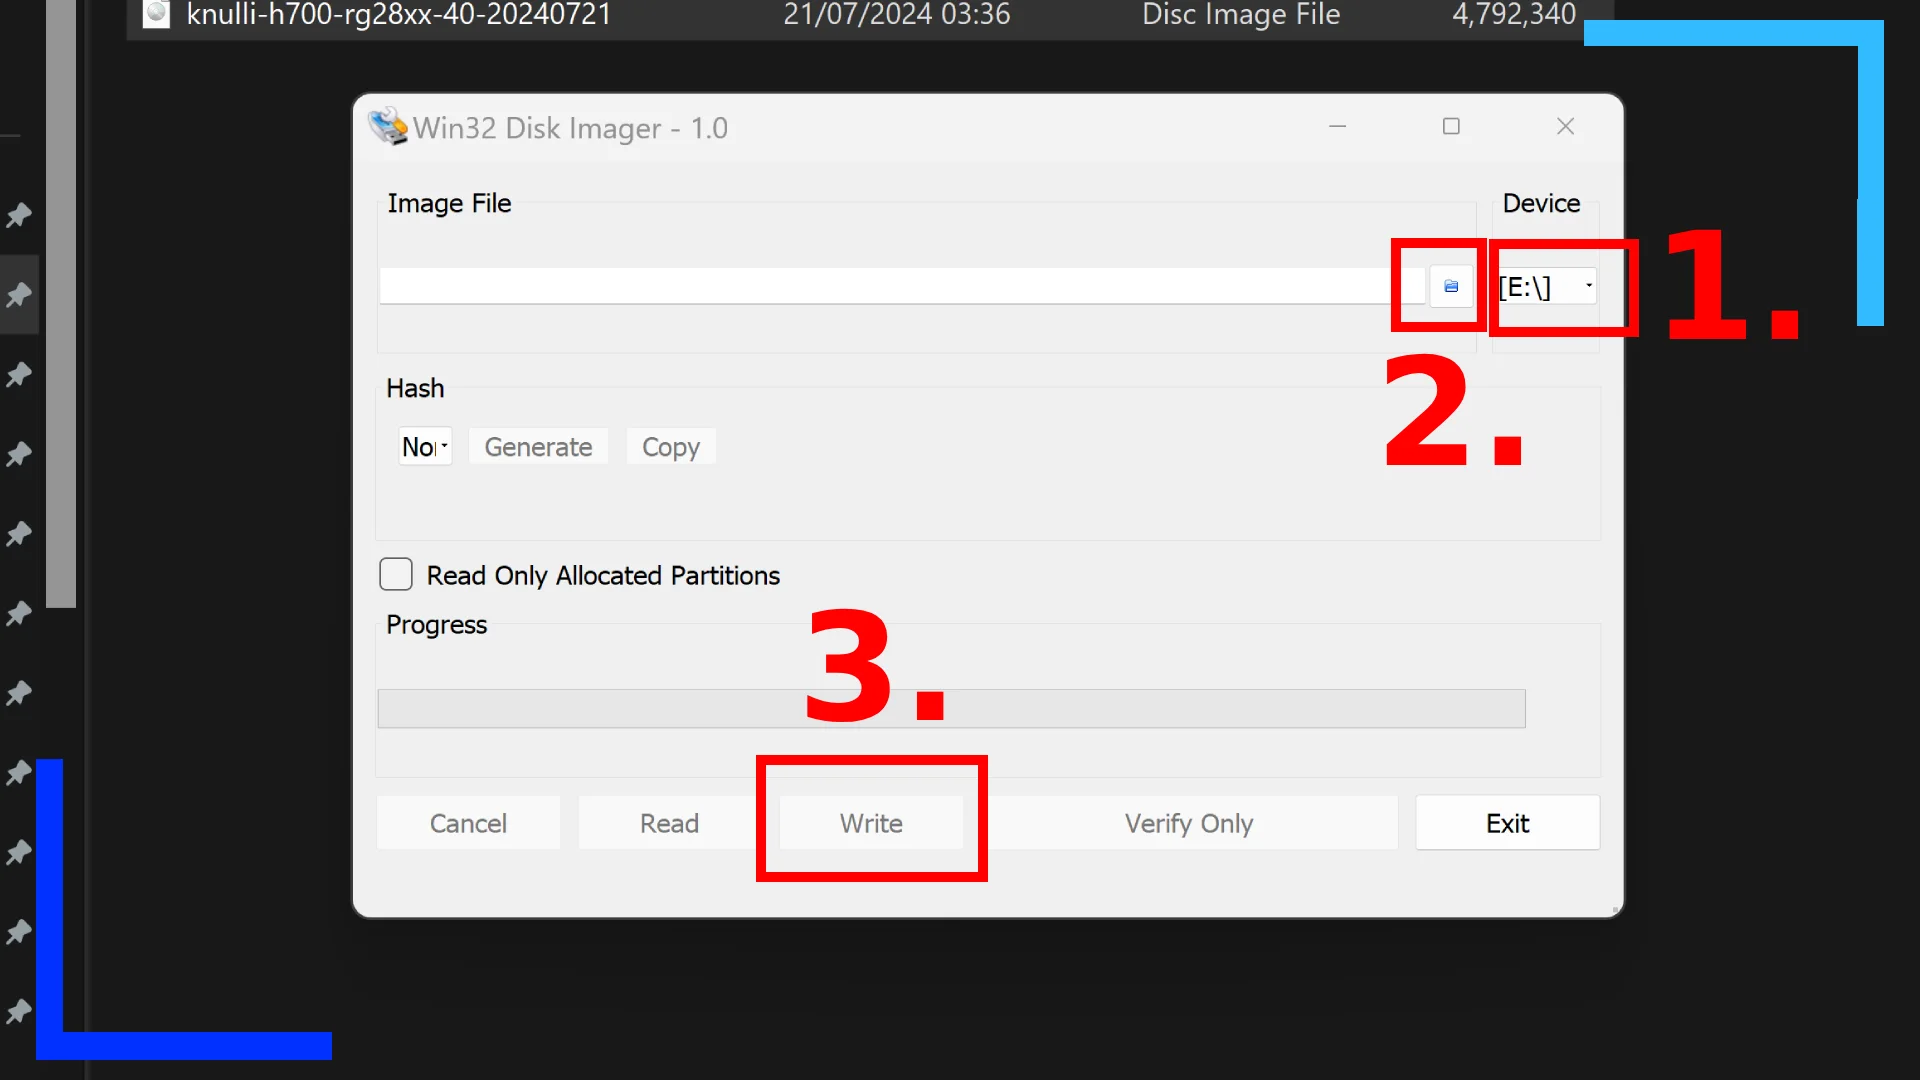
Open up your imaging app (Win32 Disk Imager if you’re using the same as me). Next, plug your SD card into your PC. One quick note, installing Knulli to the SD card will delete everything. So if you need to back anything up, do so now or forever hold your peace.
In the imaging app, make sure the disk drive (1.) matches that of the SD card. In my case, the SD card is the “E” drive, but that may be different on yours depending on how many drives you’ve got attached.
If the drive in the app matches the SD card drive, move on. If not, change it.
Now click on the blue folder icon (2.) and navigate to where you extracted the image file in step three. Head into the image folder and click on the image inside twice to load it into the app.
All you need to do now is hit Write (3.) and the app will install Knulli to the SD card and tell you when it’s finished and safe to eject the SD card.
If you don’t plan on adding any ROMs now, you’re free to plug the SD card into your retro handheld and boot it up. That first time boot may take a bit longer, too, so don’t be worried if it takes a minute to boot.
Step 5: How to Add ROMs in Knulli
I’m going to keep this simple so as not to confuse anyone. If you’re on Windows, you won’t be able to access the Knulli SD card and transfer over ROMs how you normally would. That’s due to the SD card being designed for Linux rather than Windows. There are some options, though.
Option 1
The easiest solution is to download the Paragon Software Linux File Systems for Windows. This software has a free trial and will let you access the SD card from within Windows and can transfer over what you need to. The downside, that free trial is limited, and eventually you’ll need to pay to access the software.
Option 2
The second option is to use the Anbernic device’s built-in network transfer. You’ll find this in the Settings area on the device under your Wi-Fi options. Once your device is connected to the Internet, simply open up Windows Explorer on your PC and head into Network.
If you get a pop-up saying you need to enable network transfer, hit the option to enable it now.
Next, in the address bar (the area near the top of the screen that tells you where you are) type in “\\Batocera” without the quotation marks and hit enter.
Note: The official documentation says you should type in “\\Knulli” but that didn’t work for me. It was only when I typed in the Hostname found in the Wi-Fi network settings, in my case “Batocera,” that it worked.
The biggest downside of this option is not only are you limited by your upload and download speeds, not all Anbernic devices have a Wi-Fi option. If you’re using the RG28XX, for example, you’ll need to go with option one or option three.
Option 3 (Recommended)
Our third option is the most convoluted, but it’ll let us use the SD card from within Windows, so it’s the one I recommend. The only drawback is some Portmaster games may not work on the new file system.
To do this, load up your device with the Knulli SD card in. Once loaded, hit the Start button to bring up the menu. Head into front-end developer options at the bottom, then navigate to Format.
Click on Format then select the internal SD card and change the file system to exFAT. Finish the process and reboot the handheld once. Now shut it down and transfer the SD card back to a PC.
In Windows 11, right-click on the Start Menu and click on Disk Management.
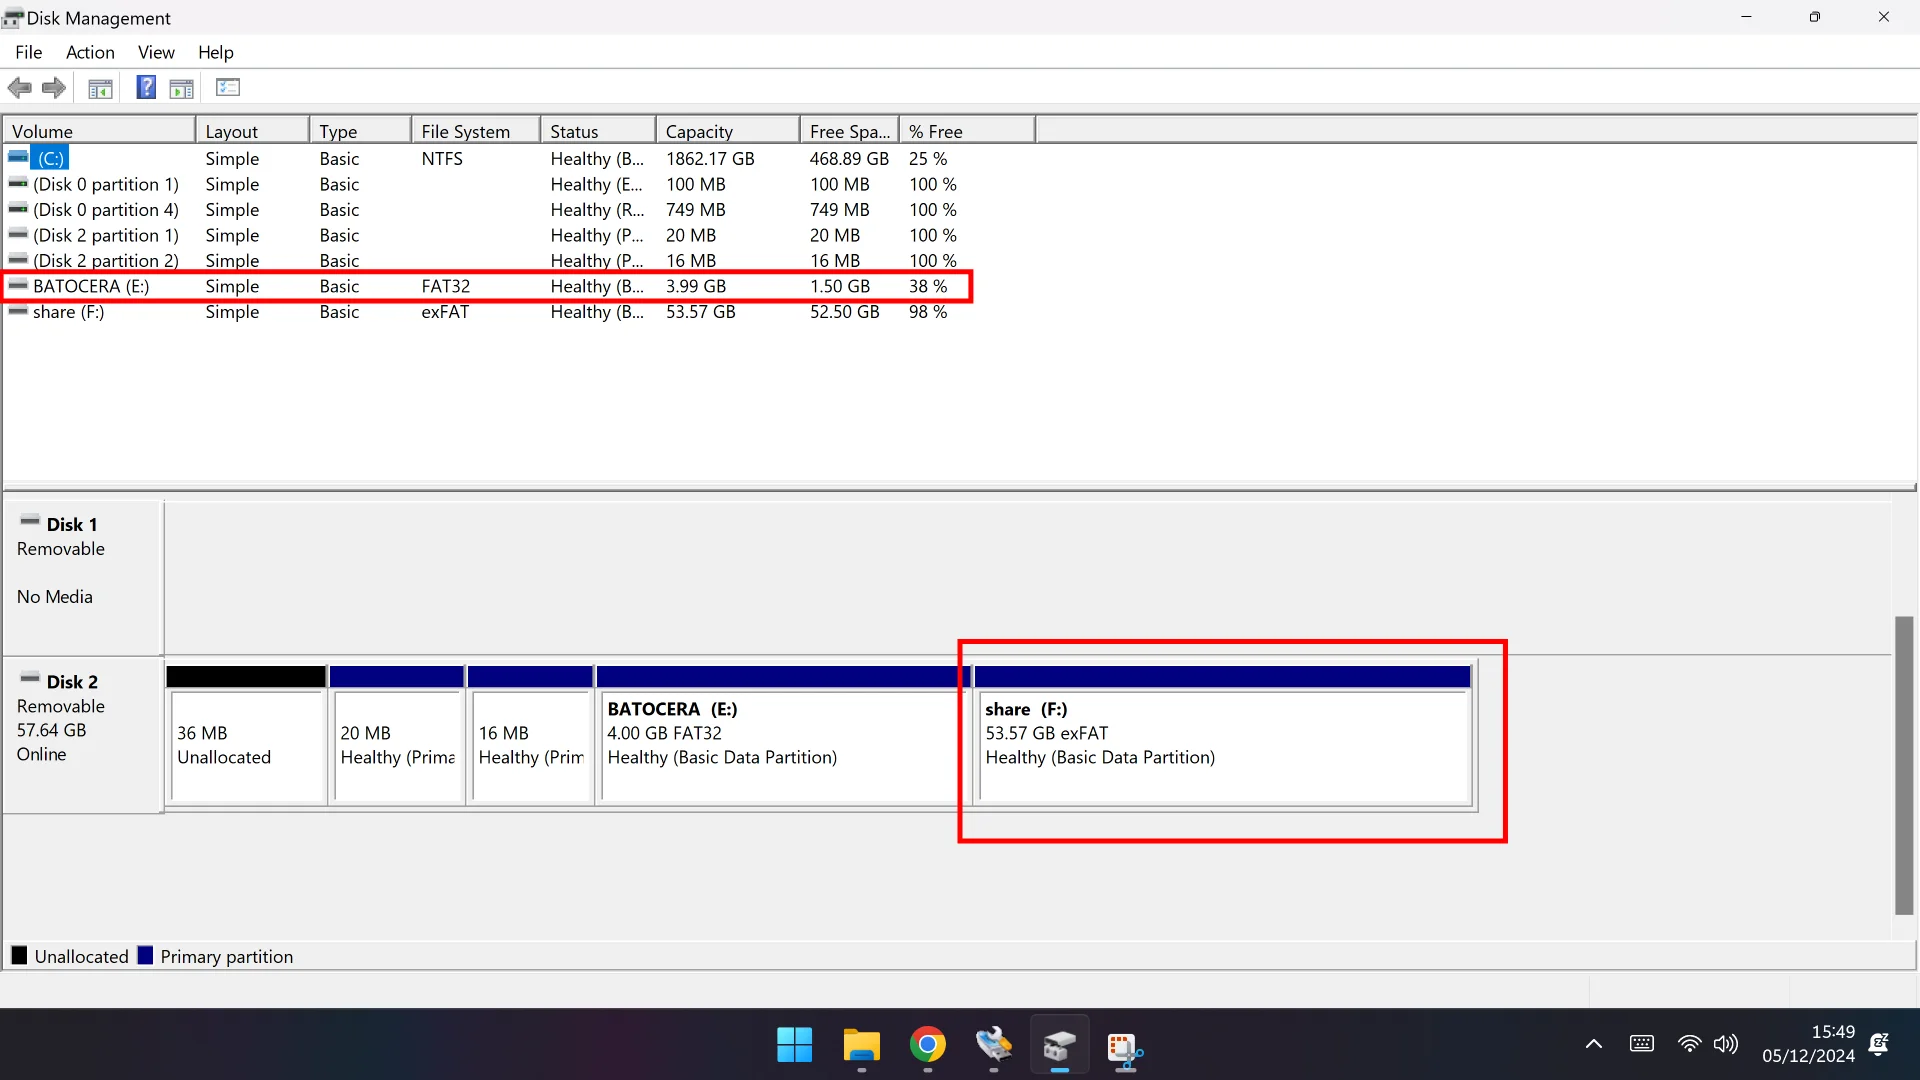
You should see something similar to the image above. Click on the Batocera drive (your drive letter may differ from mine) and to the far right you’ll see an unformatted area. Right-click this area and create a new partition with the exFAT file system, name it “share” minus the quotation marks, and assign it a drive letter.
Once that’s complete, the share partition should now be visible from within Windows. If you find it doesn’t have any folders, whack it back into the device and load it up, then power it back down and transfer it back to the PC again. Loading it once from within a Knulli device card should create the correct folder structure.
Back on the PC, you should now see a ROMs folder complete with the individual console folders inside. Now it’s just a case of transferring your ROMs to the corresponding folder, and they’ll then show up when you put the card back into the device.
As I say, this method is long-winded, but it’s worth it if you want to access the Knulli SD card inside of Windows.
Option 4
If you own a Steam Deck and you’ve got ROMs installed to your main internal drive, you can insert the SD card and head into Desktop Mode and copy ROMs through the Linux file explorer (the blue folder icon). It’s that simple!

