Believe it or not, installing Minecraft on the Steam Deck is really easy. Gone are the days of needing to install the poorly supported Minecraft launcher. Now you can get one app, Prism Launcher, and install different instances and a host of mods in a matter of minutes.
Read on the learn how to install Minecraft the easy way.
(This article has been updated to feature in-depth details to use the latest and easiest method for playing Minecraft on Steam Deck).
Step 1: Download Minecraft Prism Launcher
Boot into Desktop Mode by holding down the Power Button and selecting Switch to Desktop.
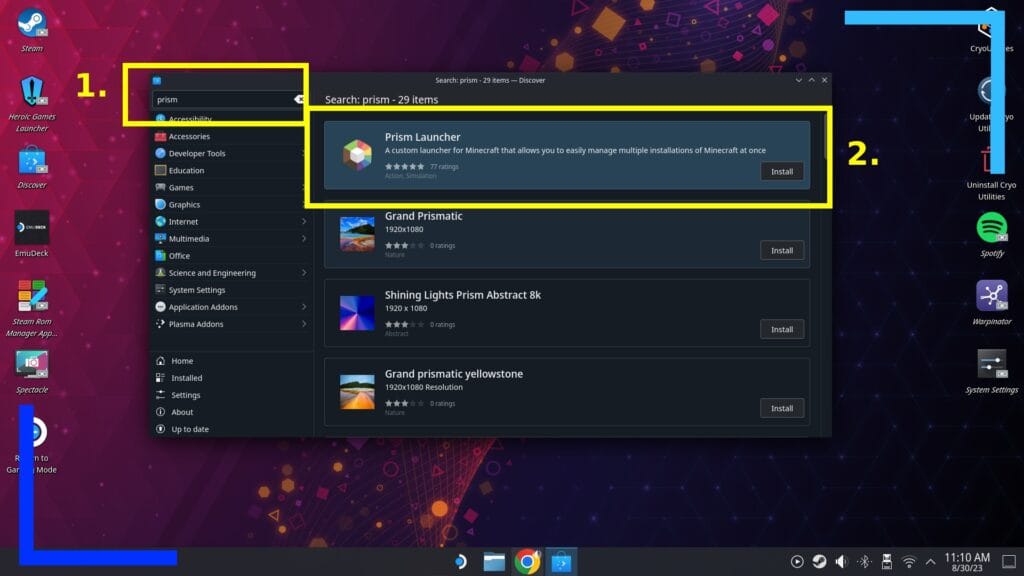
Once the desktop environment loads open up the Discover Store (the blue shopping bag icon). Click in the search bar at the top left of the screen (1.) and type in “Prism” and hit enter to search. The first result in the right window (2.) should be Prism Launcher with a small install button to the lower right. Click on install now and Prism Launcher will download and install itself to the Steam Deck.
Step 2: Open Prism Launcher
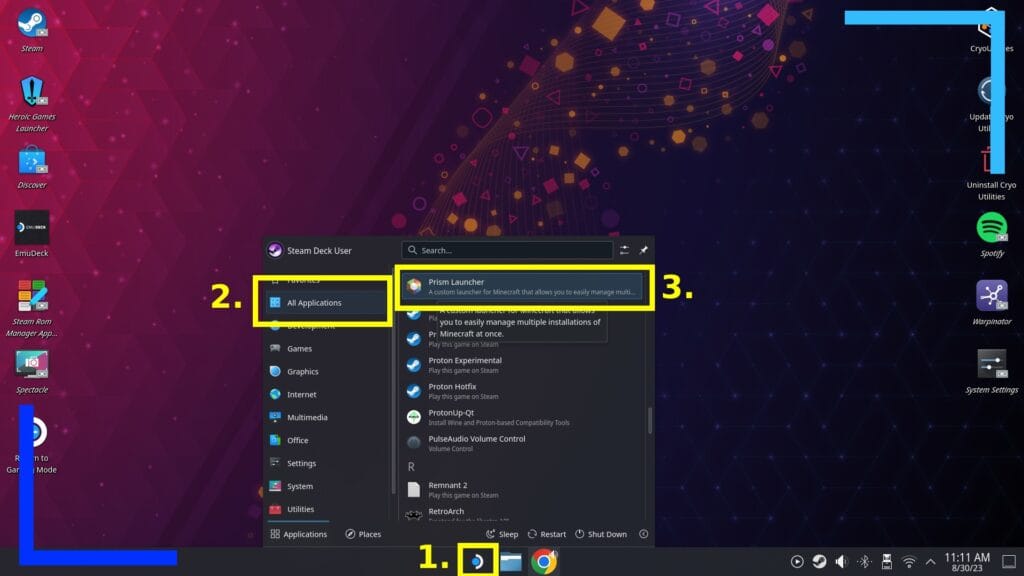
Once Prism Launcher has finished installing, click on the Start Menu (1.) and under All Applications (2.) scroll down to ‘P’ and you should see Prism Launcher (3.). Click on that now to open it and load it up.
Step 3: Set Up Prism Launcher
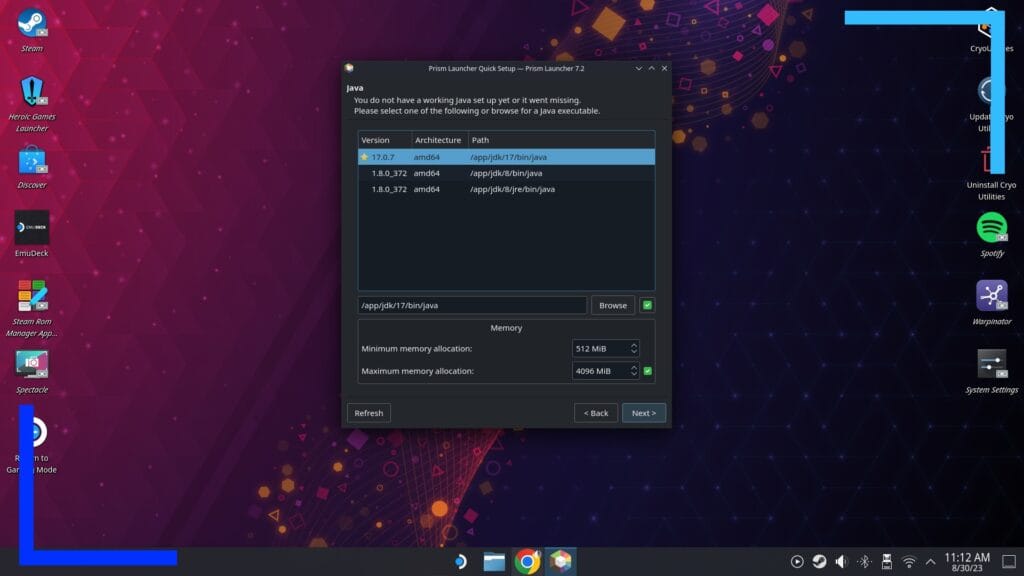
The very first time you open Prism Launcher you’ll be greeted with a few questions. Don’t worry, this is all easy stuff and just entails clicking Next a few times.
What this will do is set the Java dependencies and state how much memory Minecraft is allowed to use. On a high-end PC it’s worth setting the minimum RAM usage to a higher value, but as this is a Steam Deck and the power is finite, just stick with the defaults and Minecraft should work fine. Or at least it did whenever I’ve been playing it. If you go off and load it up with several hundred of mods, keep in mind the Steam Deck may struggle to run under that much pressure.
Step 4: Add Your Minecraft Account
Once the first-time installation is out of the way you’ll be greeted with the main Prism Launcher screen. Before we get into installing Minecraft on the Steam Deck we need to add the account you purchased Minecraft on.
For most, this will be a Microsoft account as Microsoft has been pushing account mergers the last few years. If yours is still a Mojang, though, don’t worry, there’s an option for that as well.
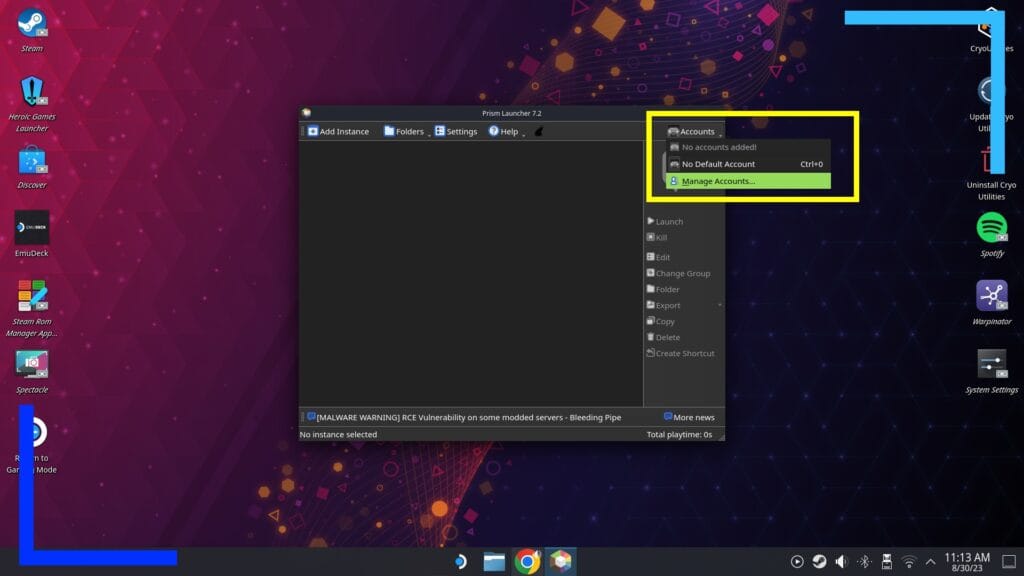
To get started click on the Accounts section in the top right of the window and then click Manage Accounts.
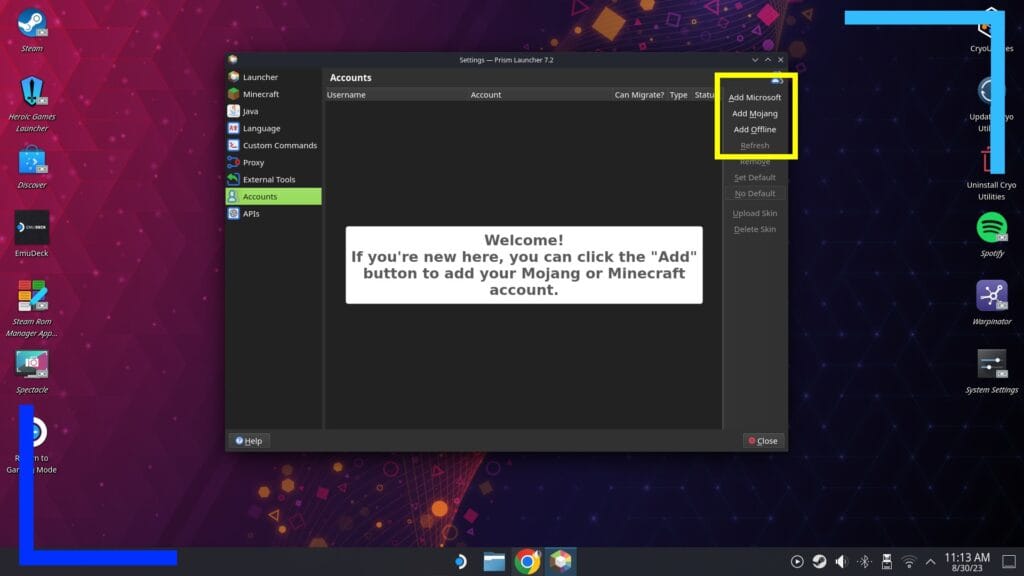
Your options here are as follows:
- Add Microsoft Account.
- Add Mojang Account.
- Add Offline Account.
Click on whichever version your account is. As I say, most will now be on a Microsoft account, but if you never got around to merging your Mojang account with an Xbox Live account, then stick with the Mojang login. As always, never share any of your login info with anyone.
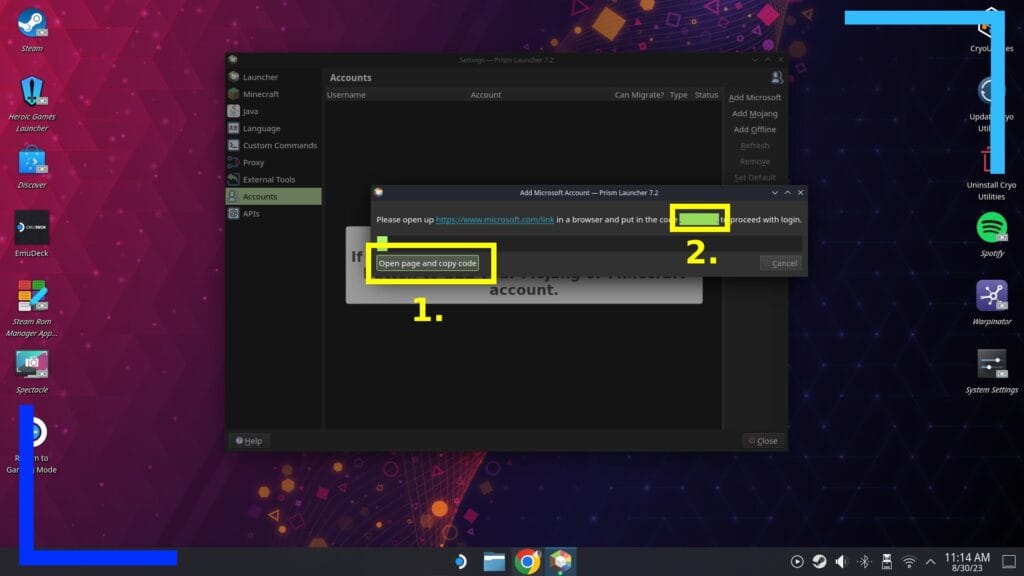
Once you’ve clicked on the account type a new window will pop open. If you have Microsoft Edge installed, click on Open page and copy code (1.) and Edge will open in a new window.
From here it’s just a case of logging in on Edge if you haven’t already and pasting the code (2.) into the box. Eventually you’ll get a message saying it’s now safe to close the Edge window and when you go back to Prism Launcher, the account process will finish up.
If you find the open page link didn’t open an Internet browser, copy the Microsoft website link directly above the open page link and paste it into your browser of choice. It’s slightly more long-winded but should still work just as well.
Step 5: Add a Minecraft Instance
Now we’ve got your Minecraft account all set up, we can go ahead and download a playable version of Minecraft known as an instance.
Think of instances as different versions of Minecraft with different updates applied. Want to play something from before The Deep Dark was introduced? Go grab 1.18 and below. How about the original beta version of Minecraft? You can grab that too if you want.
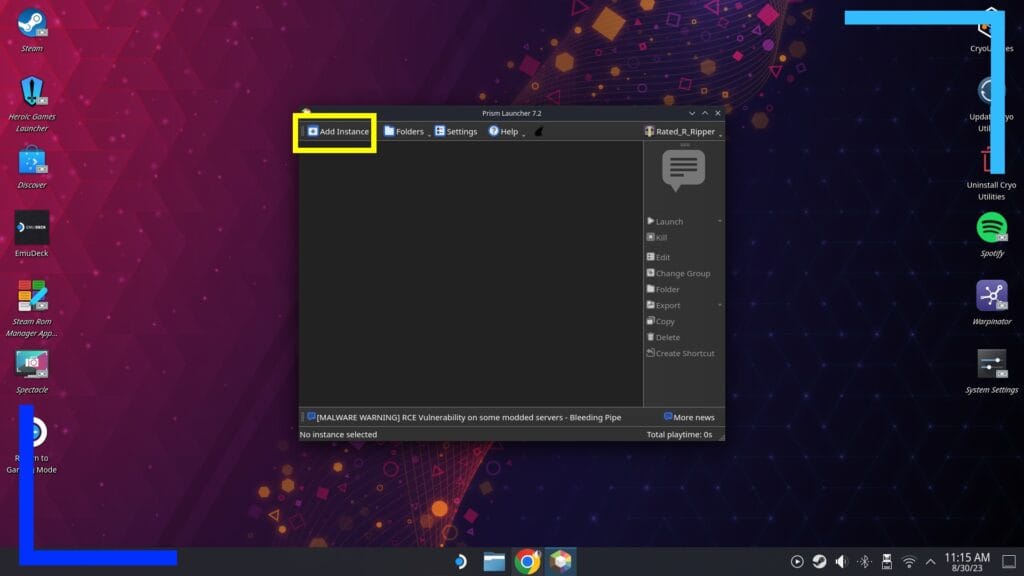
To get started click on the Add Instance button at the top left of the window.

In this example I’ll be installing Minecraft version 1.19.4, but feel free to grab whichever version you want to play with first.
After clicking Add Instance click on the version of Minecraft you want to install (1.).
Something to note here because there’s a lot going on. You can sort the versions by releases, betas, and experiments (2.) and install a mod launcher alongside it (3.). If you want a mod loader, feel free to click on the version you use now.
When you’re happy with your selections, click on OK to move on.
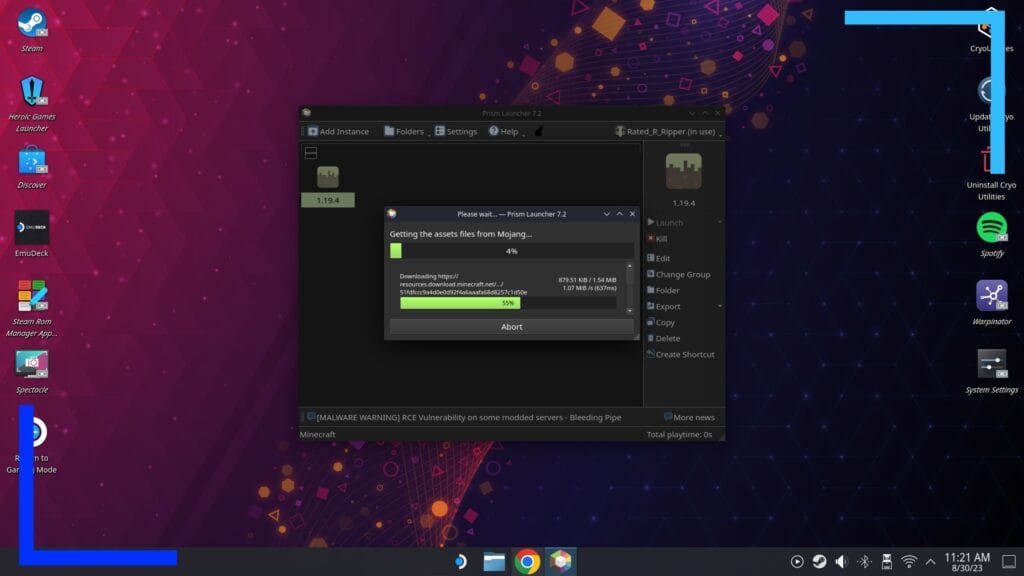
A new window will appear (shown above) and all the necessary files will be downloaded and installed. If the installer doesn’t start, close Prism Launcher and reopen it to try again. This happened to me my first time and a simple reboot fixed all my problems. If only all tech issues could be that easy to solve!
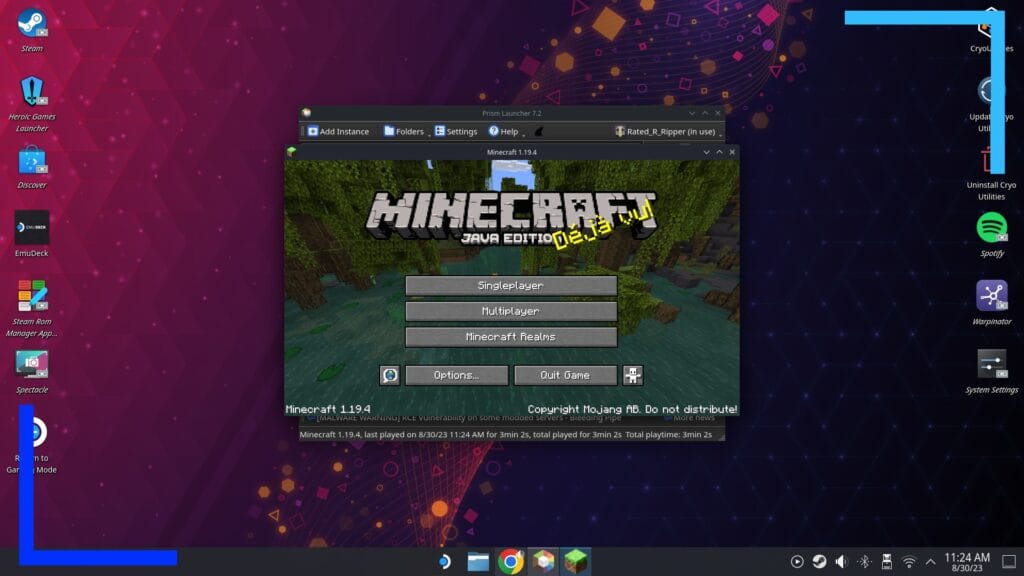
That’s it! Upon completion, Minecraft will load up for the first time. You’re now free to go off and play if you want, or, keep reading if you want to know how to install Minecraft mods on Steam Deck.
How to Install Minecraft Mods on Steam Deck
Installing Minecraft mods on Steam Deck is actually even easier than it is on PC. I know, right? Shocking.
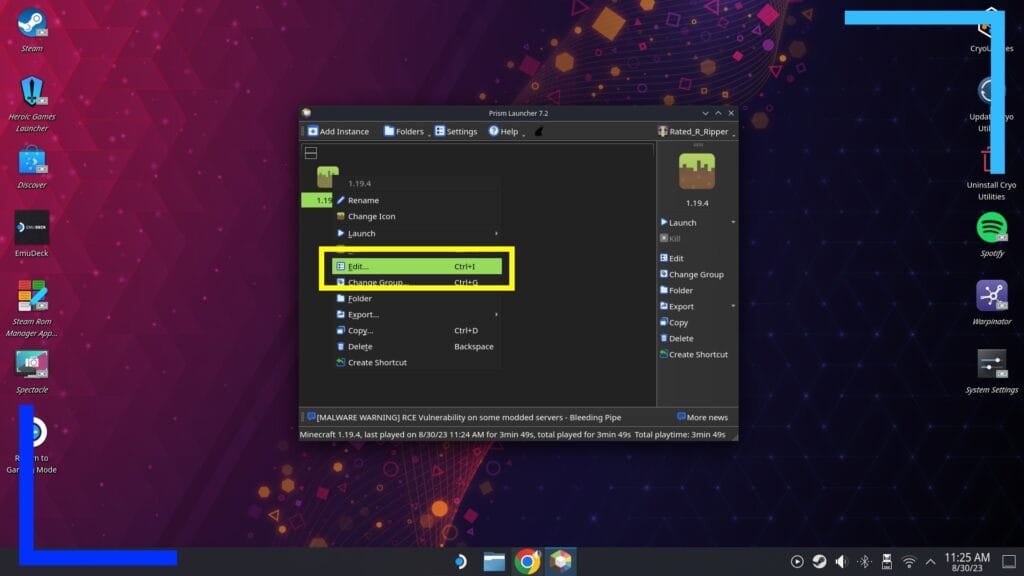
Select your Minecraft instance and click it with the left trigger to open the submenu. Ignore all the options and focus on Edit. Click that now.
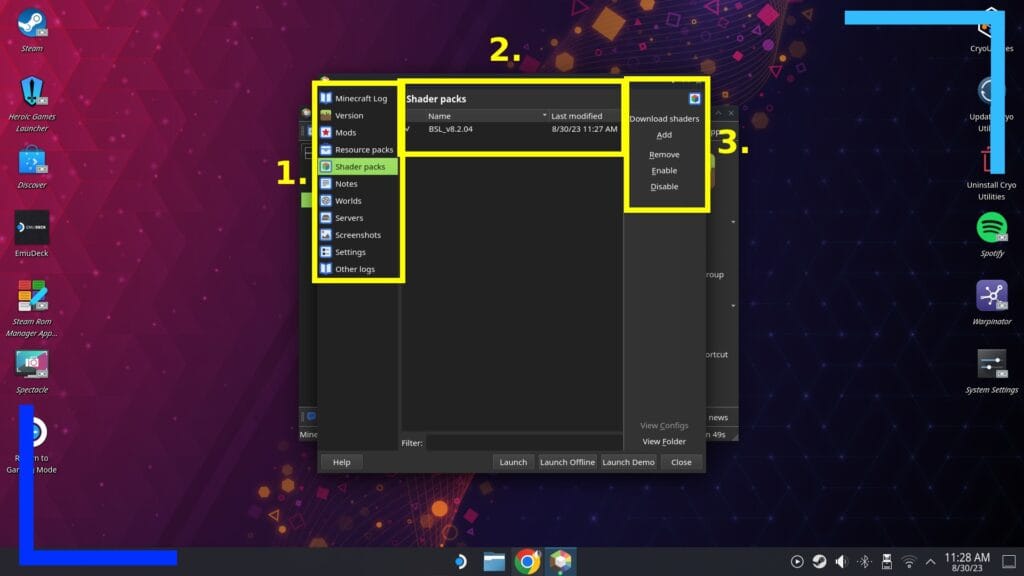
This is another screen packed with a lot of info so let’s break it down. The left box (1.) denotes all your settings options. Here are the main elements to focus on:
- Minecraft Log – tells you what’s happening and is especially useful if something keeps crashing.
- Version – Let’s you see what’s installed.
- Mods – Click here to install mods. You’ll need a mod loader first, though.
- Resource Packs – It’s here you can install resource packs.
- Shader Packs – Go here to install shaders.
The second window (2.) is less interesting but it still matters. When you click on a setting in the left window, the middle window will show you what’s installed.
One of the many great things about Prism Launcher is you can install mods and packs manually and you can also download everything directly. See the window on the right (3.)? It’s here where you can download and add mods manually and enable or disable them. You’ll be here a lot, so I recommend taking a few seconds to familiarize yourself with the layout.

What’s with the picture of this lush version of clearly modded Minecraft? That’s my Minecraft running on the Steam Deck with a host of packs I downloaded through Prism Launcher to give you an idea of what’s possible. It all runs at a smooth 60 frames per second as well. Pretty cool, right? My setup for this look is listed below:
- Version: 1.19.4 with Fabric Loader.
- Mods: Iris and Sodium.
- Shader Packs: BSL.
Is the Minecraft Launcher on Steam Deck?
You can technically add the Minecraft Launcher as a non-Steam game and it’ll work well at 60 frames per second. There’s a big downside, though. Whenever you close the game, you need to log back in every time. That means typing in your account email address and password every, single, time. And yes, it’s very annoying.
That’s why I did this guide. Prism Launcher saves your login details so you don’t need to log back in whenever you want to play. It’s easier, smarter, and lets you download mods directly without needing to mess around with Windows-like filesystems. It is, in short, the best way to play Minecraft on the Steam Deck.
All images were captured on Steam Deck hardware and designed by RetroResolve.