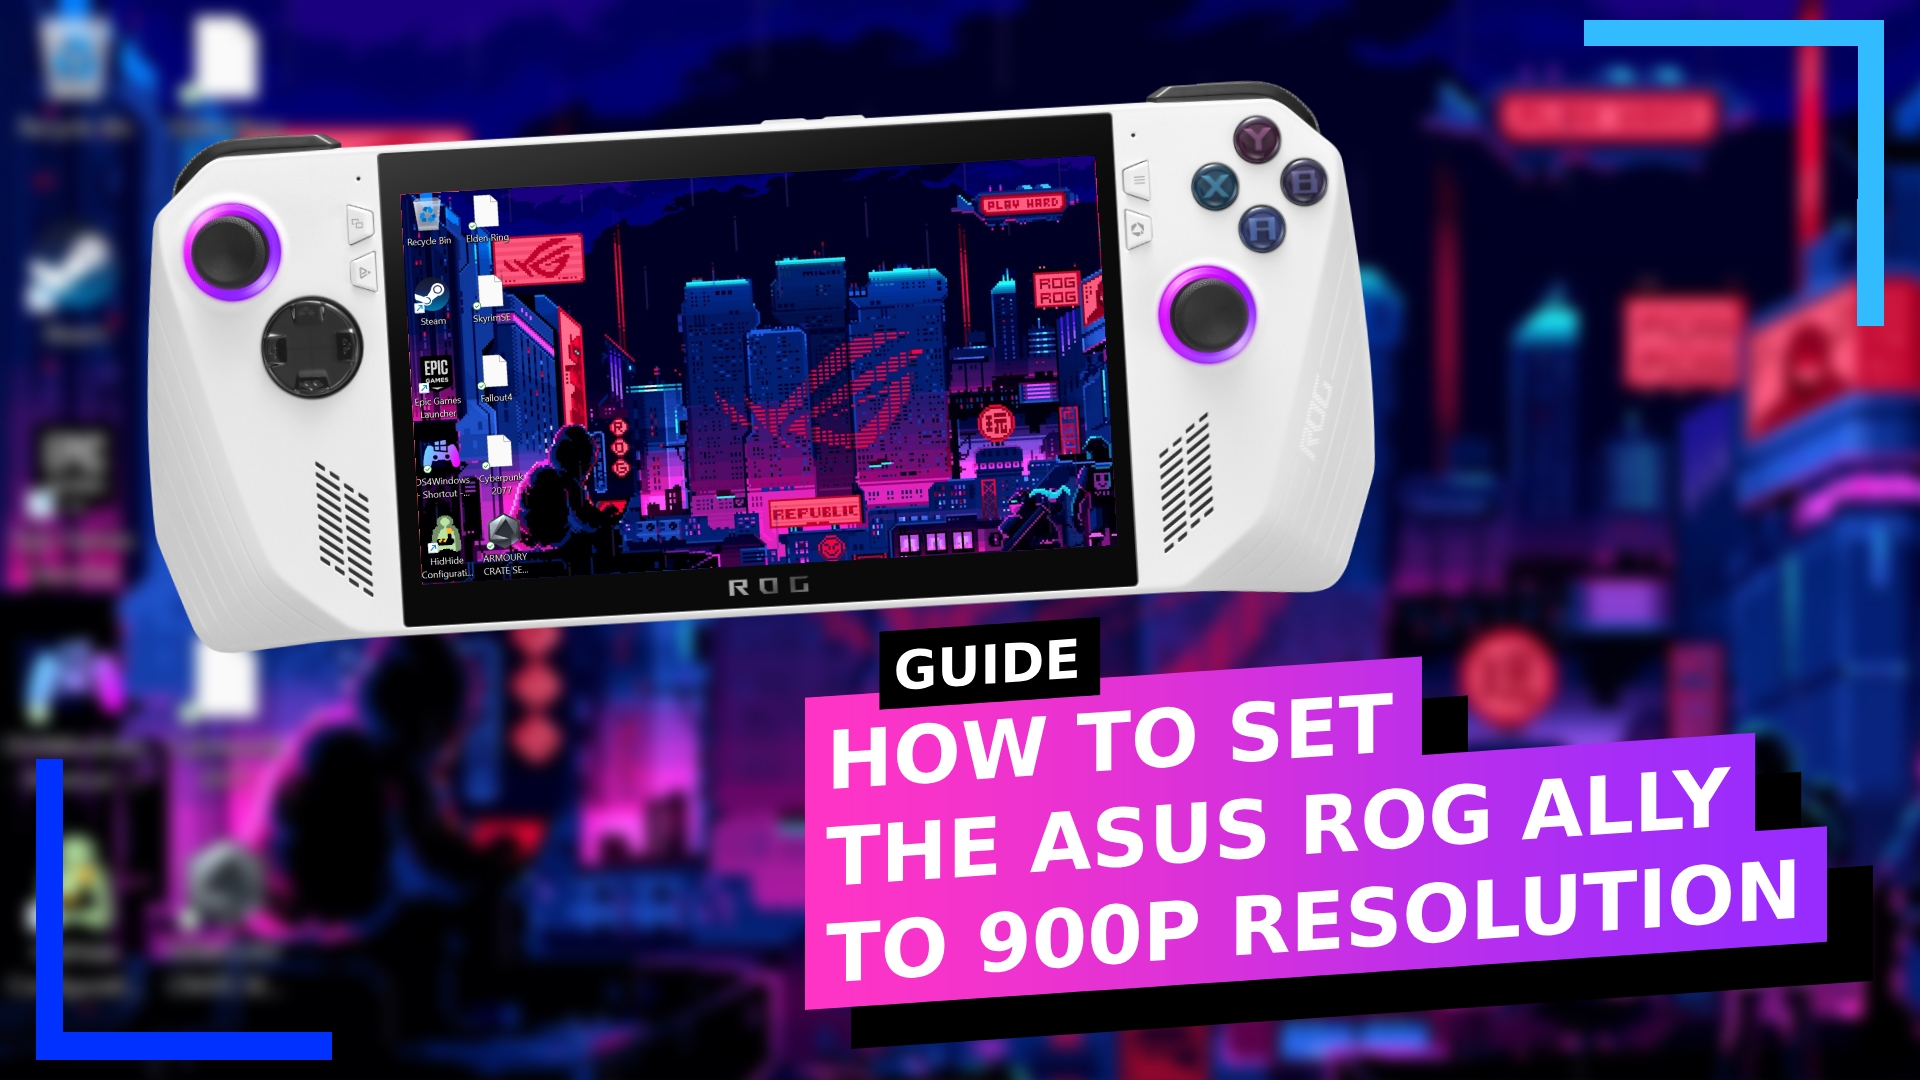
If you’re like and you are tired of the blurry visuals associated with 720p on the ASUS ROG Ally but don’t want to risk the performance hit that comes with running games in 1080p, I recently learned how to set the Ally to 900p to get slightly better visuals without the risk of killing the overall performance.
Step 1: Download the ROG Ally Custom Resolutions File.
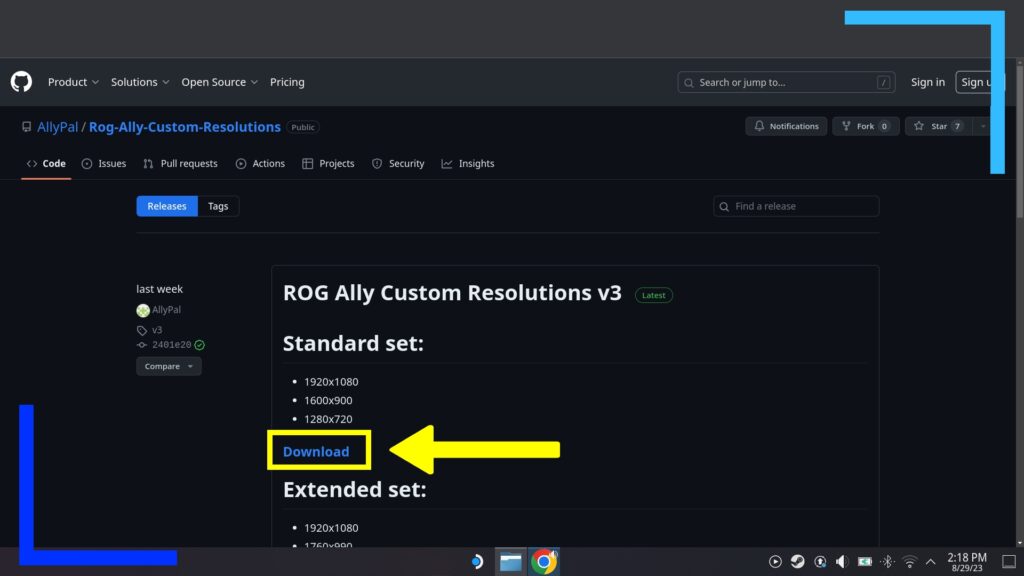
To kick things off we need to head to the AllyPal GitHub and download the resolutions file pictured above.
The file we’re grabbing is a registry edit, which will add more options to the ROG Ally’s display setting and in turn let us change the resolution to 900p. By default the ROG Ally can only switch between 720p and 1080p when in handheld mode, hence why we need a file to add more options.
Note: When the ROG Ally is docked and connected to a TV or monitor, you’ll have access to the other options. It’s only when used as a handheld that you can’t switch to 900p manually.
Step 2: Install Extra Resolution Options on the ASUS ROG Ally.
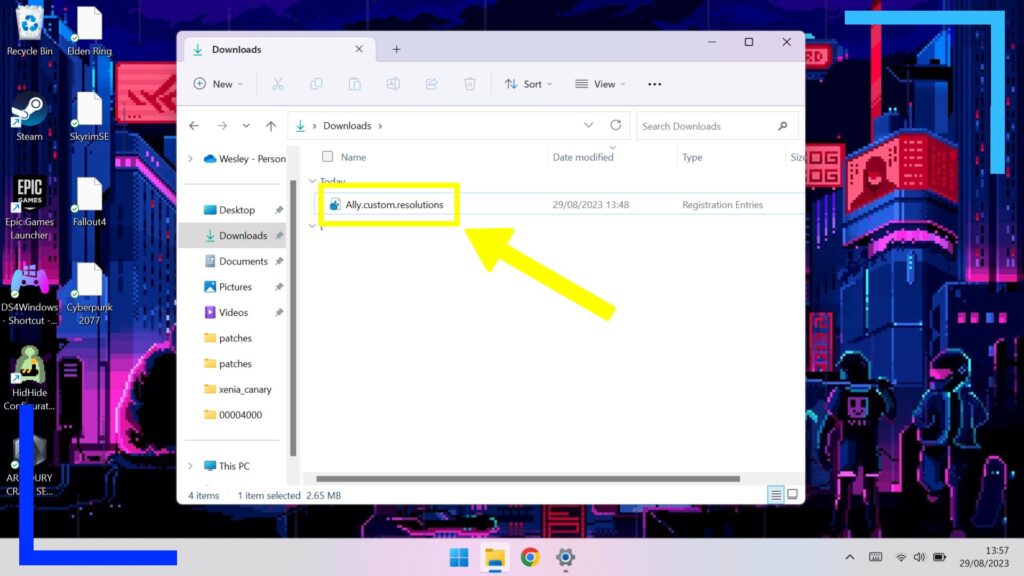
Once the file has finished downloading, click on Windows Explorer (the yellow folder icon) and head into your download folder. Inside you should see a file named “Ally.custom.resolutions.” Click on this file twice with the right bumper and you’ll be asked whether you want to install it.
Select “OK” and keep hitting that and a few (safe) pop-ups later it’ll be installed. It won’t work straight away, though, so don’t try. Instead, reboot the ROG Ally by pressing the Windows button on the bottom bar and select Restart. Once your ASUS ROG Ally has rebooted, Windows will detect the changes we made and we’re safe to move on.
Step 3: Access the ASUS ROG Ally’s Display Settings.
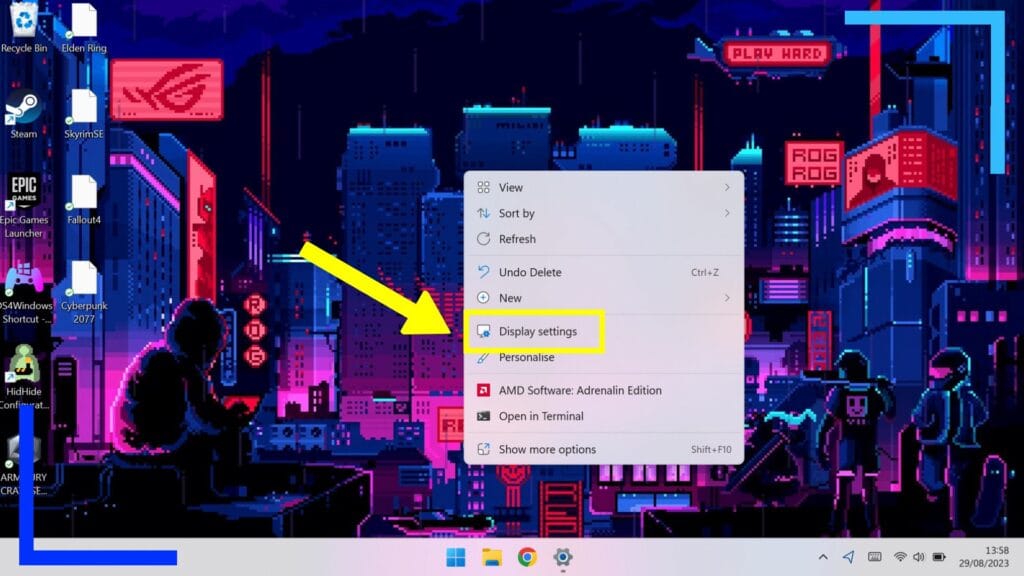
On the main desktop screen (the one with the wallpaper and your shortcuts), click on the wallpaper with the right trigger to bring up the submenu (pictured above) and click on Display settings.
Doing this will open a new window and let us change the screen scale size, turn HDR on or off, adjust the brightness, and more importantly, set the ROG Ally’s resolution.
Step 4: Change the Resolution to 900p.
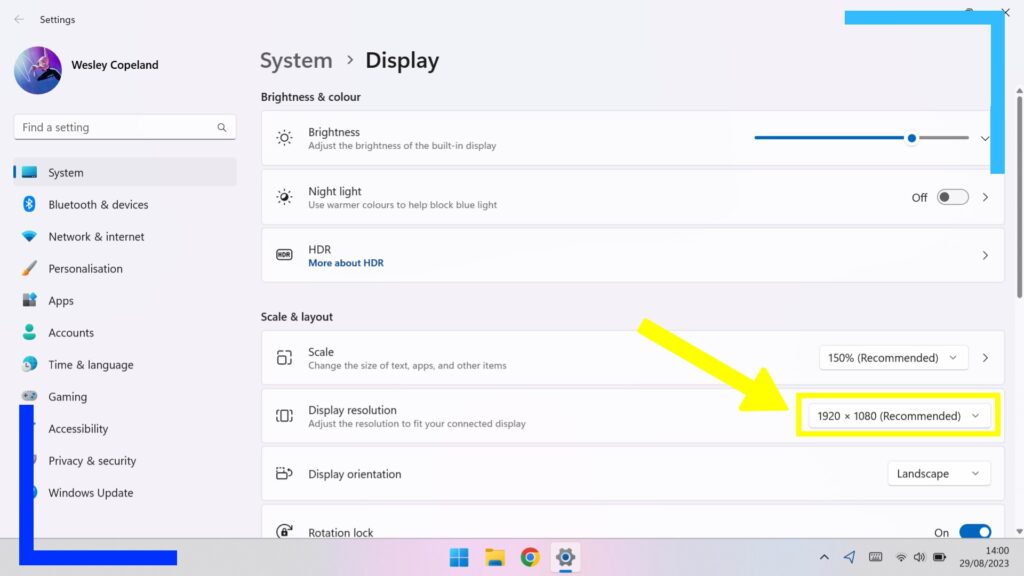
Under the Display resolution heading is a button to the right with the screen’s current resolution. Mine was set to 1920 x 1080, but yours may say 1280 x 720.
Click on that button and a drop-down menu will appear.
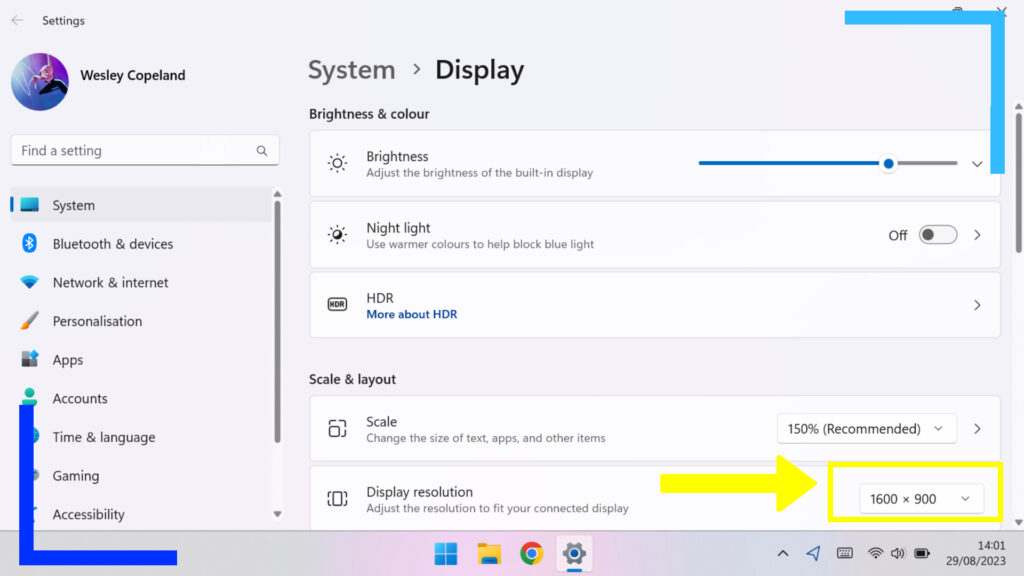
Now just change the setting to 1600 x 900 and save the changes and the screen will switch to the new resolution. How easy was that?
What Does Changing the Resolution to 900p Do?
The ASUS ROG Ally is capable of up to 1080p, but with higher resolutions come hits to performance. 1080p is the best, but you’re often going to have to drop settings down to the lowest they’ll go to accommodate the extra level of crispness.
Normally most of us will instead choose to drop the resolution down to 720p so we can get a higher framerate. The visuals become more blurred, but the trade-off is we get extra frames per second and potentially higher settings.
Think of 900p as the jack of all trades: It’s got good visuals and good performance. 720p will still offer better performance but the visuals won’t be as crisp as 900p. 1080p, meanwhile, will offer the best visuals but also the worst performance out of the three.
The only downside is the ASUS ROG Ally doesn’t let users select 900p in handheld mode, hence why this guide exists. But, as you’ve probably realized, activating 900p is really simple, and the slightly more crisp visuals mixed with better performance than 1080p make 900p a best-of-both-worlds kind of scenario.
Does Changing the Resolution to 900p Offer Better Performance?
I’ve heard differing reports about this. Some people say yes, but I can’t see how that could be. The higher the resolution, the higher the CPU usage. You can’t raise CPU usage and get better performance.
My testing also backs this up. There may be some random examples where this isn’t true (because PC gaming is like that), but on the whole, don’t expect better performance unless you’re coming down from 1080p.
What you will get by changing the ASUS ROG Ally to 900p is cleaner visuals and less blurring with only a slight hit to performance.
Testing Results.
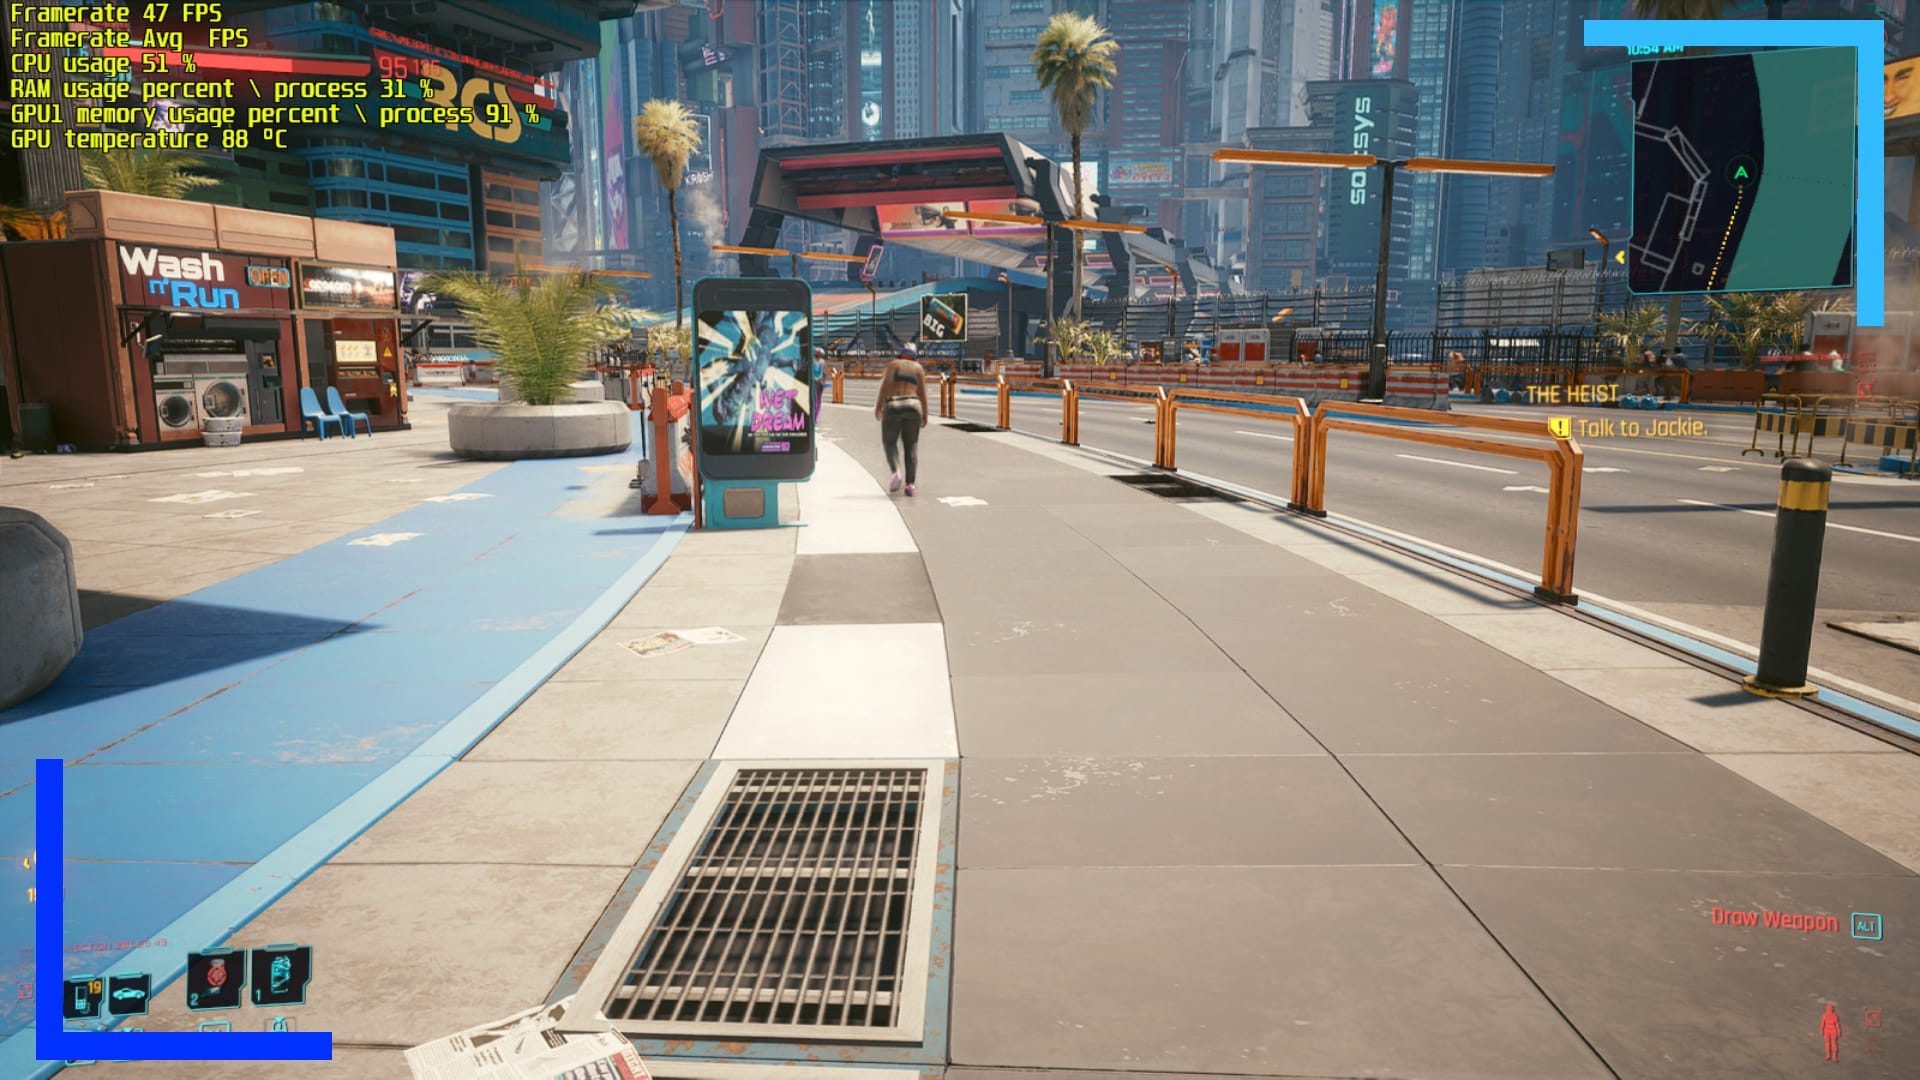
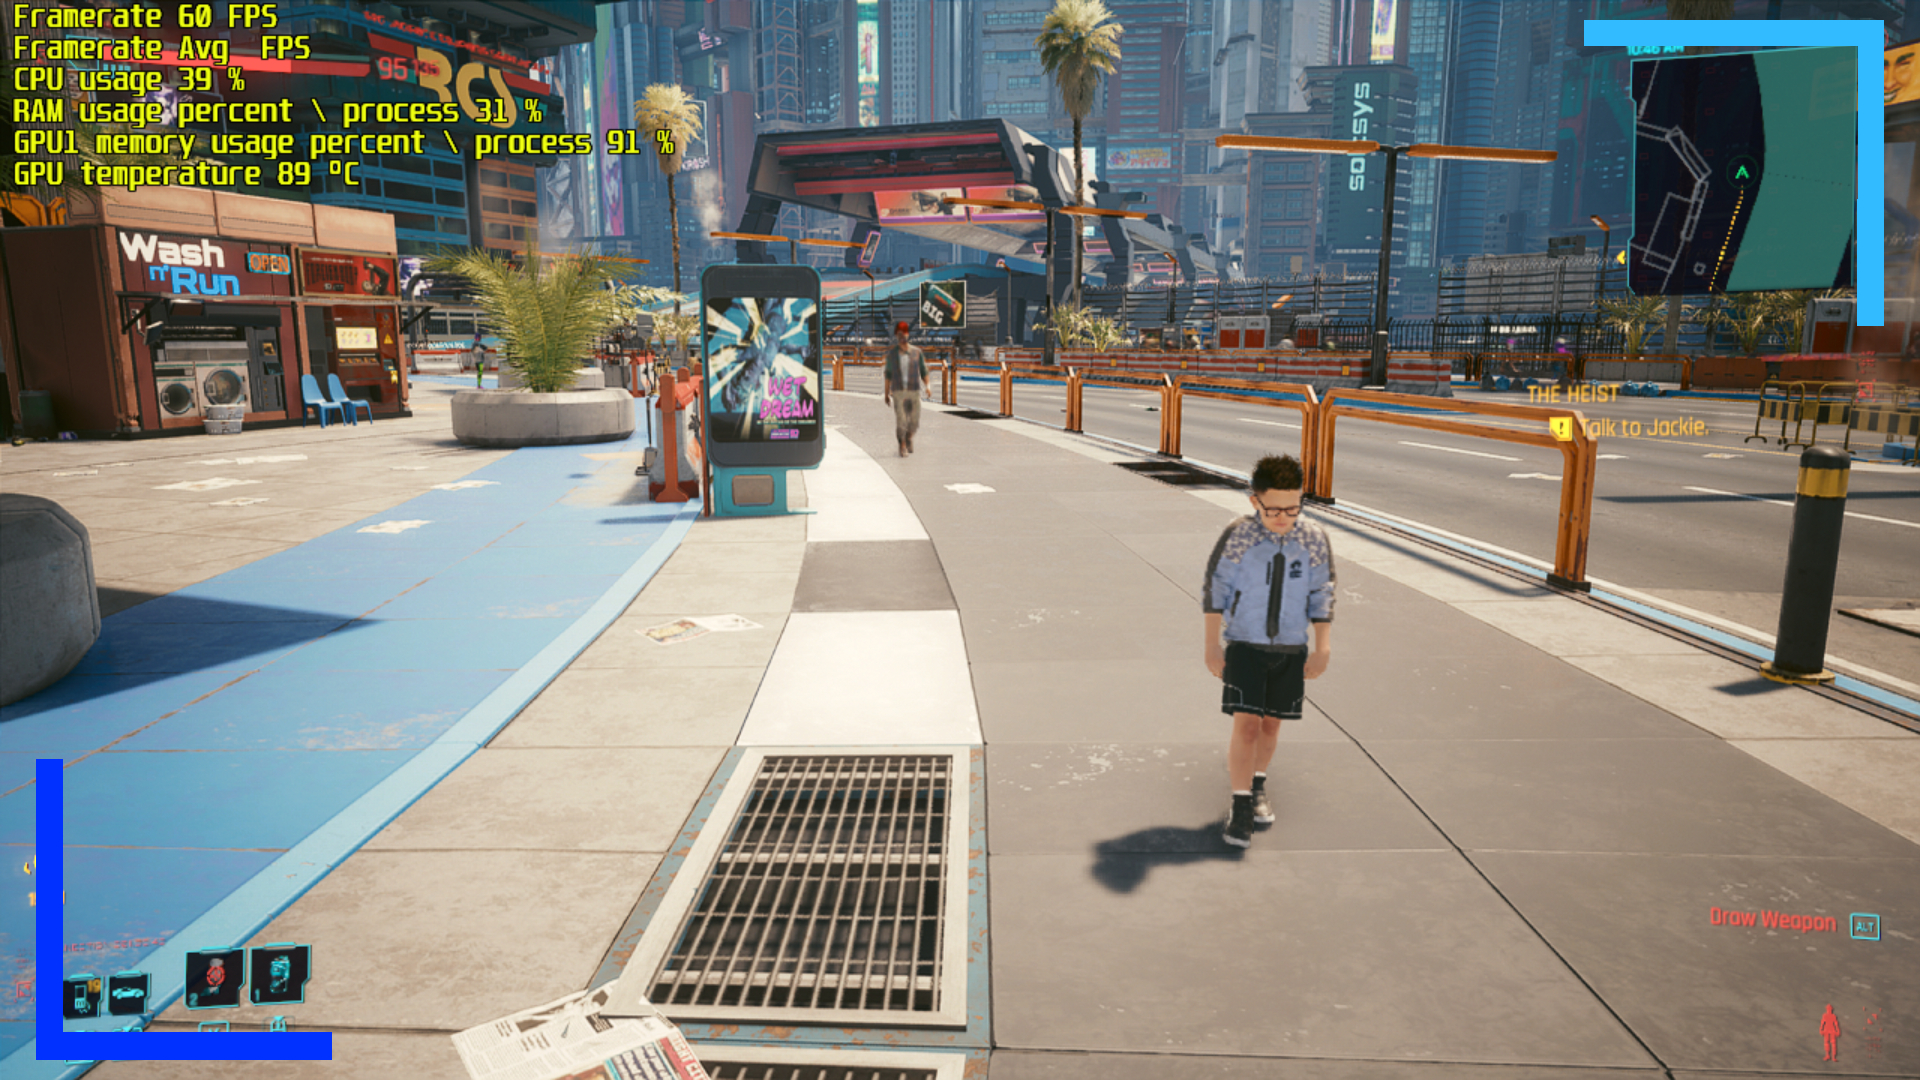
For my 900p testing I decided to go with Cyberpunk 2077 as it’s a high-end game that pushes the ROG Ally to its fullest.
I used the settings from my performance review, which generally runs the game at 45 to 55 frames, with some areas reaching 60 frames per second. In the area where I conducted this experiment, I was able to hit 60 frames per second often at 720p but the visuals remain blurred. When I switched to 900p, I did take a hit to the framerate as expected, but the visuals looked much closer to 1080p in terms of crispness.
With the image slider above, I’ve kept the file size large to give you a better idea of how much cleaner things look. If you can’t spot any differences, try focusing on the grate and the small store to the left. The signpost looks much cleaner in 900p.
Frames did drop – from around three to 15 – but Cyberpunk 2077 is a difficult game to run on the Ally, so I’d consider the results a solid win for people who want crisper visuals without massive performance drops.
All screenshots in this guide were captured on ASUS ROG Ally hardware by RetroResolve.

