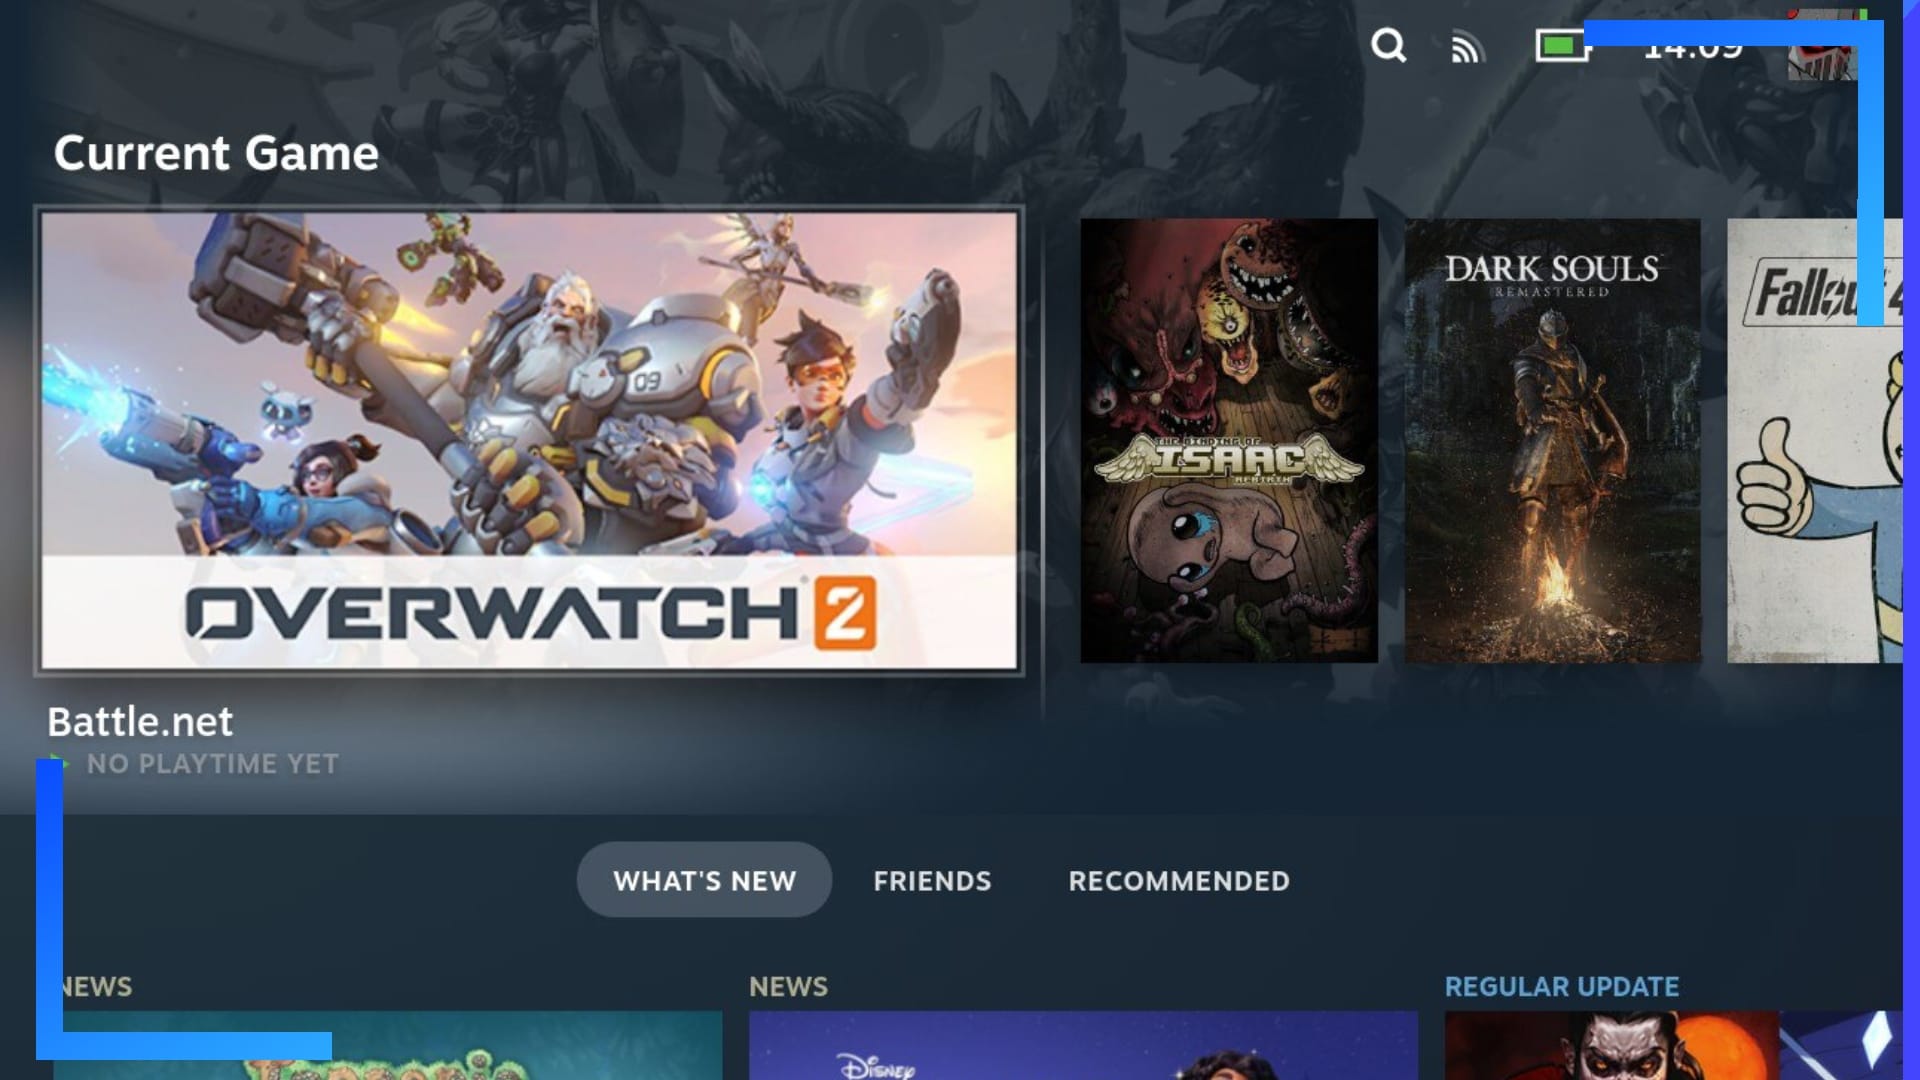
Update: Great news! Overwatch 2 is now available to download through Steam, so there’s no need for this guide anymore. Just load up Steam, type in “Overwatch” and hit install. That’s it!
Orignal guide follows…
Wondering how to play Overwatch 2 on Steam Deck? The solution is much simpler than you’d think.
Although some guides mention Proton-GE, it’s now possible to play Overwatch 2 on the Steam Deck without needing to install any extra, custom versions of Proton. Just grab Battle.net, install Overwatch 2, and you’re good to go.
As with all my guides, there’s nothing complex here. If it seems like a lot of work, it’s not. All my Steam Deck guides are designed with newcomers in mind, so I go in-depth with everything so all skill levels can understand what’s going on.
With that out the way, let’s begin.
Step 1: Boot into Desktop Mode
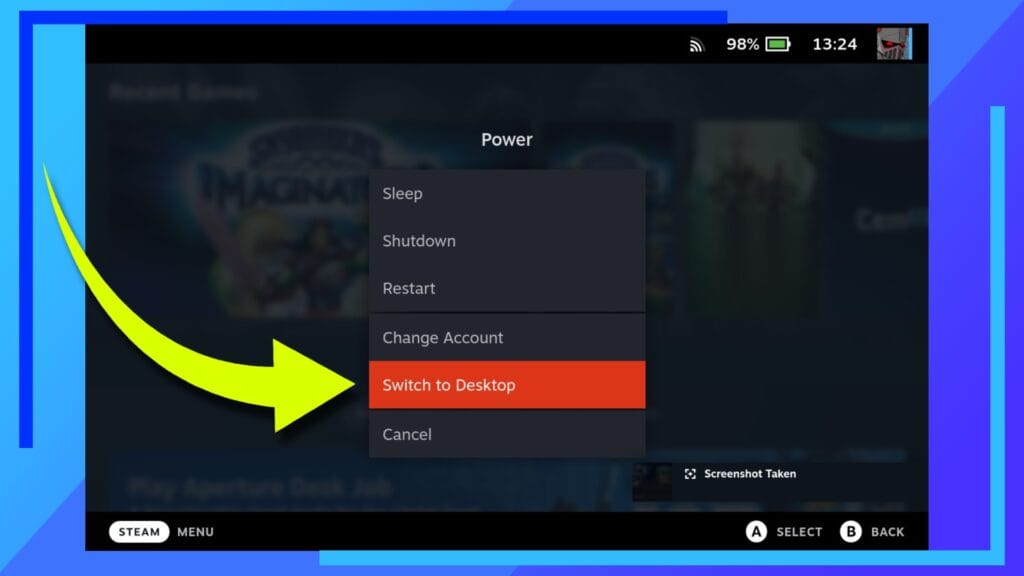
Let’s kick things off by booting into Desktop Mode. After the Steam Deck has loaded, hold down the power button until a menu appears. When it does, click on “Switch to Desktop”.
Step 2: Download Battle.net
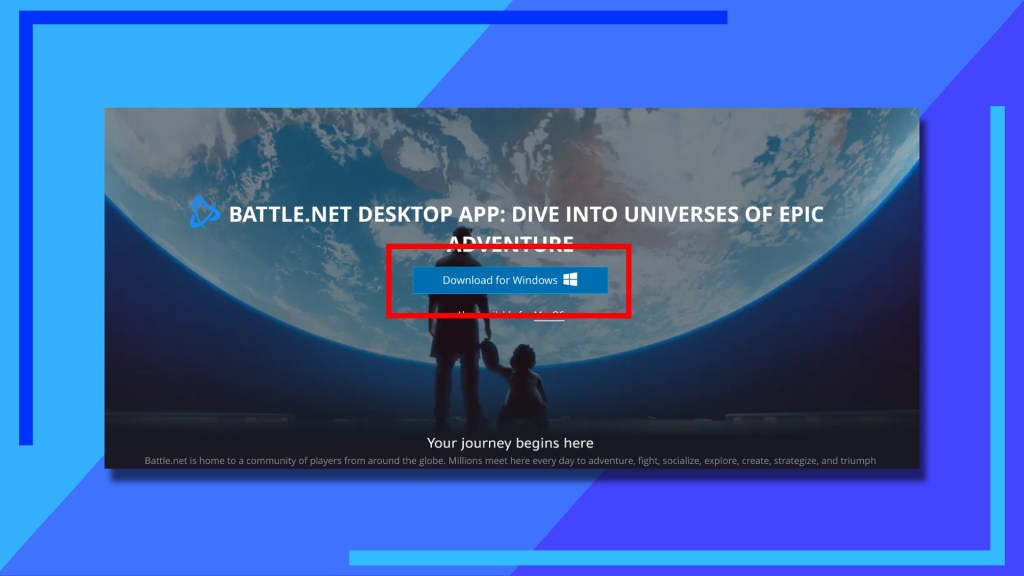
Another easy one for you: Open up your Internet browser and head over to the Battle.net website. You should see a massive button marked “download”. Click on that and the Battle.net installer will begin to download.
You’ll be downloading the Windows version here as there isn’t a native Linux version to use on the Steam Deck. That’s totally fine as we’ll be configuring it to run inside of the Steam Deck’s operating system in just a few short moments.
Step 3: Add Battlenet to Steam
For this next part we’ll be adding Battle.net to Steam so we can boot it as a non-Steam game.

Head into the downloads folder in the Dolphin file explorer (the blue folder icon). In downloads, you should see the Battle.net installer file. Use the left trigger to click on it once to bring up the sub-menu. From here, look to the middle of the menu and use the right trigger to click on “Add to Steam”.
When that’s finished, go and open up the main Steam app.
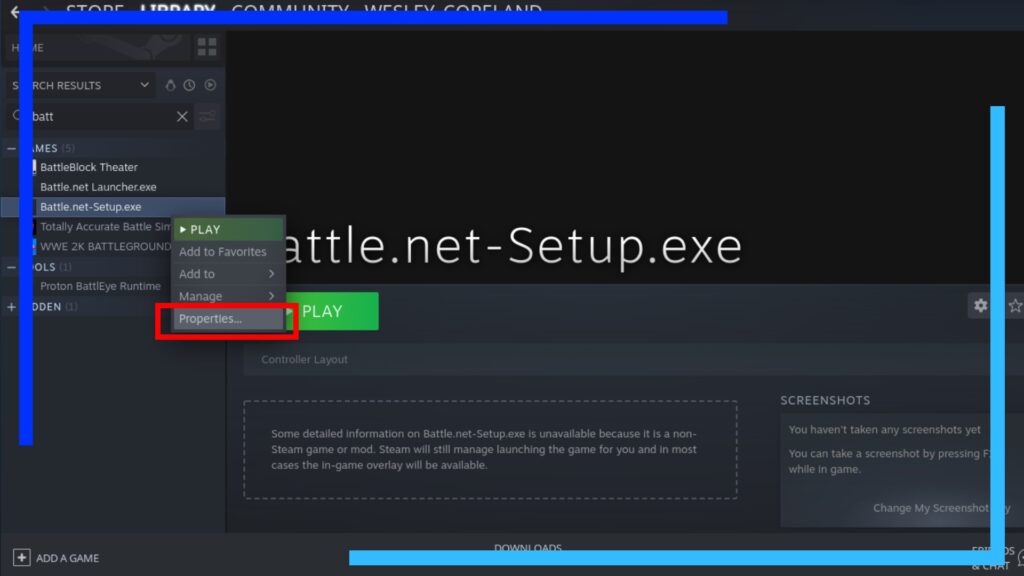
Head into Library and in the search box type “batt.” This will locate the Battle.net installer we just added to Steam and let us configure it some more.
Use the left trigger to click on the file “Battle.net-Setup.exe” to bring up another sub-menu from within Steam. This time, click on “Properties”.

With Properties open, click on “Compatibility” first, then on the right should now be a tick box. Click in the tick box to force the use of a specific Steam Play compatibility tool, then select the latest Proton version. When I did it, it was Proton 7.0-5. If you’re reading this later, those numbers are the end may be higher in values.
It’s also worth noting, Proton 8.0 currently doesn’t work with this method, so feel free to roll back to Proton 7.0-5 if the latest version doesn’t work.
Step 4: Install Battlenet
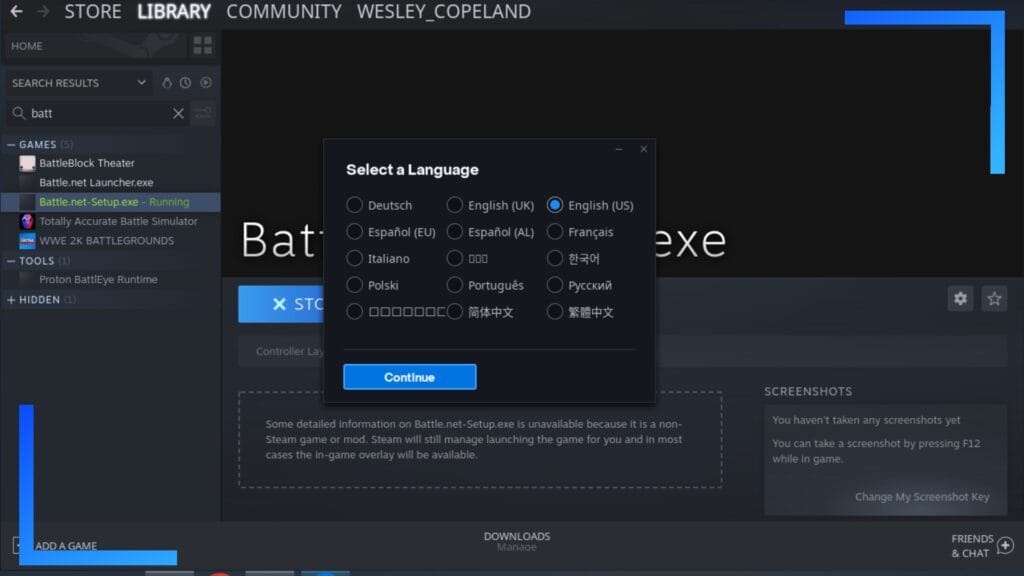
Close the window and hit the big “Play” button. After a few seconds, the Battle.net installer should kick in.
This is a painless process, and if you’ve ever installed a Windows program, you’ll feel right at home. For the most part it’s just a case of following the on-screen instructions. There are a couple of things to consider first, though.
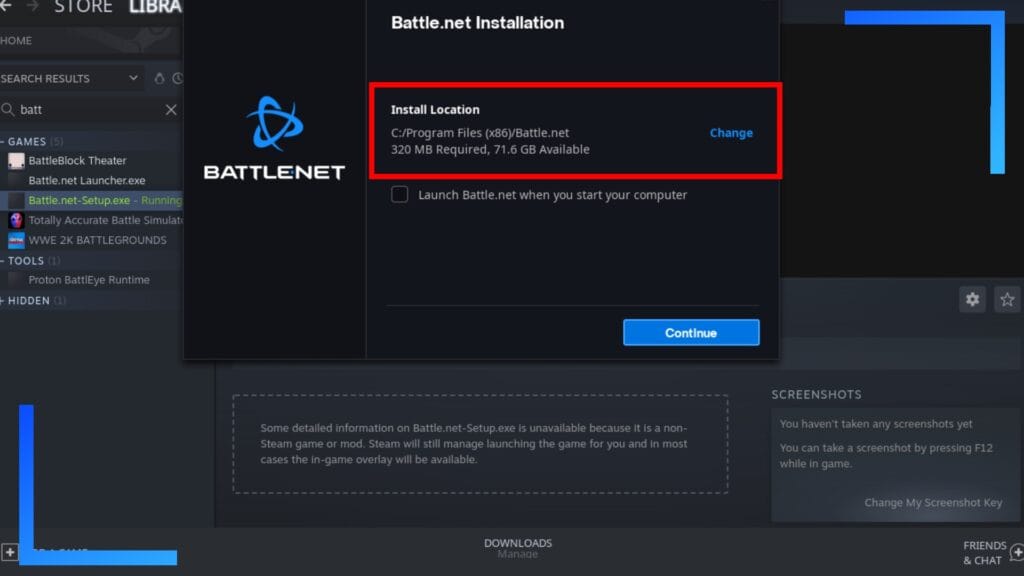
The most important part is deciding where to install Battle.net to. If you leave it as the default installation path, the Steam Deck will dump it somewhere that can be awkward to find later on. You can do this, of course, but I’d recommend changing the installation path to something a little easier to remember.
When I installed Overwatch 2 on Steam Deck, I added it to my SD card. If you want to do that, click on “Change” and select the following path:
/run/media/mmcblk0p1/CreateAFolderHere
If you want to run Battle.net and Overwatch 2 from the Steam Deck’s internal storage, you could always use the following path as an alternative:
/Home/Deck/MyGames/CreateAFolderHere
The choice of where to install Battle.net is up to you. So long as you remember where it is, everything’s golden.
After the installer has done its thing, open the folder location you installed Battle.net to and find the file named Battle.net Launcher.exe. Use the left trigger to add it as a non-Steam game, then load up the Steam app and search for this file.
This process is the same as what we did when adding the installer earlier, so feel free to read over that section again if you’ve forgotten how it works.
After you’ve located the file in Steam, open up Properties, tick the box on the right, and add a new Proton version.
Your best bet for the main Battle.net launcher is to go with GE-Proton7-51. I’ve already got a guide to installing Proton-GE and it only takes around five minutes. The reason being, this version of Proton works really well with Battle.net, whereas the normal Valve versions struggle with different elements.
Moving on to the next problem. After Battle.net has installed it’ll ask you to log in. I have no idea why, but when tried to log in, the Steam Deck on-screen keyboard started acting up and wouldn’t let me enter text.
To get around this issue, I loaded back into Gaming Mode and logged in through there. The only problem I found is when I did log in, I couldn’t see the “install” button for Overwatch 2. So to get around that issue, I booted back into Desktop Mode. So long as you click on “remember me,” the login credentials will carry over between Gaming Mode and Desktop Mode.
One final point (I know, I know!), in Gaming Mode the controls will default to gamepad. However, if you hold down the Steam button and touch the right trackpad, you can use that as your mouse to get around and log in without much fuss. It’s one of the many useful Steam Deck hotkeys worth knowing about.
Step 5: Install Overwatch 2 on Steam Deck
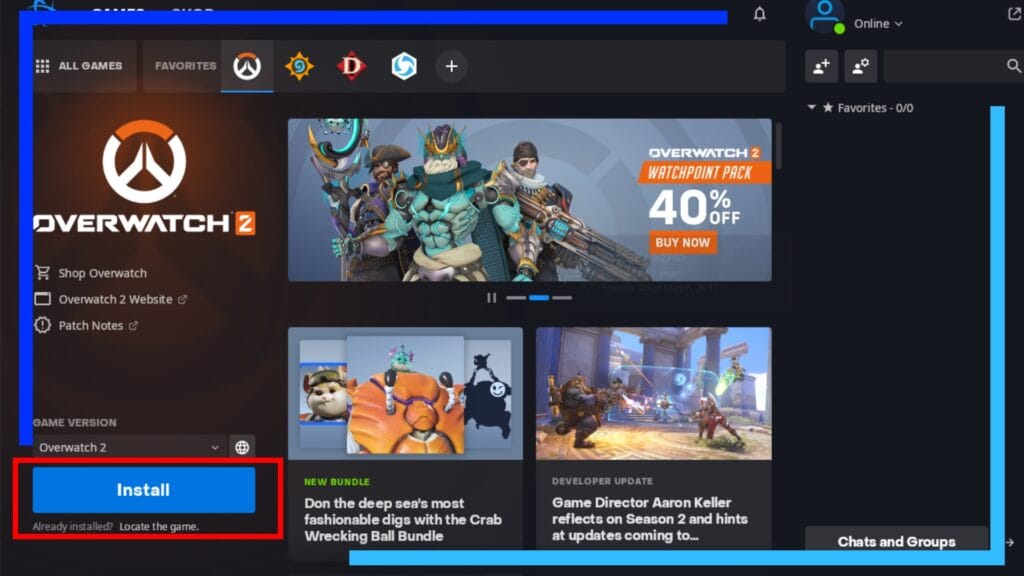
Now for the moment you’ve been waiting for: How to install Overwatch 2 on Steam Deck.
Open up the Battle.net app, click on Overwatch 2, now click on “Install.” That’s it! How easy was that?
Now you’ve got Battle.net up and running you’re free to not only install Overwatch 2, but also Diablo Immortal, Hearthstone, and many other Blizzard games. Not bad for 20 minutes of work, eh?
Further Reading
One thing to note, there is an Overwatch.exe file that bypasses the Battle.net launcher. This makes loading up faster, but it doesn’t save your credentials, meaning you need to enter them every, single, time. Not fun. Don’t do this, it isn’t worth it.
Another thing worth considering: Remember how we added the Battle.net installer to Steam? It’s worth doing that again, only this time do it with the “BattlenetLauncher.exe” file inside the main Battle.net folder. Although the installer should reroute to the launcher, an update to Proton has the potential to break this functionality, so adding the main launcher itself to Steam is recommended.
Oh, and if you’re after an easy way to change the artwork of Battle.net to Overwatch 2, be sure to check out how to add custom game artwork on Steam Deck with just the click of a button.

