Update: Diablo 4 is now available via the main Steam store. If you purchased it through the Battle.net installer, still use this guide. If you’re yet to pick up Diablo 4, though, I strongly recommend grabbing it through Steam to make the installation process much simpler.
Original guide follows…
Diablo 4 runs surprisingly well on the Steam Deck. Even though the game isn’t available through Steam, it’s easy to get up and running.
The process is the same as what I devised for running Overwatch 2 on the Steam Deck. Only instead of Overwatch 2, you switch that out for Diablo 4. It’s simple stuff, honestly.
If you’ve not got Battle.net installed before, read on to learn how to install Diablo 4 on Steam Deck with pictures to guide you through every step.
Step 1: Boot into Desktop Mode
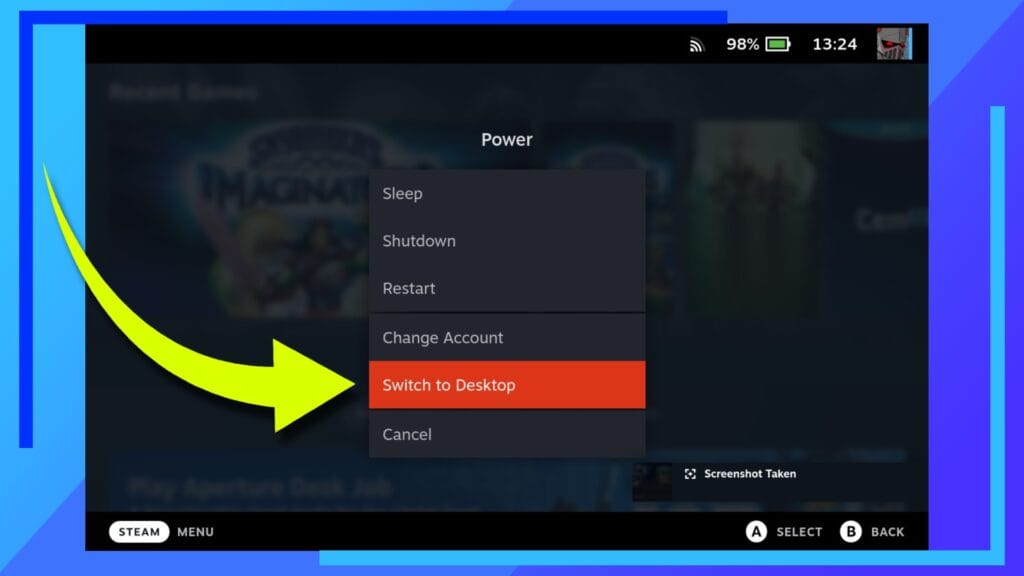
As with most of my guides, let’s start by booting into Desktop Mode. Load up the Steam Deck as normal, then once loaded, hold down the Power Button until the menu shown above appears. From this menu, click on Boot to Desktop.
After a few moments, the Steam Deck will boot into the Linux-based desktop environment.
Step 2: Download Battle.net
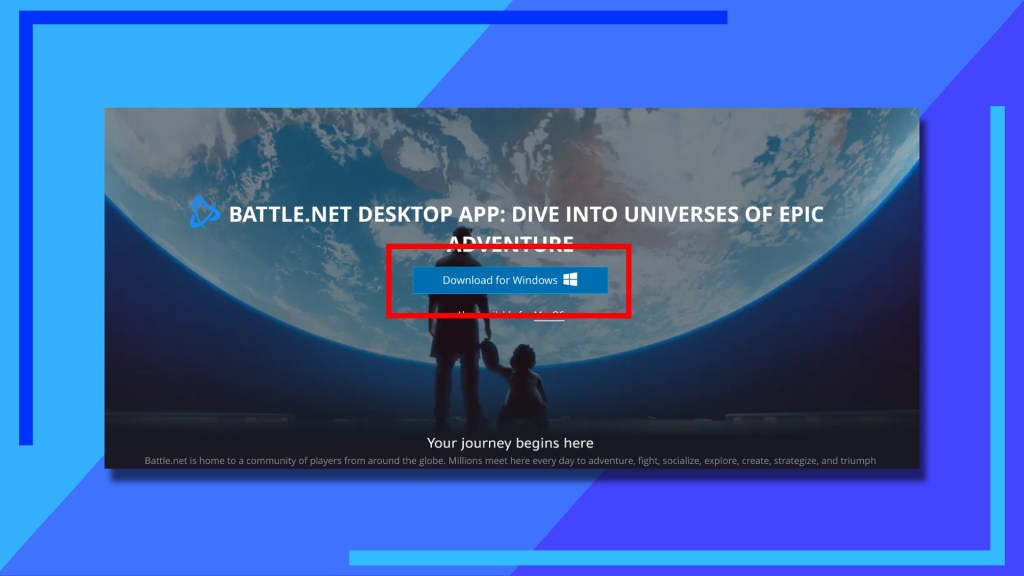
To run Diablo 4 on the Steam Deck we need Battle.net, so let’s go to the Battle.net website and download the installer file.
You’ll spot a massive download button once the page has loaded. Just click on that once and the installer will automatically download to the Steam Deck.
Step 3: Add Battlenet to Steam

Now we’ve got the installer file, we next need a way to run it. To do this, we’ll be adding to Steam as a non-Steam game.
Open up the Dolphin File Explorer (the blue folder icon) and go into the Downloads folder. That’s where you’ll find the Battle.net installer we just downloaded.
Use the left trigger to click on the installer and from the sub-menu that opens up, use the right trigger to click on Add to Steam.
A small Steam icon will appear for a few seconds. Once that’s gone, you’ve successfully added the installer to Steam.
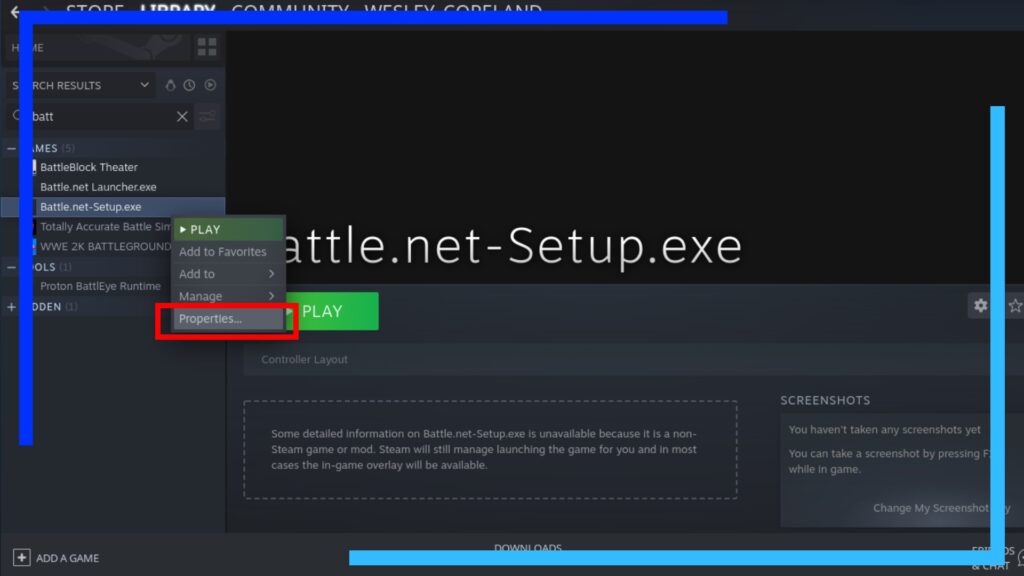
Load up the main Steam app and click on Library. See the search box to the upper left of the window? Click on that. If the keyboard doesn’t appear, press the X button to invoke it.
Now type in “Battle” into the search bar and click enter on the keyboard to begin the search. The Battle.net installer should now appear in the search results below.
Click the left trigger on the name to bring up the sub-menu. One of the options in the sub-menu is Properties. Click on that now.

For this next part we’re going to configure the installer so it can work on the Steam Deck.
Let’s start by clicking on Compatibility (1.) to bring up some more options. To the right of this is a tick-box (2.). Click on that to tick the box to force the use of a specific Steam Play compatibility tool, then click on the drop-down box below that to select the latest Proton version.
Make a note of how to do this as we’ll be doing this again later. Also, if the latest version of Proton doesn’t work, try using Proton 7.0-5 instead.
Step 4: Install Battlenet
Press the X in the top-right of the window to close it down and go back to your Library.
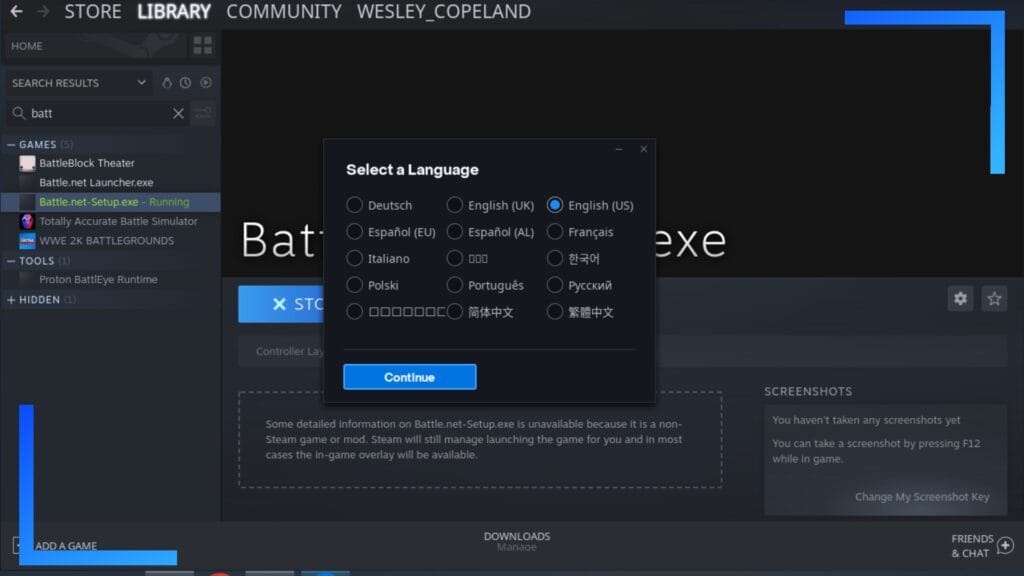
Find the Battle.net installer once again and hit that big Play button. Give it a few seconds to load up and the installer file will begin to do its thing.
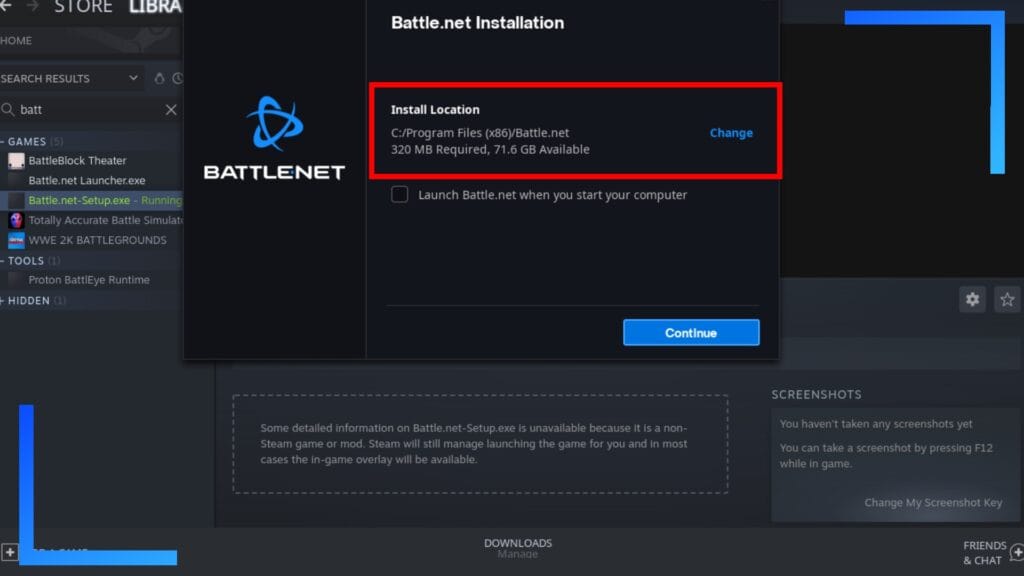
This is an easy process, but it’s worth deciding where you want Battle.net installed to. If you don’t change this now, the main Battle.net launcher will be placed in a generic directory, which may make finding it more difficult later on.
To avoid this, I recommend changing the installation path to one of the following options.
If you want to install Battlet.net and Diablo 4 to an SD card, go with this path:
/run/media/mmcblk0p1/CreateAFolderHere
Or if you want to run games from the internal SSD, go with this path instead:
/Home/Deck/MyGames/CreateAFolderHere
Once the installer has finished installing Battle.net, open the folder location you installed Battle.net to and add the main Battle.net Launcher.exe file as a non-Steam game. Go back into Steam and search for this file in the search box as we did earlier for the installer.
Once found, head into Properties, tick the box, then add a Proton version from the drop-down menu.
Now, despite what other websites are saying, the latest versions of Proton don’t work. I’ve tried them and they get stuck on the main character selection screen. That’s why I suggest installing Proton-GE and going with GE-Proton7-51.
With that version I was able to load up, log in, and select my characters I’d been playing with on other systems. It works, so don’t go with the default Proton versions if you want to save yourself a headache.
You’ve got the hard part done now, but there’s still some troubleshooting to go through. As Proton gets more advanced, these problems may get fixed. If you’re reading this when they haven’t though, here are some tips.
If the Steam Deck on-screen keyboard won’t let you enter text when trying to log in, head back to Gaming Mode and try booting the main Battle.net app through there. Doing this let me bring up the on-screen keyboard by pressing the Steam and X button and worked as it should.
Doing this may throw up a problem where the Diablo 4 install button can’t be pressed, but once you’ve logged in and ticked the option to remember your login details, you can then reboot back into Desktop Mode where the install button will work once more.
Also, when you load Diablo 4 in gaming mode, the controls will default to gamepad. That means you can’t move the cursor to click on things, including Play. To get around this, just hold down the Steam button and move the right thumbstick to bring up the cursor and move it around.
Step 5: Install Diablo 4 on Steam Deck
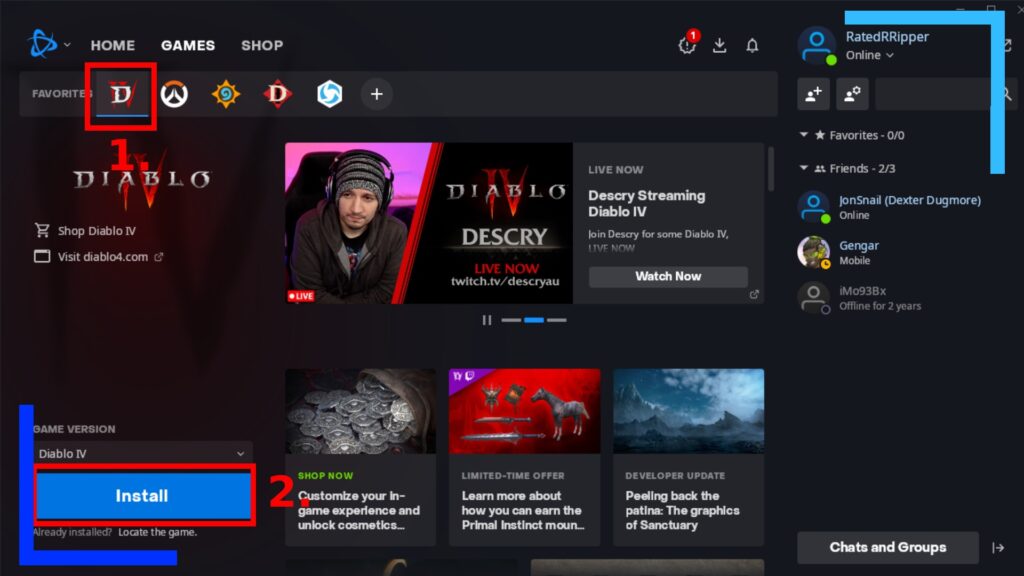
After all that, we’re safe to go ahead and install Diablo 4 on the Steam Deck.
Load up Battle.net, click on Diablo 4, then hit the big Install button. Follow the on-screen instructions and Diablo 4 will download and install to the Steam Deck. Here’s a photo of what Diablo 4 looks like on my Steam Deck:
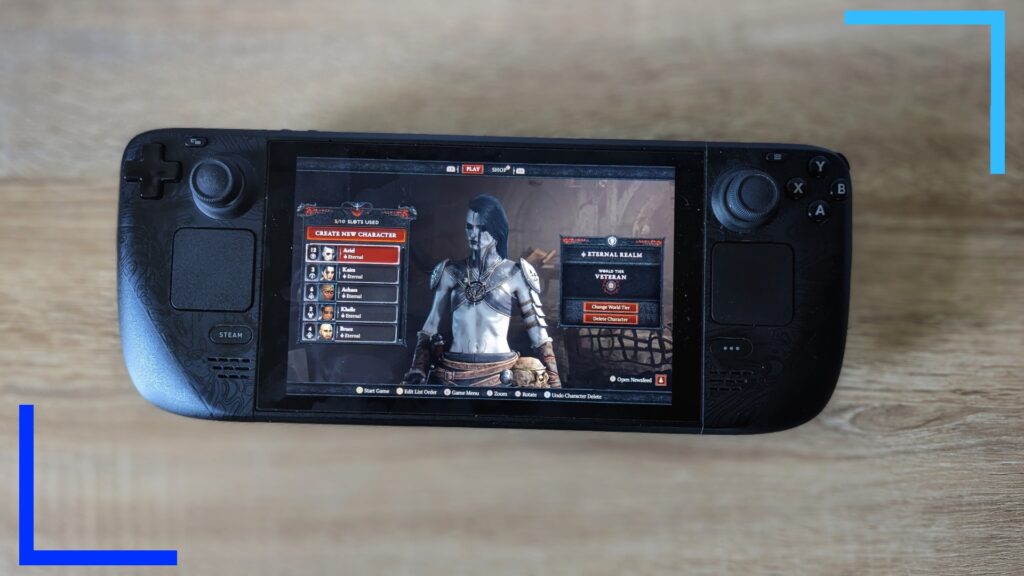
I didn’t bother with the HD assets you can download as the Steam Deck only outputs at 800p anyway. Plus they double your file size from 40GB to 80GB, so it’s not worth the extra space. Feel free to get it if you want, though.
With that, you’re now free to go off and play Diablo 4. That wasn’t so hard, was it?

