If you’ve installed Skyrim mods on the Steam Deck, I’ve got some good news. Thankfully, Skyrim mods on the ASUS ROG Ally are much, much simpler to get up and running thanks to the Ally being a Windows 11-based device.
The Steam Deck required a fair amount of hoops, and thanks to the temperamental nature of the Deck, it’s there were more problems that needed fixing.
On the ASUS ROG Ally, the process is vastly streamlined. Read on to learn how to install the mods and what other files you’ll also be needing.
Step 1: Download Vortex and SKSE

Before we do anything, we need to download some files. The first thing we need is Vortex Mod Manager.
This program will allow us to install Skyrim mods on the ASUS ROG Ally and makes the whole process a lot easier.
To get Vortex, head to the Nexus website and click on the Download button. Follow the on-screen instructions and select Slow Download and the file will be downloaded. I’d also recommend signing up for a free Nexus account while you’re here.
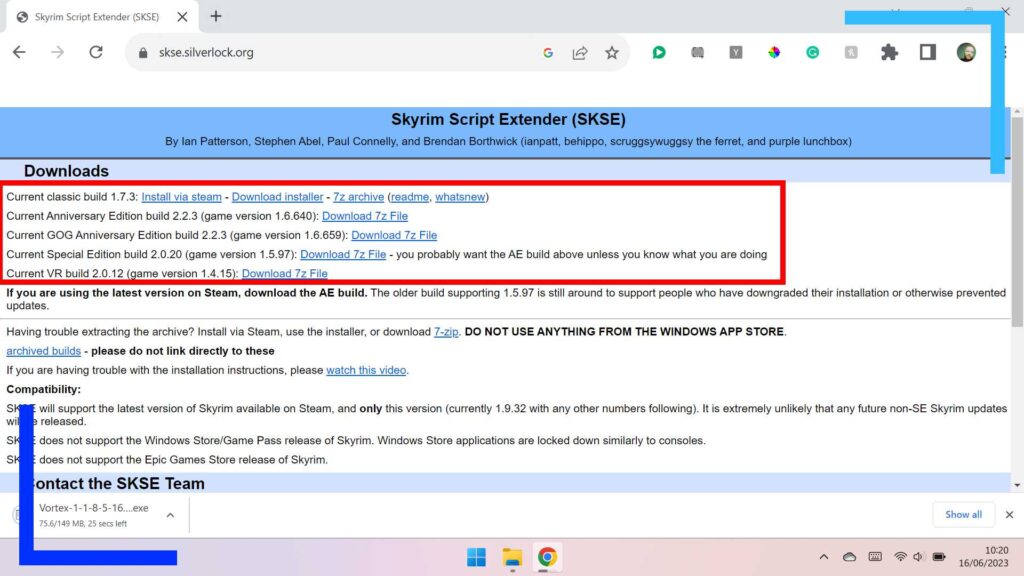
The next file we need is called SKSE. This is a Skyrim script extender that allows us to run more advanced mods. A lot of mods need this to run, so I’ve included it in the guide as you will end up needing it at some point.
Head to the SKSE website (shown above) and download the version of SKSE that corresponds with your version of Skyrim.
Note: If you’re running Skyrim: Special Edition, that counts as Anniversary Edition now, so grab that.
Step 2: Install SKSE
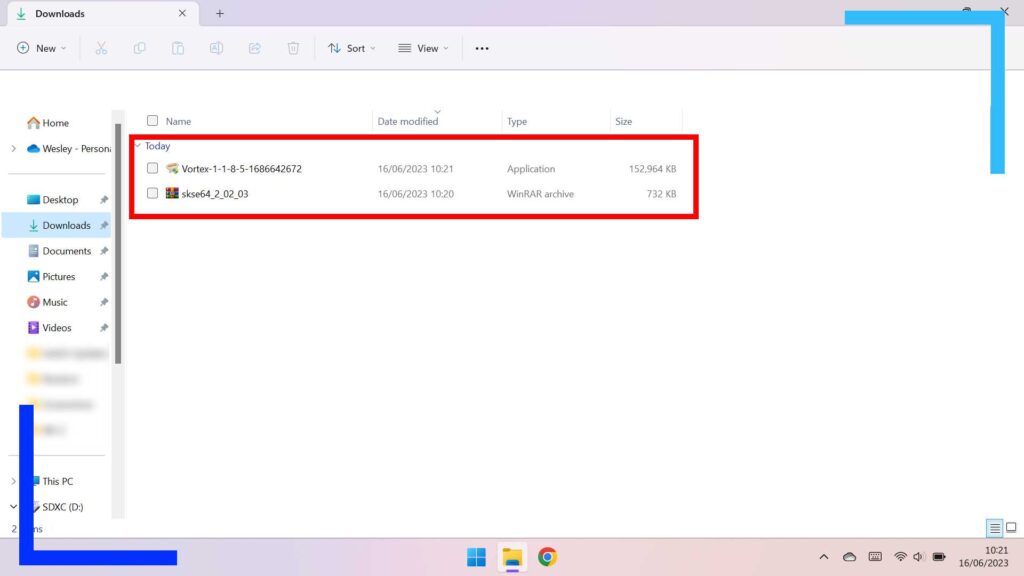
Head into the file explorer (the yellow folder icon) and click on Downloads. Inside this folder should be the two files we just downloaded.
First, let’s install SKSE. If you haven’t booted Skyrim ever, do that now before moving on. If you want to know the best settings for Skyrim on the ROG Ally, check out the previous link.
Use the right trigger on the Ally to click on the SKSE RAR file. If you can’t access it, you need to go and download WinRAR.
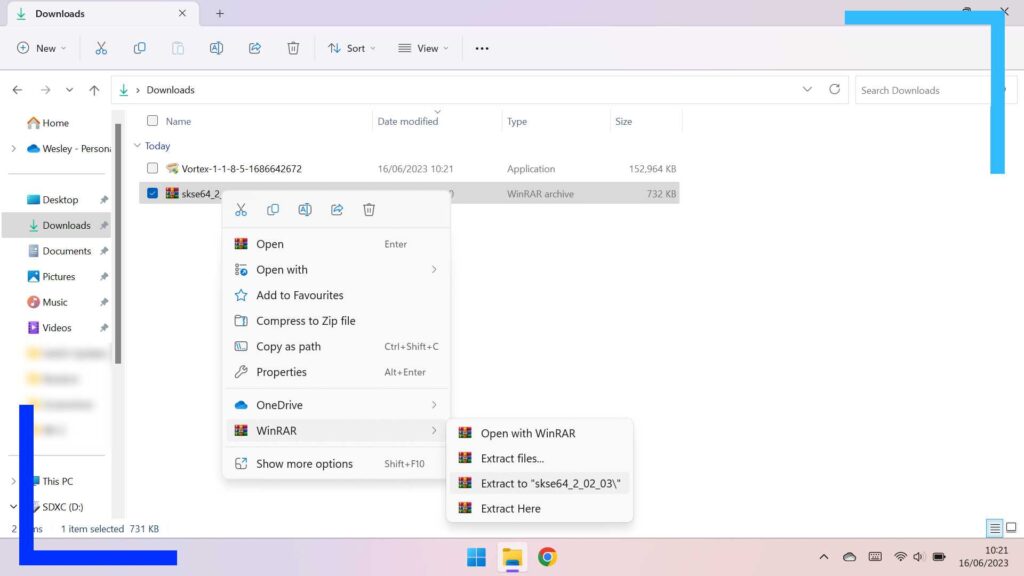
Once clicked, a submenu should pop up. From this menu, use the right bumper to click on WinRAR, then select “Extract to ‘skse64′”. This will unzip the file and dump it into its own folder.
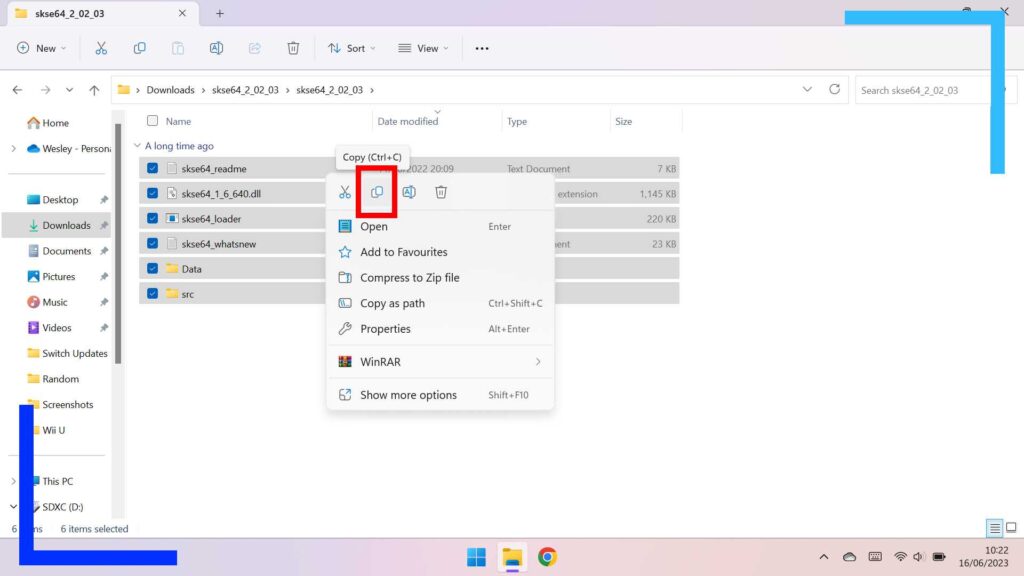
Go inside the new SKSE folder until you see all the files seen in the screenshot above. Hold down the right bumper on an empty area, then drag the right stick across all the filese to highlight them.
Next, use the right tirgger to click on them to bring up the submenu once more. See that little button highlighted in the screnshot above? That’s the Copy button. Click that now.

For this next part we want to Paste SKSE into the main Skyrim folder, the location of which will depend on where you installed it to.
I have Skyrim installed on an SD card to save space, so for me the path is:
D: Steam Library > steamapps > common > Skyrim
Note: The “D:” part may be different depending on what letter you assigned to your SD card.
If you installed Skyrim on your main internal storage device, then the path should be:
C: > Program Files > Steam > steamapps > common > Skyrim
Once you’re inside the main Skyrim folder, click with the right trigger on an empty space to bring up the submenu and select the Paste icon to transfer SKSE into the folder.
You should see a file named “skse64_loader”. This is now your main Skyrim launch file if you want to use mods. Feel free to use the submenu on this file to make a shortcut on your desktop now if you want.
One quick point with SKSE, when it first loads there’s a chance it’ll be stuck in keyboard and mouse mode. To fix this, set the Ally to desktop mode with the left menu button on the Ally itself, then load up your playthrough and head into the Settings menu to toggle the controller on.
Once you back out of the menu, Skyrim will save and you’ll be able to use gamepad mode fully.
Step 3: Install Vortex on the ASUS ROG Ally
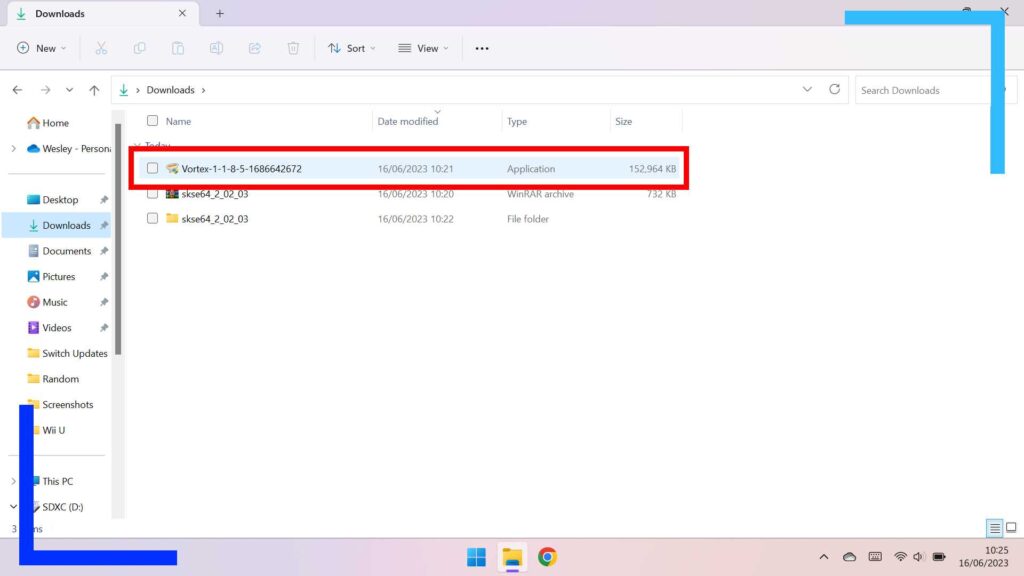
Thankfully, installing Vortex on the ASUS ROG Ally is much simpler than SKSE. Head back to the Downloads folder from earlier and click on the Vortex file with the right bumper to launch it.
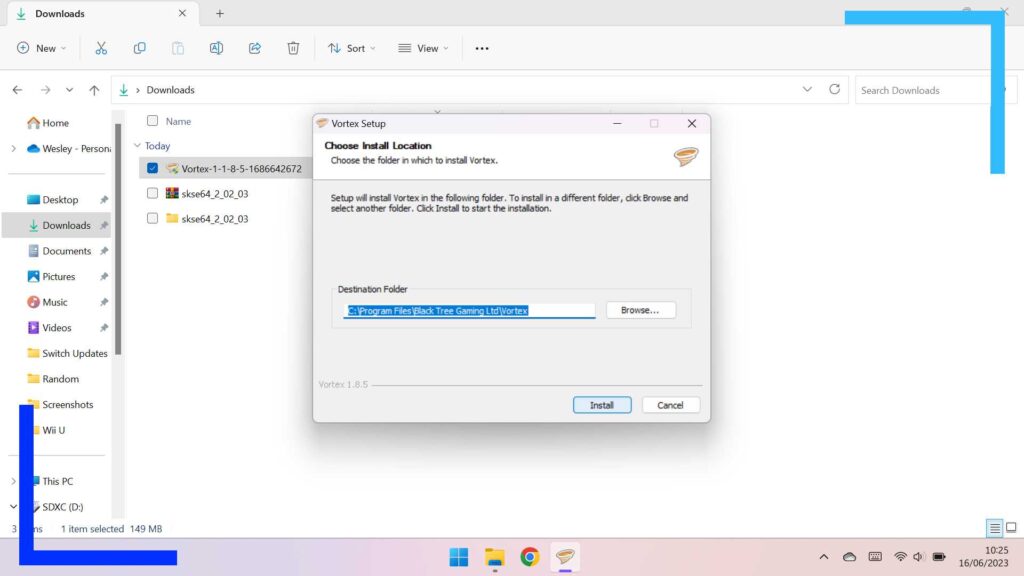
The installation process is painless. The only thing worth considering is if you want to install Vortex to the internal storage or to an SD card.
If you want it on a memory card, when asked for the installation path hit Browse and navigate to your SD card.
That’s it! Follow the on-screen instructions and Vortex Mod Manager will be installed.
Step 4: Vortex First Boot
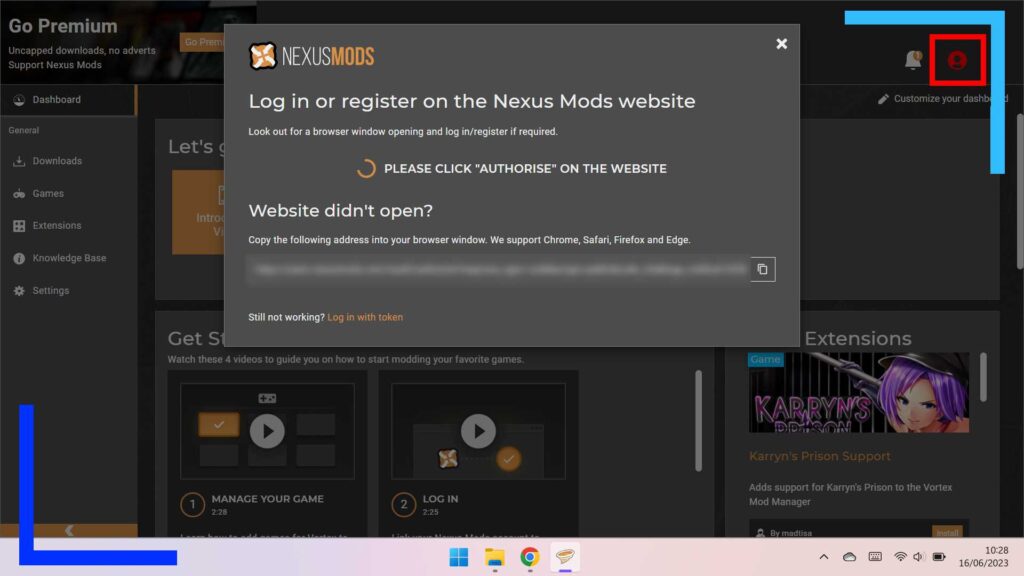
Vortex will automatically run once you finish the installation. Before we get into how to use the app, click on the red profile icon (highlighted in the screenshot above) and log in with your credentials.
This will allow you to download mods directly from the Nexus mods website and saves you needing to download the mod separately and then manually load it in.
While you’re here, it’s also worth going into Games and searching for then adding Skyrim so Vortex knows which games it’s supposed to install mods for.
Step 5: How to Install Skyrim Mods on the ASUS ROG Ally

For this example I’ll be using Achievements Mod Enabler, which lets you use mods without disabling achievements (the mod in the main image is Super Skyrim Bros. by the way). It’s super useful and I strongly recommend it if you’ve still got achievements to unlock and want to use mods.
Once you’ve found the mod on the Nexus website, go to Files, then find the latest version for Windows. You’ll have two options – Mod Manager Download and Manual Download. Manual Download will download the mod to your Downloads folder, while the Mod Manager Download will download a link that opens up Vortex and downloads the mod through there.
Click on the Mod Manager Download now.
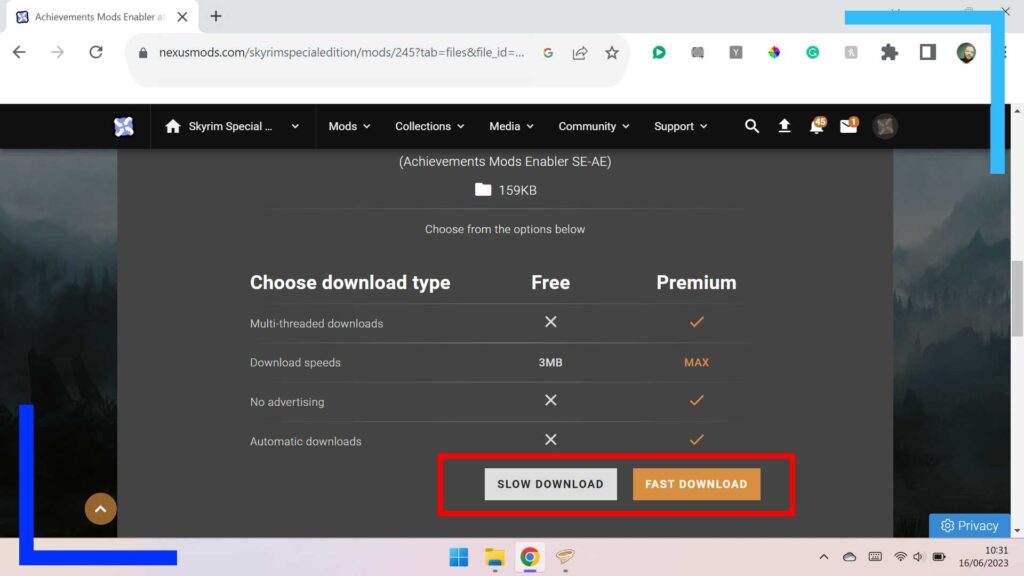
The next page will ask if you want to use the premium feature of a fast download or the free, slower version. Click on the slow download button if you’re not a subscriber and a pop-up will appear asking if it’s okay for Vortex to manage these links. Click okay, and then switch back to Vortex and the file will appear in your downloads.
Once it’s downloaded, it’ll be automatically applied to Skyrim providing you’ve added Skyrim as a managed game inside of Vortex.
This process is the same for the vast majority of mods, so feel free to vamoose and grab as many mods as you want.
All screenshots captured on ASUS ROG Ally hardware during testing.

