Ever wanted to play a game that isn’t on Steam? How about something you bought on DVD that you want to bring over to the Steam Deck? If that sounds like you, good news, adding non-Steam games on the Steam Deck is a nice and simple process. Seriously, after you’ve done it once you’ll never need to look it up ever again.
Step 1: Boot into Desktop Mode

Kick things off by booting the Steam Deck into desktop mode.
To do this, load up the Steam Deck as usual and once loaded, hold down the power button until a new window appears in the center of the screen.
From this menu, click or tap on “switch to desktop” and the Steam Deck will reload into the Linux desktop environment.
Step 2: Locate the Main Launch File

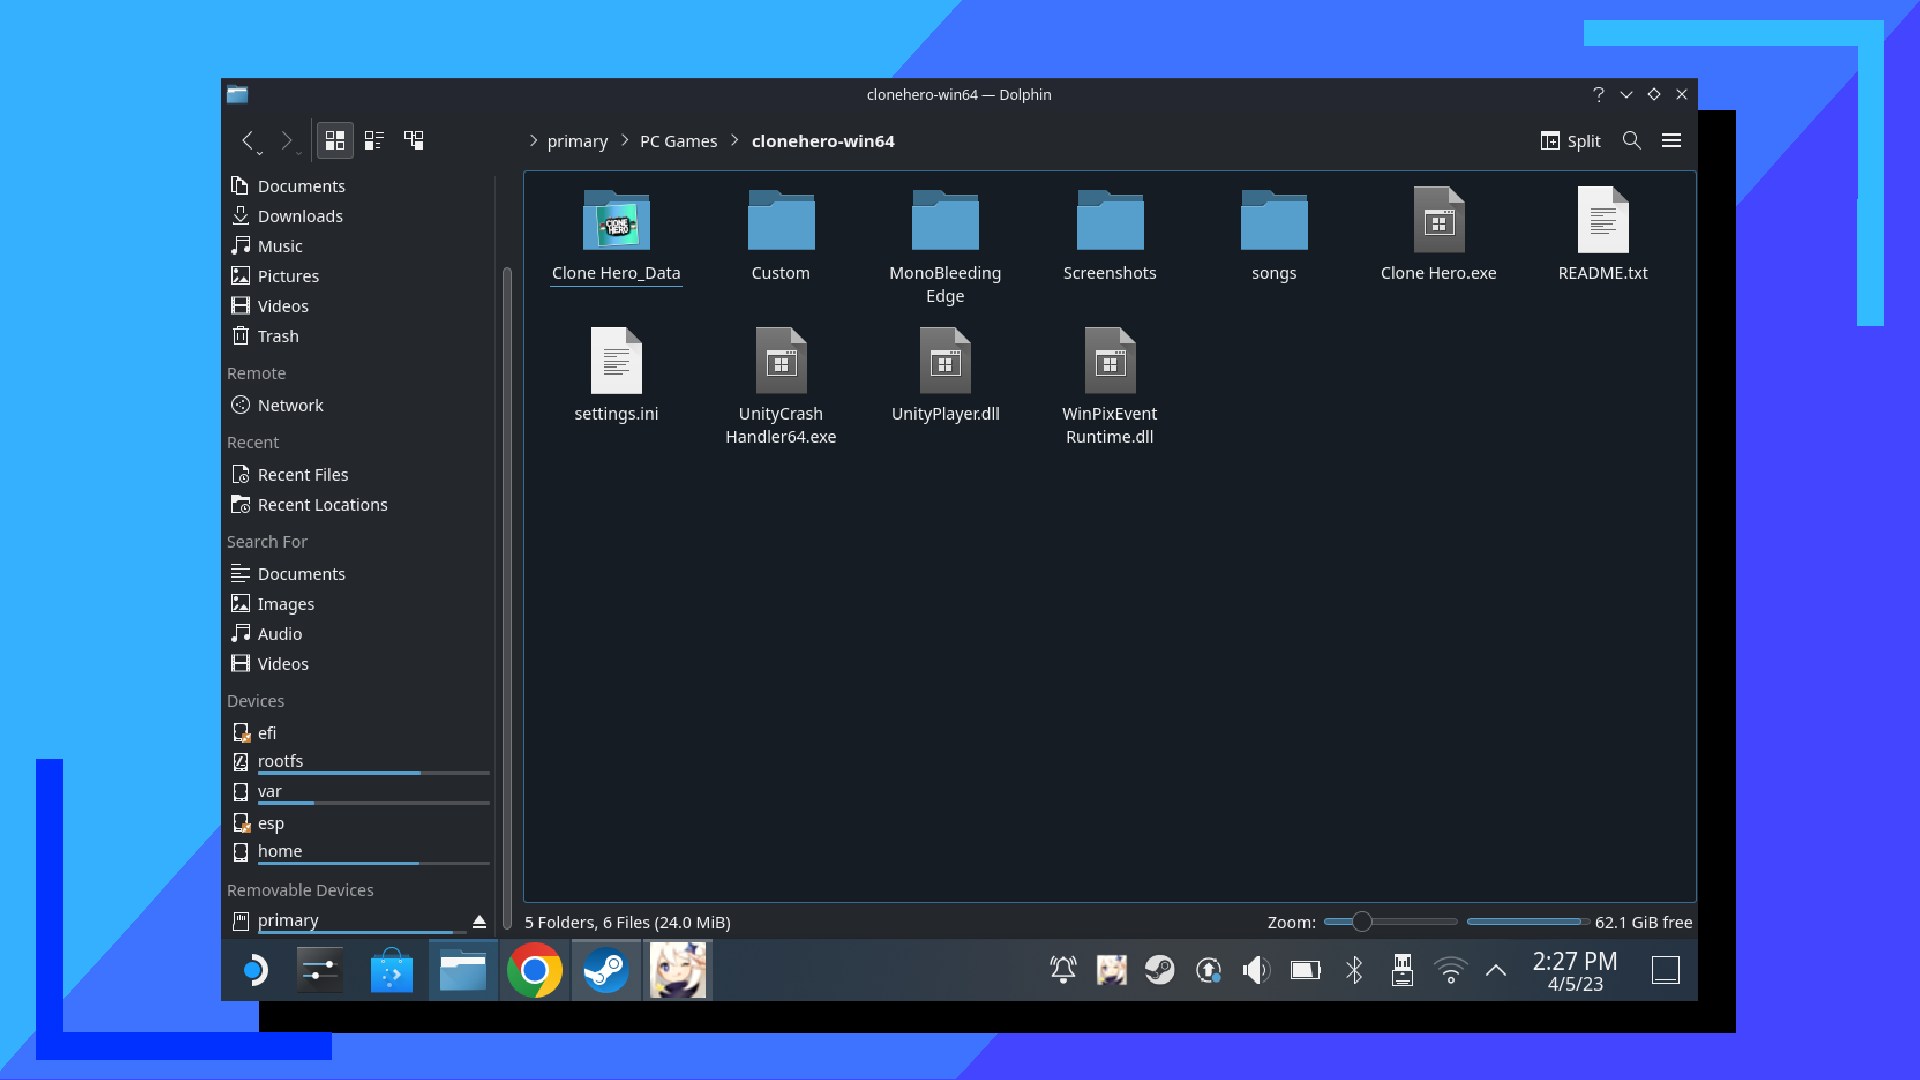
The next part is to open up your game folder. In this example, I’ll be using the free-to-play title Clone Hero, which isn’t available on Steam and can only be played on the Steam Deck as a non-Steam game.
Locate your game in the Dolphin File Explorer (the blue folder icon). What you’re searching for is the main launch file, usually ending in “.exe”. In Clone Hero’s case, it’s “CloneHero.exe”.
If you’re struggling to find it, try searching “YourGameName.exe” in the search box to the upper right of the window. If that doesn’t work, try simply searching for “.exe” and looking at which files it finds.
Once you have the launch file in your sights, you’re safe to move on.
Step 3: Add the Launch File to Steam

Using the left trigger, left-click on the .exe file. A new submenu will appear with a host of options. The one we want is “Add to Steam”. Click on that with the right trigger and a small Steam icon will show up next to the cursor.
Once that icon vanishes, move on to the next step.
Step 4: Find the Launch File in Steam

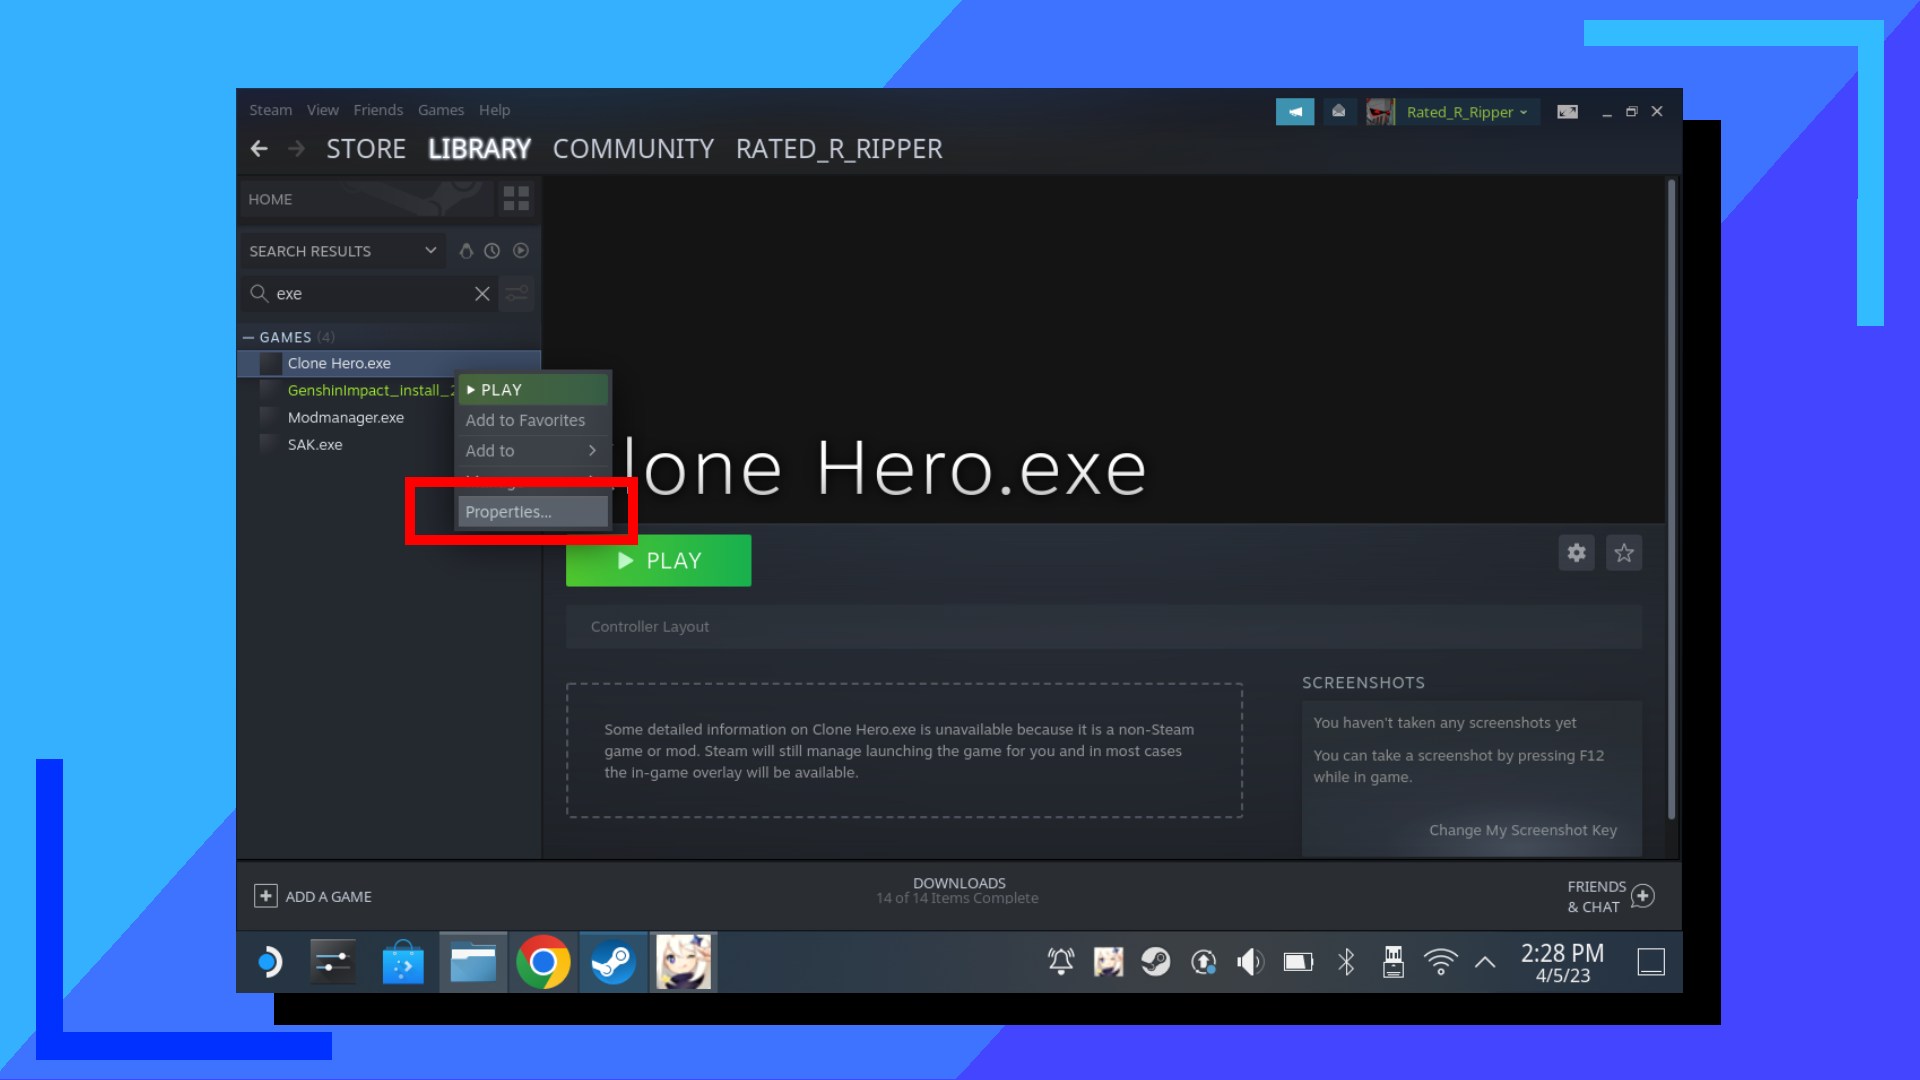
Open up the main Steam app and click on “Library”. In the left-hand column is a search box. In this, type the name of your launch file (not the game). For me, it was “CloneHero.exe”.
Your main launch file should now materialize below the search box.
Step 5: Configure the Non-Steam Game

Place the cursor over the launch file name and click it with the left trigger. A new menu will pop up.
From this new menu click on “Properties”.
Step 6: Add a Proton Version

Yet another menu will now appear. I know, there are lots of them but we’re nearly finished.
First click on “Force the use of a specific Steam Play compatibility tool” to tick that box. This will add a new dropdown box below. Click on that box and select the latest version of Proton. For me it’s Proton 7.0-6 but if you’re reading this in the future, that number may be higher.
That’s it! You’re now free to close the window and hit the big green “Play” button and your game should launch.
Bonus Tip: If you don’t want your game to have boring grey boxes as its graphics, you can use Decky to add custom artwork on Steam Deck. It’s a little more complex than adding a non-Steam game but once it’s up and running, you don’t need to manually add images yourself. Just click on the Decky option and your Steam Deck will grab the images for you.
If the Game Doesn’t Boot
Due to the Steam Deck being a Linux device that runs Windows games, not every non-Steam game is compatible. That said, there are a few tricks you can try before abandoning all hope.
The first is to try the latest version of Proton GE. What is that? Essentially, Proton GE is a custom version of Proton that features different fixes and support for other games Valve hasn’t had a chance to add itself.
The other option is to try different Proton versions. This isn’t guaranteed but there are examples where older versions of Proton can launch games the new iterations can’t. It’s strange, sure, but if it works, it works.
All images captured on Steam Deck hardware.

