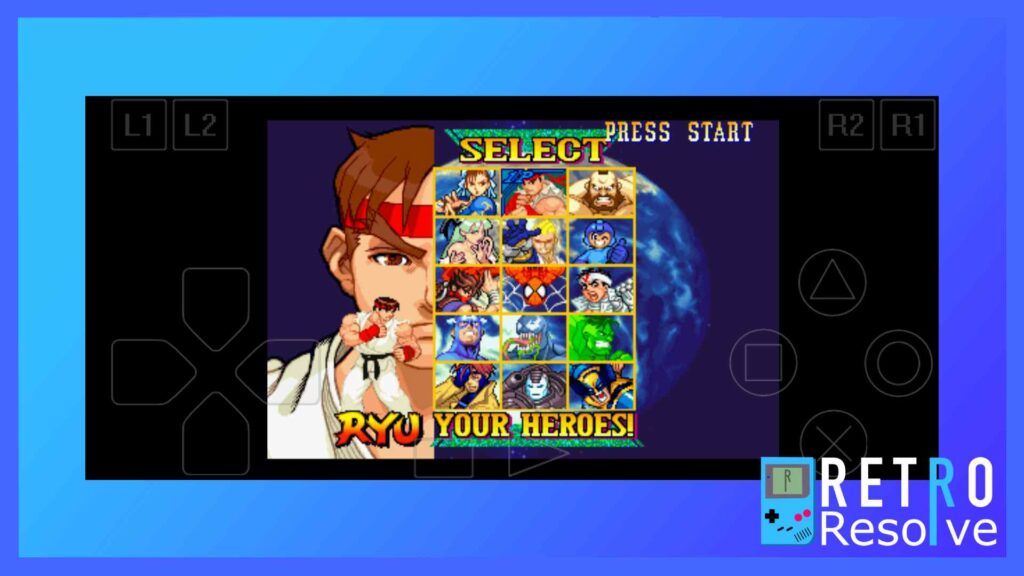
With more people turning to the classics like Final Fantasy VI, Resident Evil, or even Parappa, there’s never been a better time to grab an emulator for a mobile device.
On PC there are multiple different options, and you can even get emulators for low-end PCs so long as you know what you’re doing. But what about on mobile devices? That’s when the ePSXe Android app comes in.
Although mobile phones may not be able to match what the Steam Deck can emulate, they’re still highly capable machines. Plus you can’t exactly fit the Steam Deck in your pocket. Still, playing PS1 games on the Steam Deck at double the native resolution is still pretty neat.
Moving on, this guide covers the basics like how to get ePSXE on Android, how to get up and running, and features detailed instructions on how to get the best settings so those retro PS1 games shine a little brighter.
How to Set Up ePSXe on Android

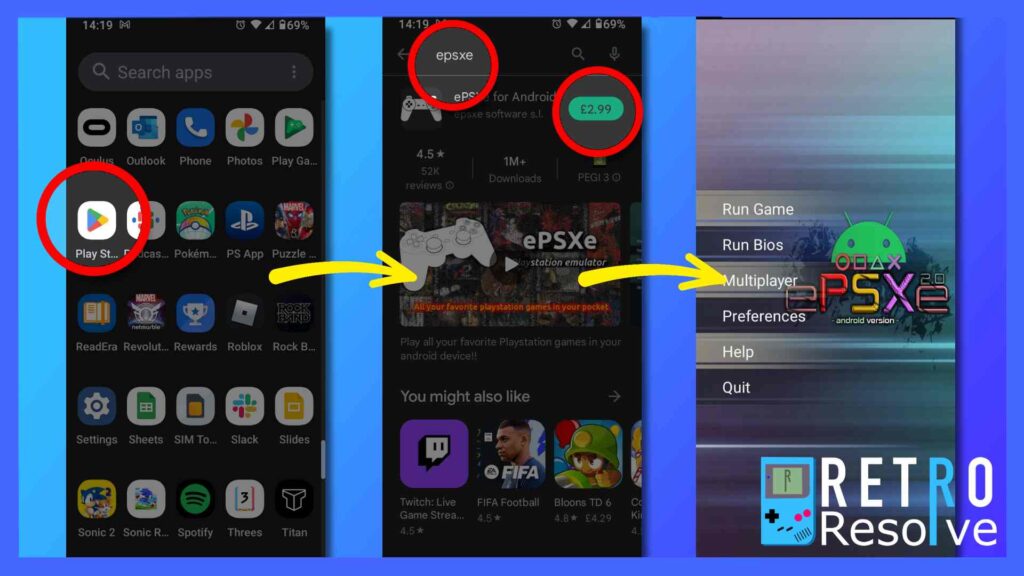
Installing ePSXe on Android is nice and easy. Simply head over to the Google Play Store and search “ePSXe” in the search bar at the top when it’s opened.
You’ll be greeted with the app and a price – in our case it was £2.99. Click on the price info to purchase it, select your payment method and hit confirm. That’s it.
The app will now automatically download and install itself. We’re not quite done yet, though.
Grabbing the PS1 Bios
To get the most out of ePSXe on Android, you’re going to need a PS1 Basic Input/Output Software (bios) file.
Think of bios files as basically the skeleton the system runs on. It’s similar to an operating system in that respect.
Now, this is important. It’s currently illegal to download someone else’s bios file. Legally you’re allowed to extract your own bios from your own PS1 console, and the case of Sony Computer Entertainment v. Connectix made it legal for developers to create their own custom version of the PS1 bios. That’s why ePSXe has a built-in bios that isn’t quite as solid as the original PS1, but it gets the job done.
If you don’t own a PS1 console anymore, just go with the stock bios option in ePSXe. If you do own a PS1 console, you can extract your bios and use that instead. But be warned, you’ll need a modded PS1 and a special extraction device like an Action Replay or Game Shark to get things up and running.
Of course, there are loads of sites online that host PS1 BIOSes, but as with ROMs and ISOs, if you didn’t rip it yourself, it’s not your property. You have been warned.
Once you’ve got your bios file, transfer it over to your Android device and place it in ePSXe folder marked “bios”. Upon loading ePSXe, the app will scan your device and install the bios in a flash. Easy peasy.
How to Use ePSXe Android to get the Best Performance

EPSXe is designed to be intuitive and compared with other PS1 emulators like RetroArch, it’s one of the easiest to use and navigate.
Upon booting you’ll be greeted with the following options:
- Run Game – Use this to boot up a game.
- Run Bios – This lets users boot directly into the PS1 operating system.
- Multiplayer – Used for configuring multiplayer in games that support it.
- Preferences – Use this to modify in-game settings.
- Help – Loads up the user guide as well as customer support options
- Quit – Closes the app.
All of the above is self-explanatory with the exception of preferences. It’s here where you’re going to be spending time if you want to get the most out of ePSXe. The reason being, each mobile device is different, and power varies across different devices. A high-end Samsung phone is going to vastly outperform the Motorola E20, for example.
We’ll now break down each section here and explain what you need to know.
- Bios Preferences: First up, bios preferences. There isn’t much to worry about here, but if you wish to switch between an official PS1 bios and the ePSXe bios, this is where you’ll do it.
- CPU Preferences: The CPU preferences area is where you can tweak performance to get the most out of a device.
- CPU frameskip is worth keeping in mind if you’re on a low-end device or the game you wish to play isn’t running correctly. Think general lag, input lag, misshapen pixels, that sort of thing. If there’s a problem, frameskip is the first point of attack everyone should go to before trying anything else. Frameskip has the highest chance of instantly fixing a problem, so don’t be afraid to try turning it on if you run into any issues.
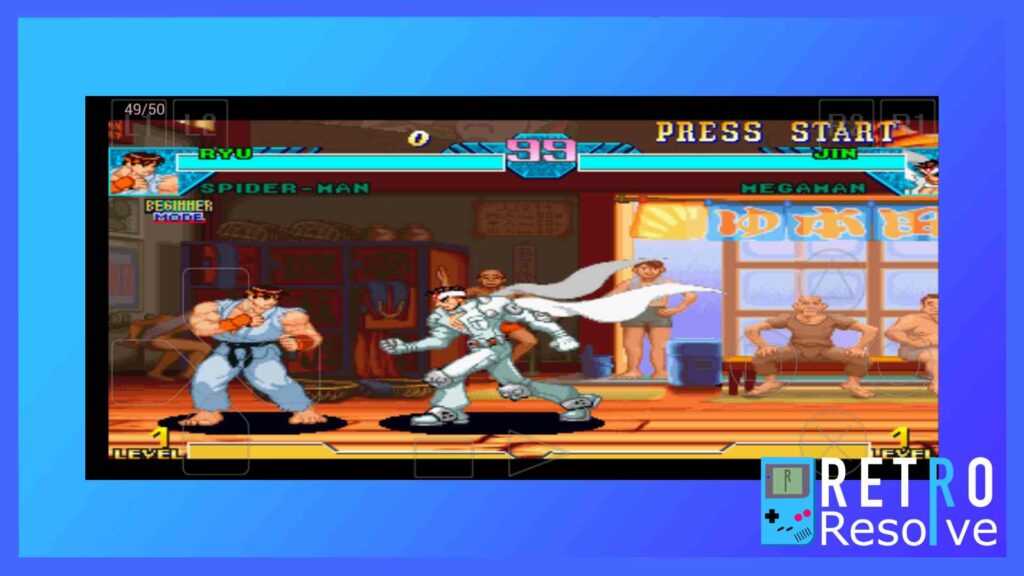
- Show FPS: Turning this option on shows a frames-per-second (fps) counter on the screen. While most will leave this off, if something feels amiss, turn this on to see whether the game is hitting the right amount of frames. Due to the PS1 being released before high-definition became widely adopted, games will run at either 30 fps for NTSC games or 25 fps for those released in PAL territories.
Set Custom FPS

Here’s where things get interesting. Depending on your phone’s refresh rate, you can force the ePSXe Android emulator to run games at higher framerates than they were originally intended.
When this works, PS1 games look and feel better than they did on original hardware. Just keep in mind, when you double the frames, you double the speed. When the emulator accommodates this change, everything runs without any problems. But as there are so many games on PS1, it’s impossible to predict how every single game will run with the custom fps option maxed out.
In terms of options, you can choose from 20 fps to 120 fps in increments of 10. If 120 fps isn’t working on your device, feel free to drop it down a little and try again.
MME Enable
According to the ePSXe designers, this function enables or disables the multimedia extension. This can lead to faster emulation but could potentially throw up issues and “less accurate” emulation overall.
You also want to avoid the force option unless you’re running a Tegra2 device as this will make the app crash. That’s bad.
PSX CPU Overclock
This is the other section worth knowing about. It’s here where you can change how fast the PS1 emulator runs.
Your options here are:
- x1
- x1.5
- x2.0
- x2.5
- x3.0
In short, if your device supports it, you can run the ePSXe emulator up to three times faster than the original hardware. To put that in perspective, if a game takes 30 seconds to load, with the x3.0 option turned on load times will be reduced to just 10 seconds.
Android Sustained Performance
The final section lets the user cap the max CPU frequency in Android Sustained Performance. Yes, that’s a mouthful.
For those who don’t know, the Android Sustained Performance was introduced during Android 7 and aims to improve the power and performance of Android devices so they can run consistently and much smoother.
How to Use ePSXe Android to get the Best Visuals

If you’ve done the above but still want to get more out of ePSXe, there are a few more options you need to check out.
- Screen Preferences: This is a big one and is by far the most controversial. It’s here where you can change the screen orientation, color depth, and most importantly, screen ratio.
Screen ratio is important because this decides how large PS1 games will be on the screen. Your options are the original 4:3, stretch, and widescreen.
If you’re after something as close to the original PS1 console as possible, the default 4:3 setting is what you’re after.
The downside of 4:3 is it will look tiny on most screens, especially on mobile phones. If you’re looking to fill the screen, it’s worth trying both stretch and widescreen.
On mobile phones, stretch and widescreen may come out looking nearly identical. On tablets, though, that’s where things could be much different. Some would argue stretching a 4:3 image is sacrilege. Personally, it doesn’t really matter. Stretched images will look more blurry than 4:3, but the trade-off is you get something that fills the screen. It’s all about personal preference.
Where to Put Games in ePSXe on Android
EPSXe is capable of utilizing multiple different CD-ROM file types, including cue/bin, cue/multi-bin, img/ccd, mds/mdf, pbp, nrg, cdi, ecm, and iso.
It’s worth noting if you’re ripping your own PS1 games, chances are the iso file type is going to be the most common.
As for where to put the games, the first thing you’ll need is a file explorer app from the Google Play Store. Once you’ve got that, it’s just a case of either connecting to a computer and copying the files to the iso folder located inside the ePSXe folder.
How to Use Cheats in ePSXe on Android
While a game is running, swipe up to bring up the navigation bar then hit the back button (the triangle pointing to the left).
This will bring up the ePSXe emulator menu. From here you should see an option named “cheats.” Click on this and you’ll be greeted with a message informing you no cheat codes have been found. That’s fine, don’t worry.
There should be two options here: Back and Download. Hit download while connected to the Internet and the ePSXe emulator will download all the necessary files for you. Easy, right?
Alternatively, and if you don’t have Internet access, you can download all the different regional cheat code files from the ePSXe website then copy them over to the cheats folder inside of the ePSXe folder on your Android device.
Is ePSXe Free and Alternatives to Consider
Unfortunately, ePSXe isn’t free, but it only costs $3.75/£2.99 to own. We’d argue that it’s worth every penny if you want one of the best PS1 emulators out there.
If you’re not looking to spend, there are some free alternatives to consider.
RetroArch is one of the best options out there simply because it is the easiest one-for-all emulation solution. And best of all it’s also available on Android for free.
RetroArch basically packs almost every emulator into one package. That means RetroArch will let you play not just PS1 games, but also Nintendo, Sega, arcade, early PC, and a host of other systems.
In terms of value, RetroArch really cannot be beaten. Unless, of course, you’ve got a Steam Deck, in which case it’s all about EmuDeck on there.

