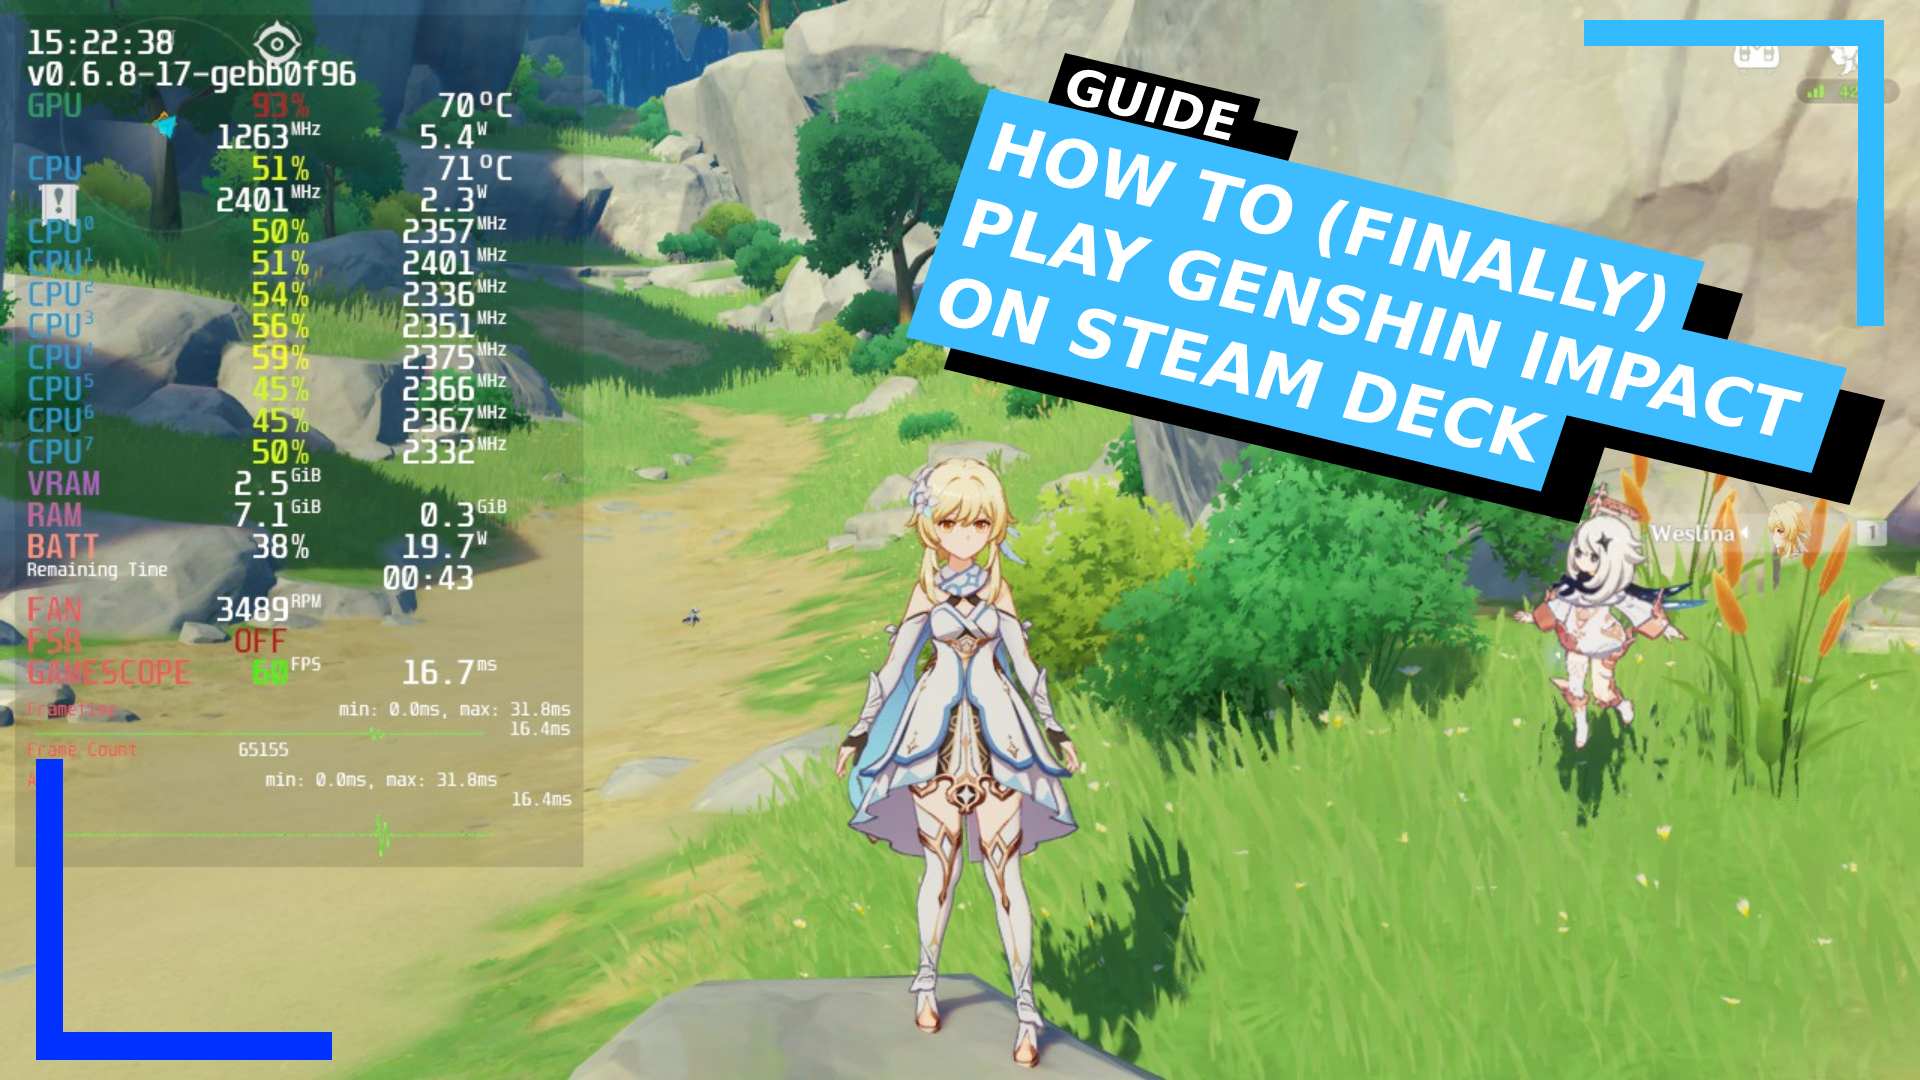
Update: Although this method was patched out, it’s now working once more (thanks for the heads up, Steam Deck Gaming), so act now before it’s patched once more.
Orignal Article follows…
Before We Begin
This guide is designed to install Genshin Impact on Steam Deck and will let you play the game from inside SteamOS. There are a few caveats you need to keep in mind before we begin, though.
Normally, Genshin Impact isn’t playable on Steam Deck through SteamOS. But the general consensus right now is that something with Genshin’s anti-cheat isn’t working as it should. The knock-on effect of that is there’s currently nothing stopping Genshin from running on systems it was never designed to, i.e. the Steam Deck.
How long this method will be around for isn’t currently known. Any update to the anti-cheat systems could render this redundant, so be sure to get it up and running ASAP. If it does get patched out, then you’ll need to revert to installing Windows on the Steam Deck and then installing Genshin natively.
I’d also strongly recommend setting up a Genshin account prior to starting this guide as the in-game sign-up isn’t working quite right.
It also goes without saying, this method can have the potential to get your account banned. I’ve not seen any reports of that being the case, but if you’re concerned at all, don’t do it.
Step 1: Download the PC Version Of Genshin Impact
Let’s first head into desktop mode. You know the drill – when the Steam Deck has loaded up, hold down the power button, then select “switch to desktop”.
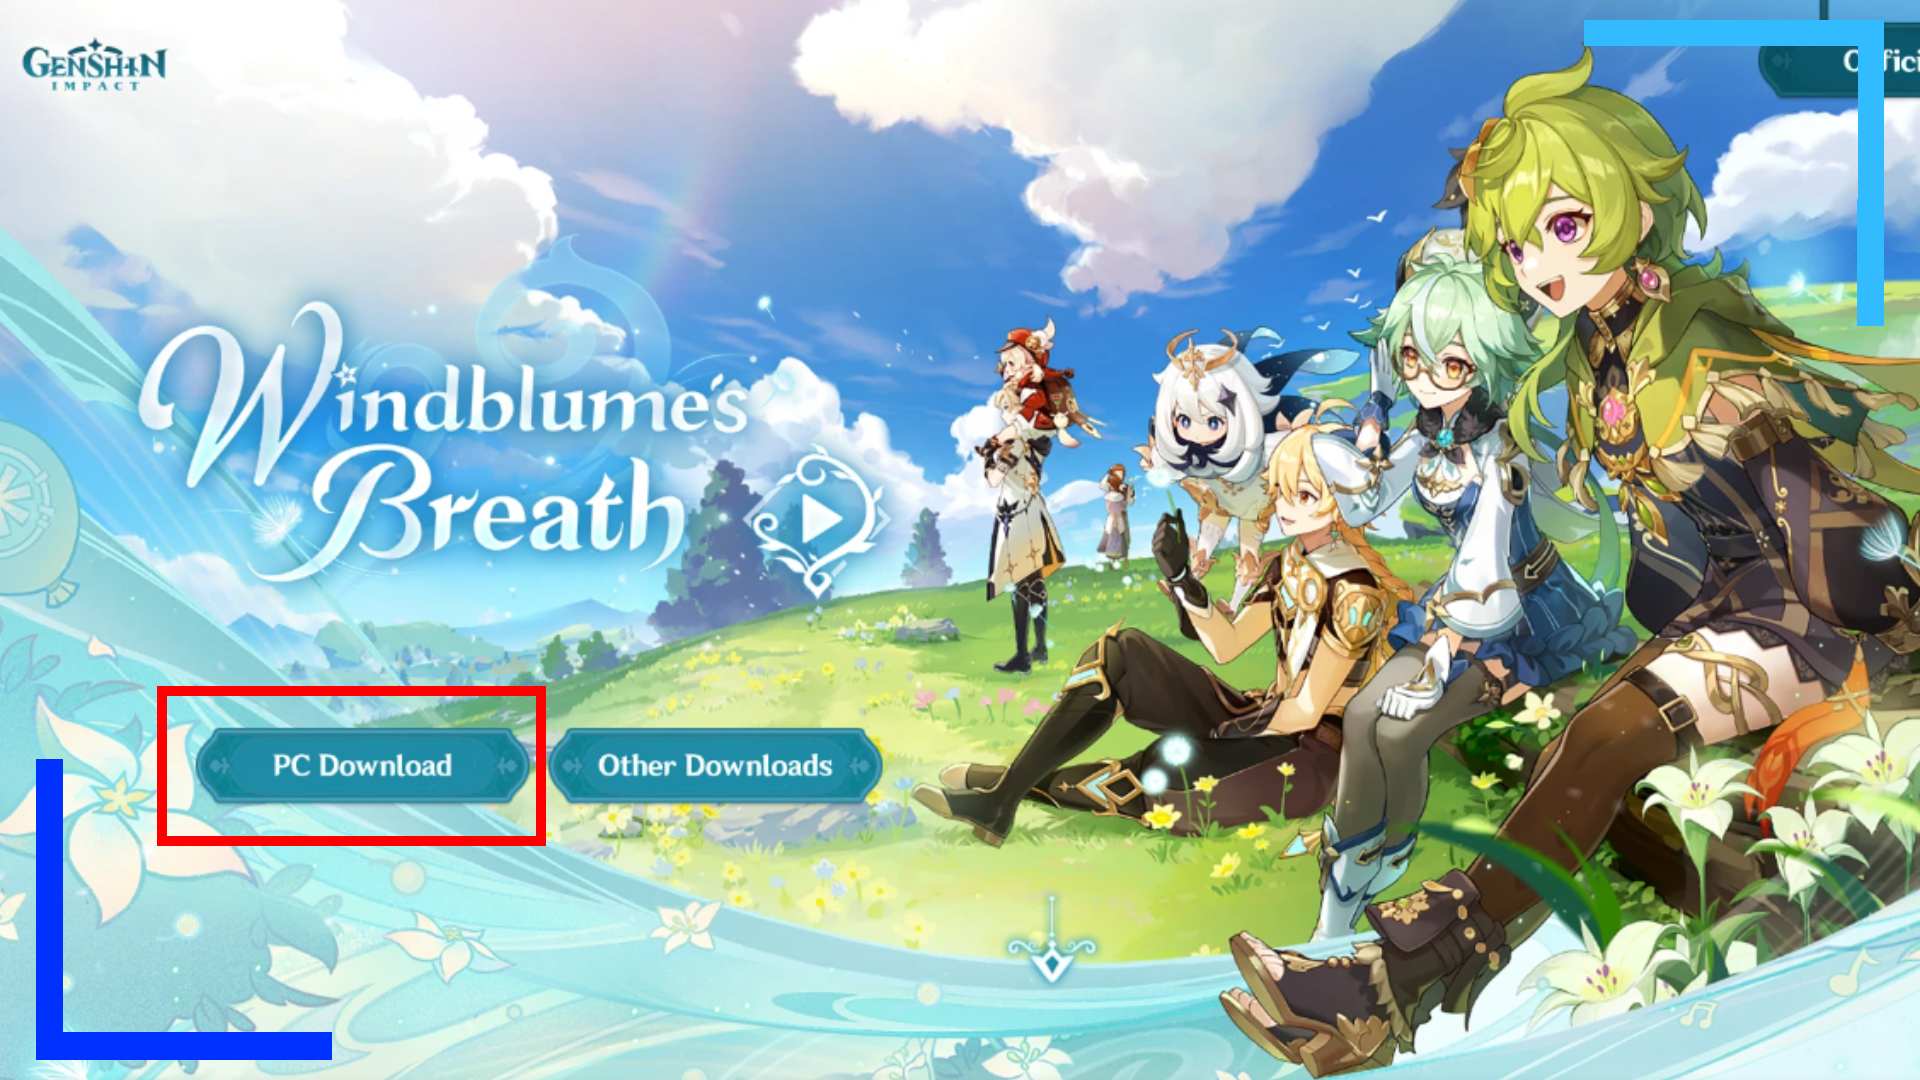
When desktop mode has finished booting, open up your Internet browser and go to the Genshin Impact website, then hit the big “PC Download” button to download the installer.
If you don’t have an internet browser installed already, you can grab Chrome or Firefox from the Discover Store (the blue shopping bag icon).
Step 2: Add the Genshin Impact Installer to Steam
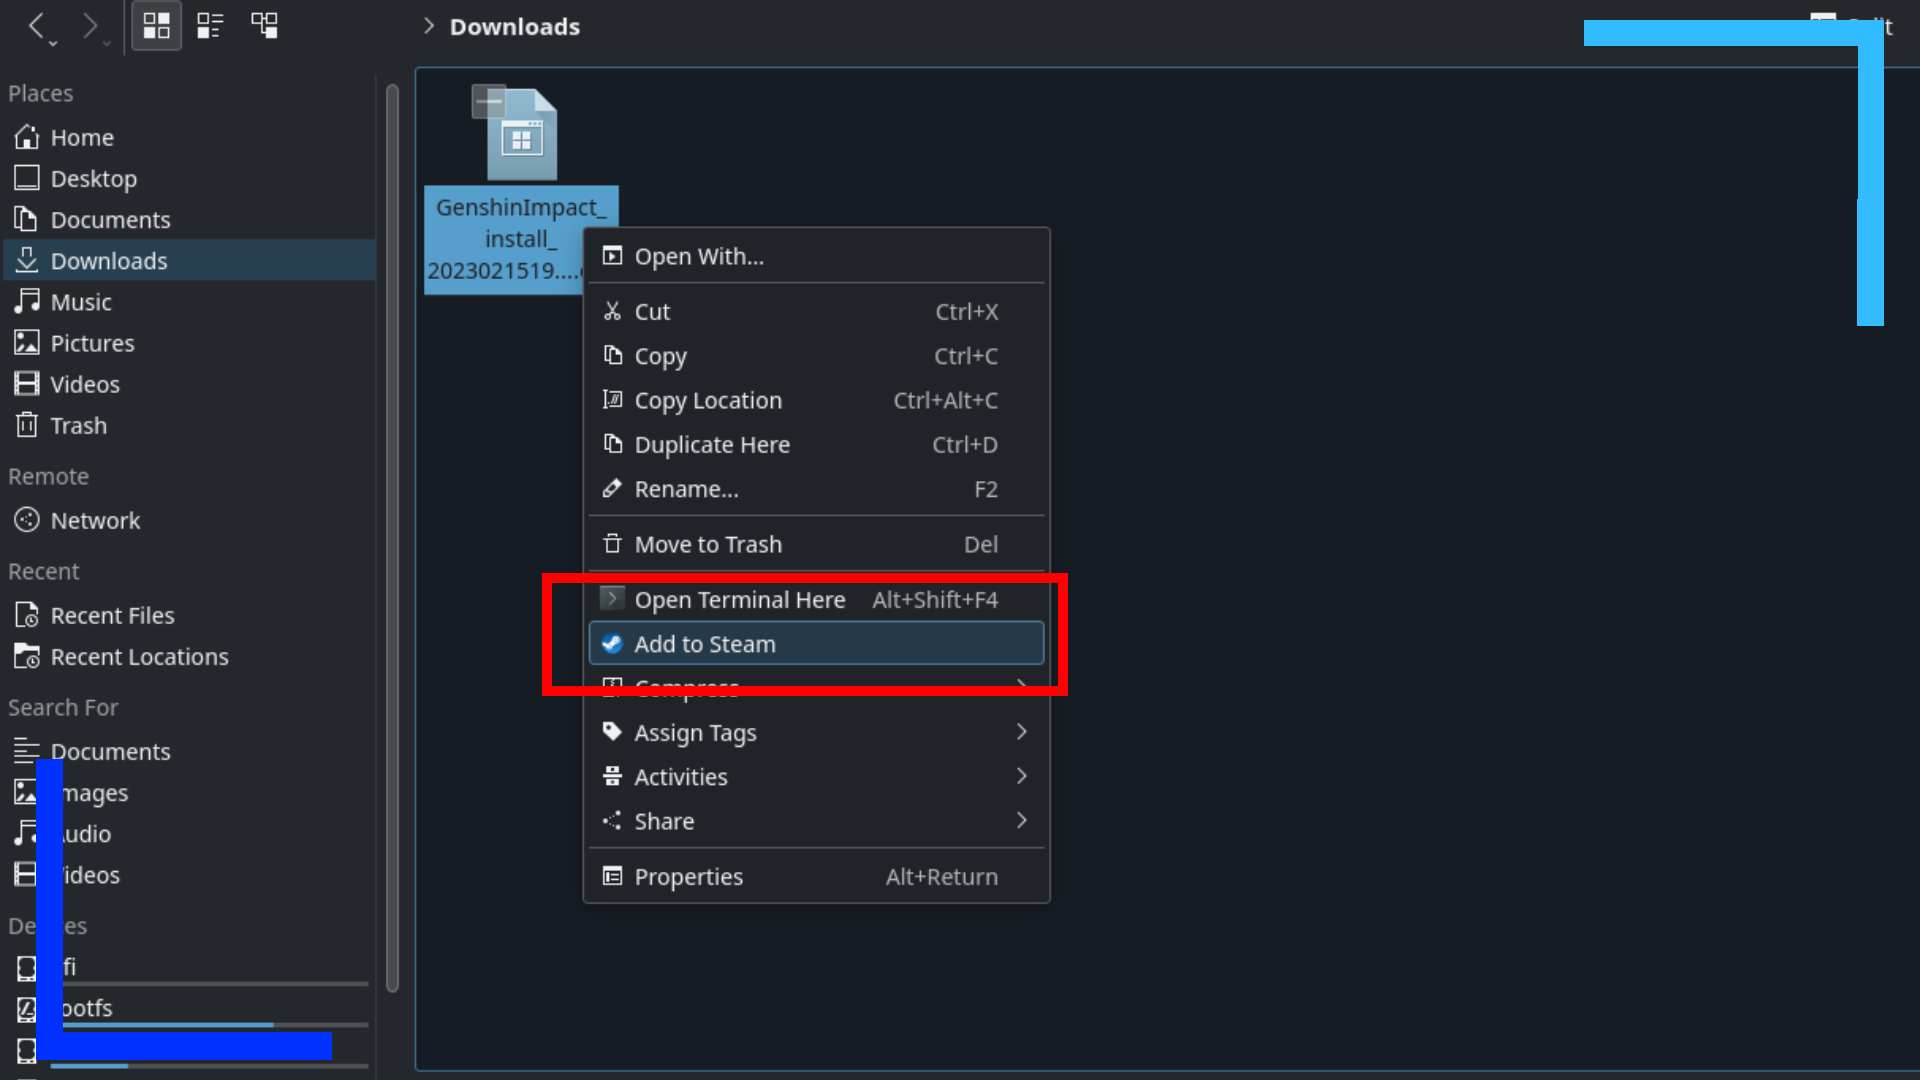
When the installer file has finished downloading, open up the Dolphin File Explorer (the blue folder icon) and go into “Downloads”. Inside you should spot the installer file.
Next we need to add it as a non-Steam game. To do this, click the file with the left trigger and then select “Add to Steam” from the menu.
Step 3: Configure the Installer
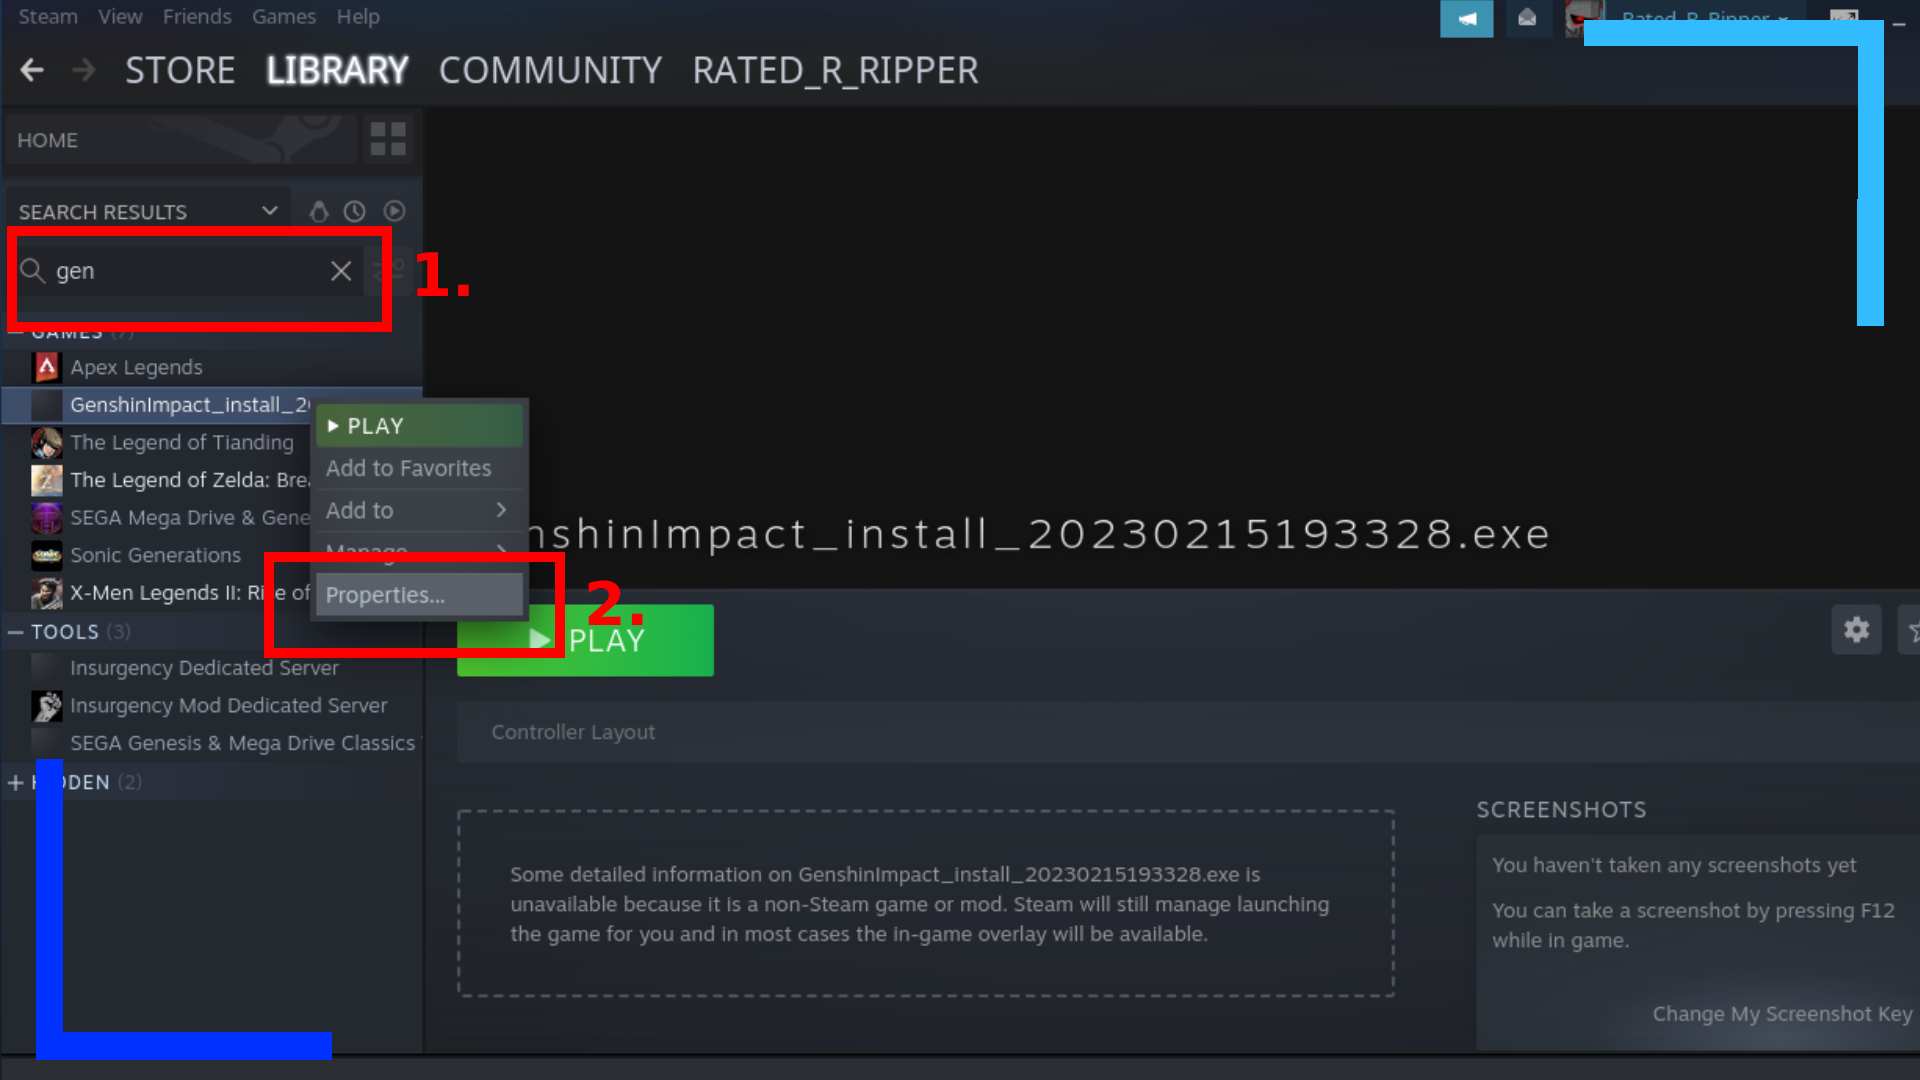
Now we’ve added the installer as a non-Steam game we next need to configure it so it’s able to run.
Open up the main Steam app and click on “Library”. In the search box on the left side of the screen, type “Genshin” (1) and you should see the file we just added displayed below. If you need to bring up the on-screen keyboard yourself, hit the Steam button and the X button together to invoke it.
Next, use the left trigger to click on the installer file we just found and select “Properties” (2).
Step 4: Add a Proton Version
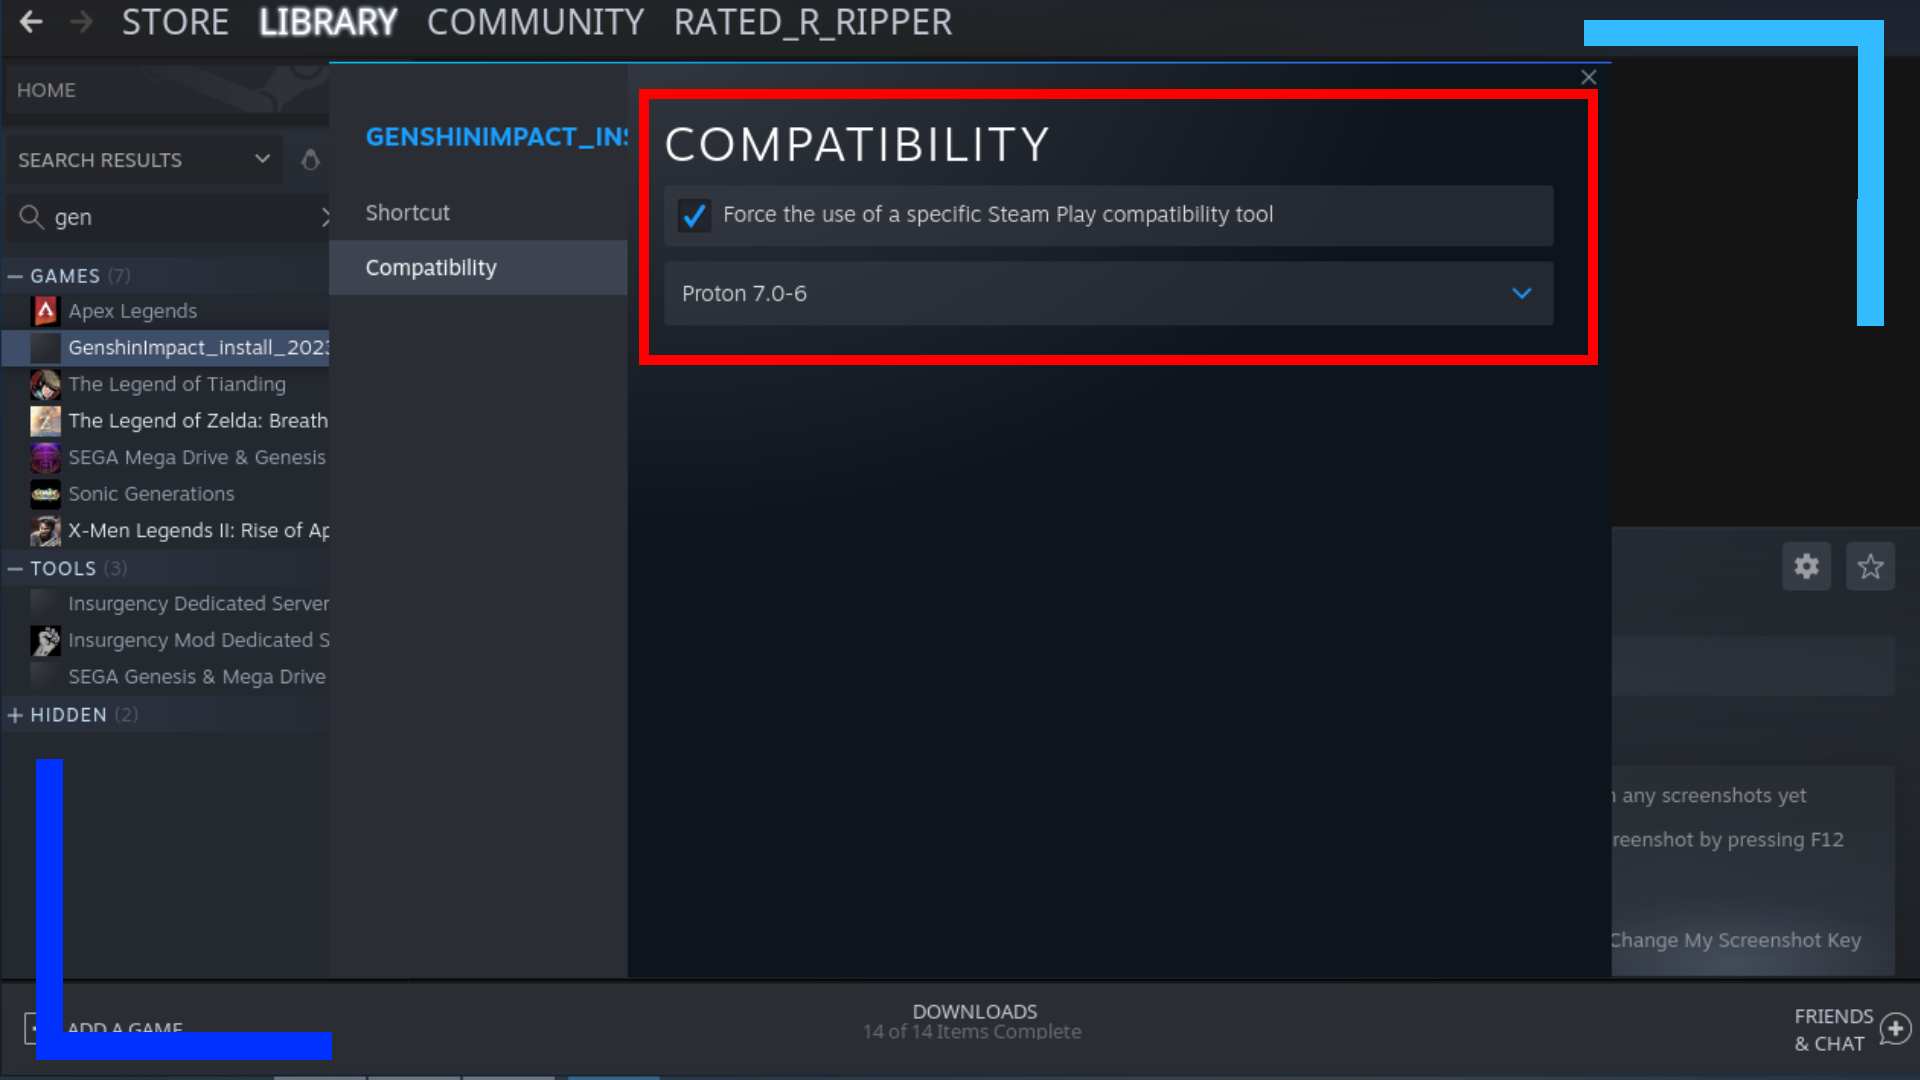
A new window should have opened (as seen above). Click on “Compatibility” then use the right trigger to click on the empty tickbox to tick it.
A new drop-down menu will appear below. Click on that and select the latest version of Proton. When I did it, it was Proton 7.0-6, but if you’re reading this in the future that number may have increased.
When you’re done, close this window.
Step 5: Install Genshin Impact on Steam Deck
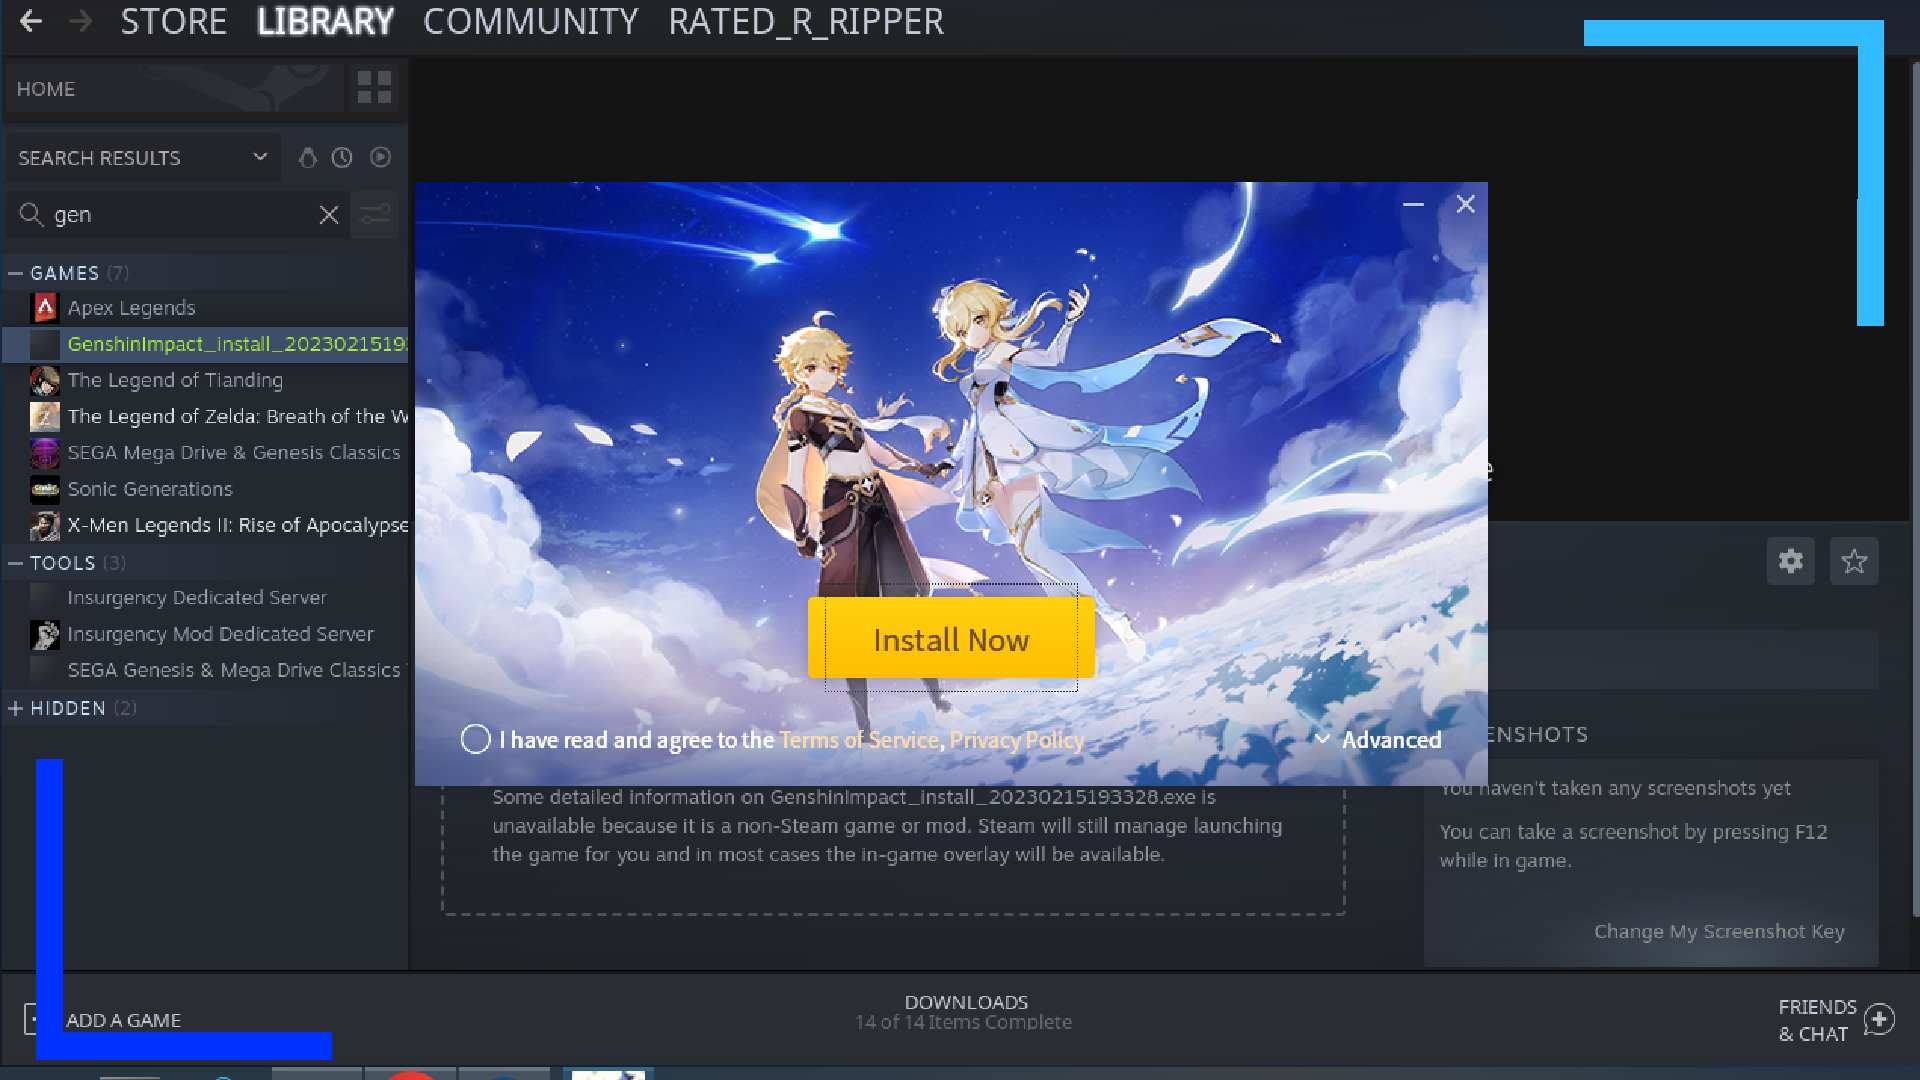
Click the big green “Play” button and the Genshin Impact launcher should, well, launch.
See that massive install button in yellow? Yeah, hit that.
This part is by far the longest as we need to physically install Genshin Impact. All 50+GB of it! You also can’t install Genshin on a micro SD card for some reason. I tried myself and just couldn’t get it to work. So for now, you’ll need to stick with the default recommended path to the internal storage.
Step 6: Launch Genshin Impact Once
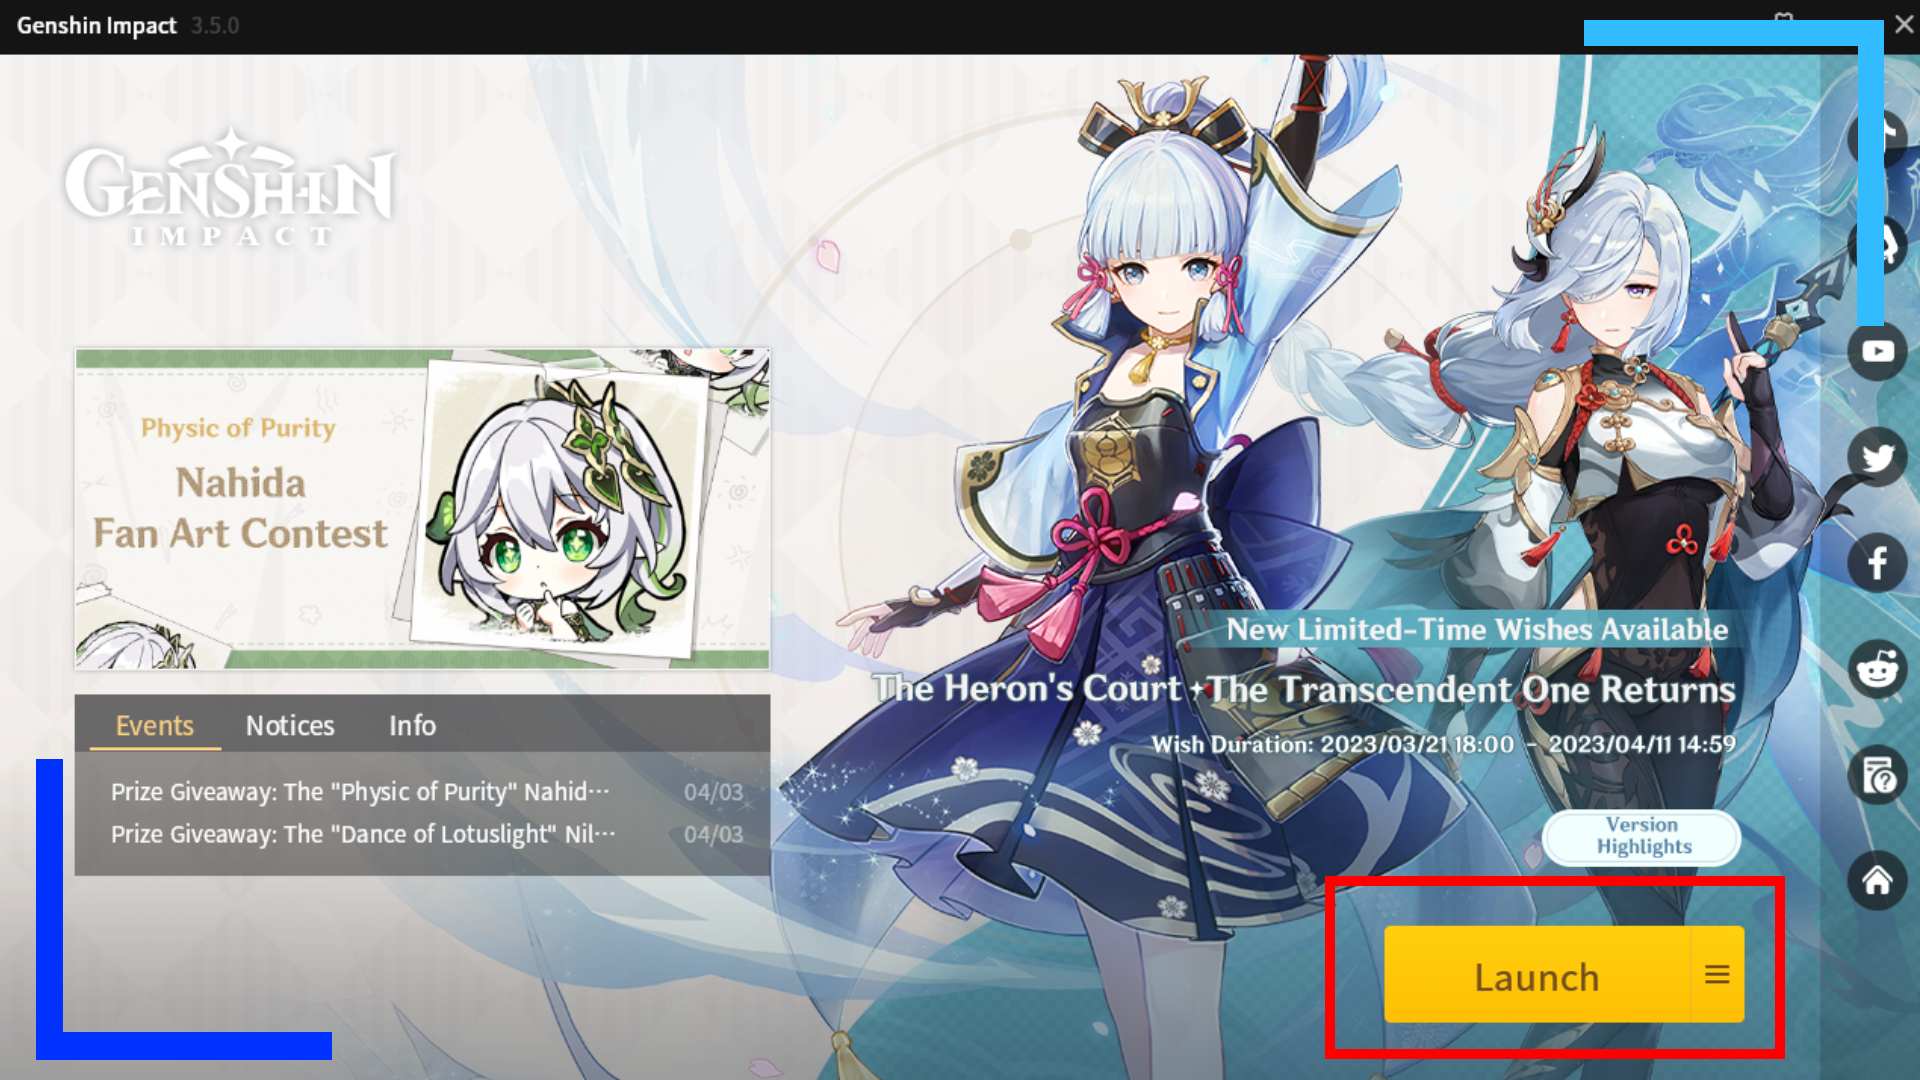
After Genshin Impact has finally finished installing, click the big yellow “Launch” button. When Genshin Impact launches and everything’s fine, close it. You’ll see why in a sec.
Step 7: Add the Genshin Impact Launch File to Steam
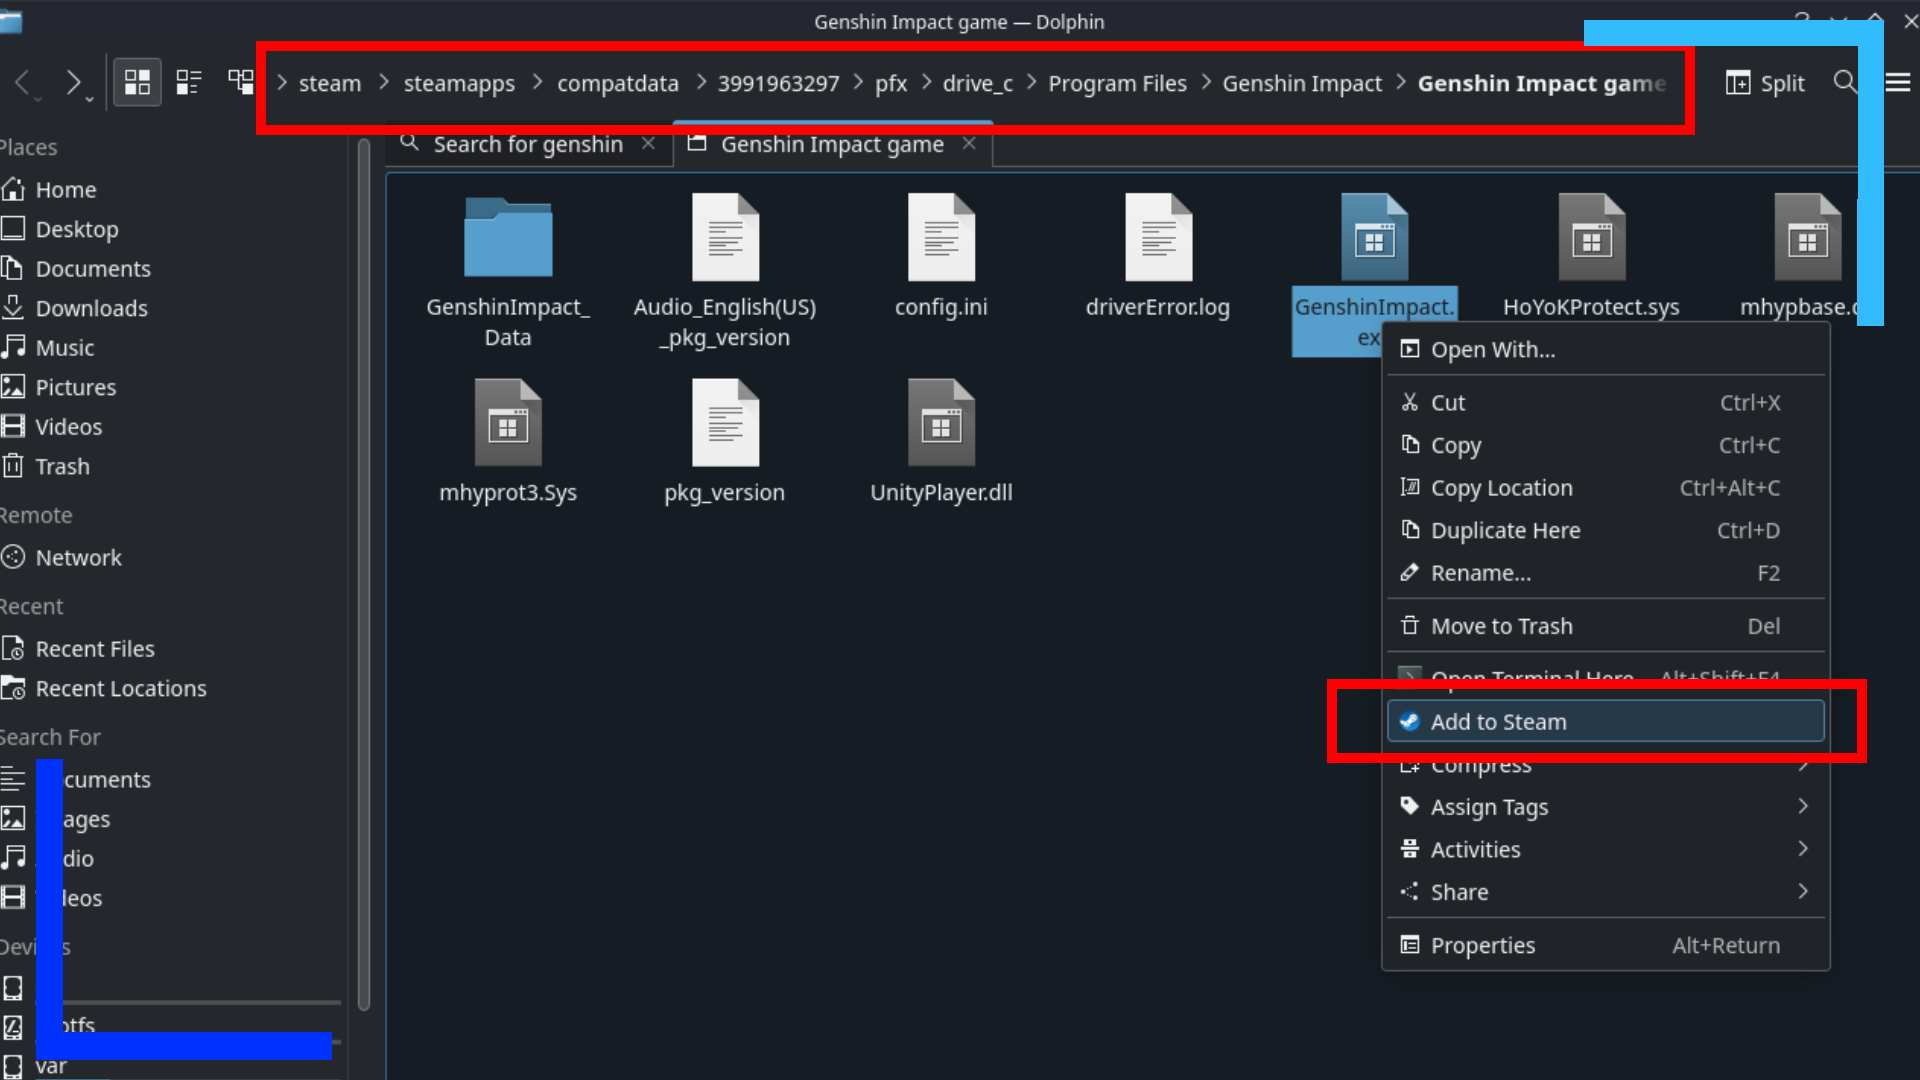
Currently, we have an installer file hooked up to Steam, so let’s switch things over so the actual Genshin Impact launch file boots up instead of the installer.
Head back into the Dolphin File Explorer and navigate through the following path:
Home> deck > .local > share > steam > steamapps > compatdata > Genshin File ID > pfx > drive_c > Program Files > Genshin Impact > Genshin Impact game >
Some notes about the above: To see the “.local” folder you’ll need to hit the three lines button in Dolphin and then add a tick to “view hidden files.”
The next point: The part of the path that says “Genshin File ID” will most likely be different. It’ll be a string of numbers and it’s hard to guarantee you’ll have the same folder name I did. Mine is called “3991963287” but yours may be different. If you can’t work it out, try searching “Genshin” in the search box. That normally finds the end of the path fairly quickly.
Once inside the “Genshin Impact Game” folder, look for the file marked “GenshinImpact.exe” file. Click with the left trigger and hit “Add to Steam” one last time.
Step 8: Configuring Genshin Impact to Work on Steam Deck
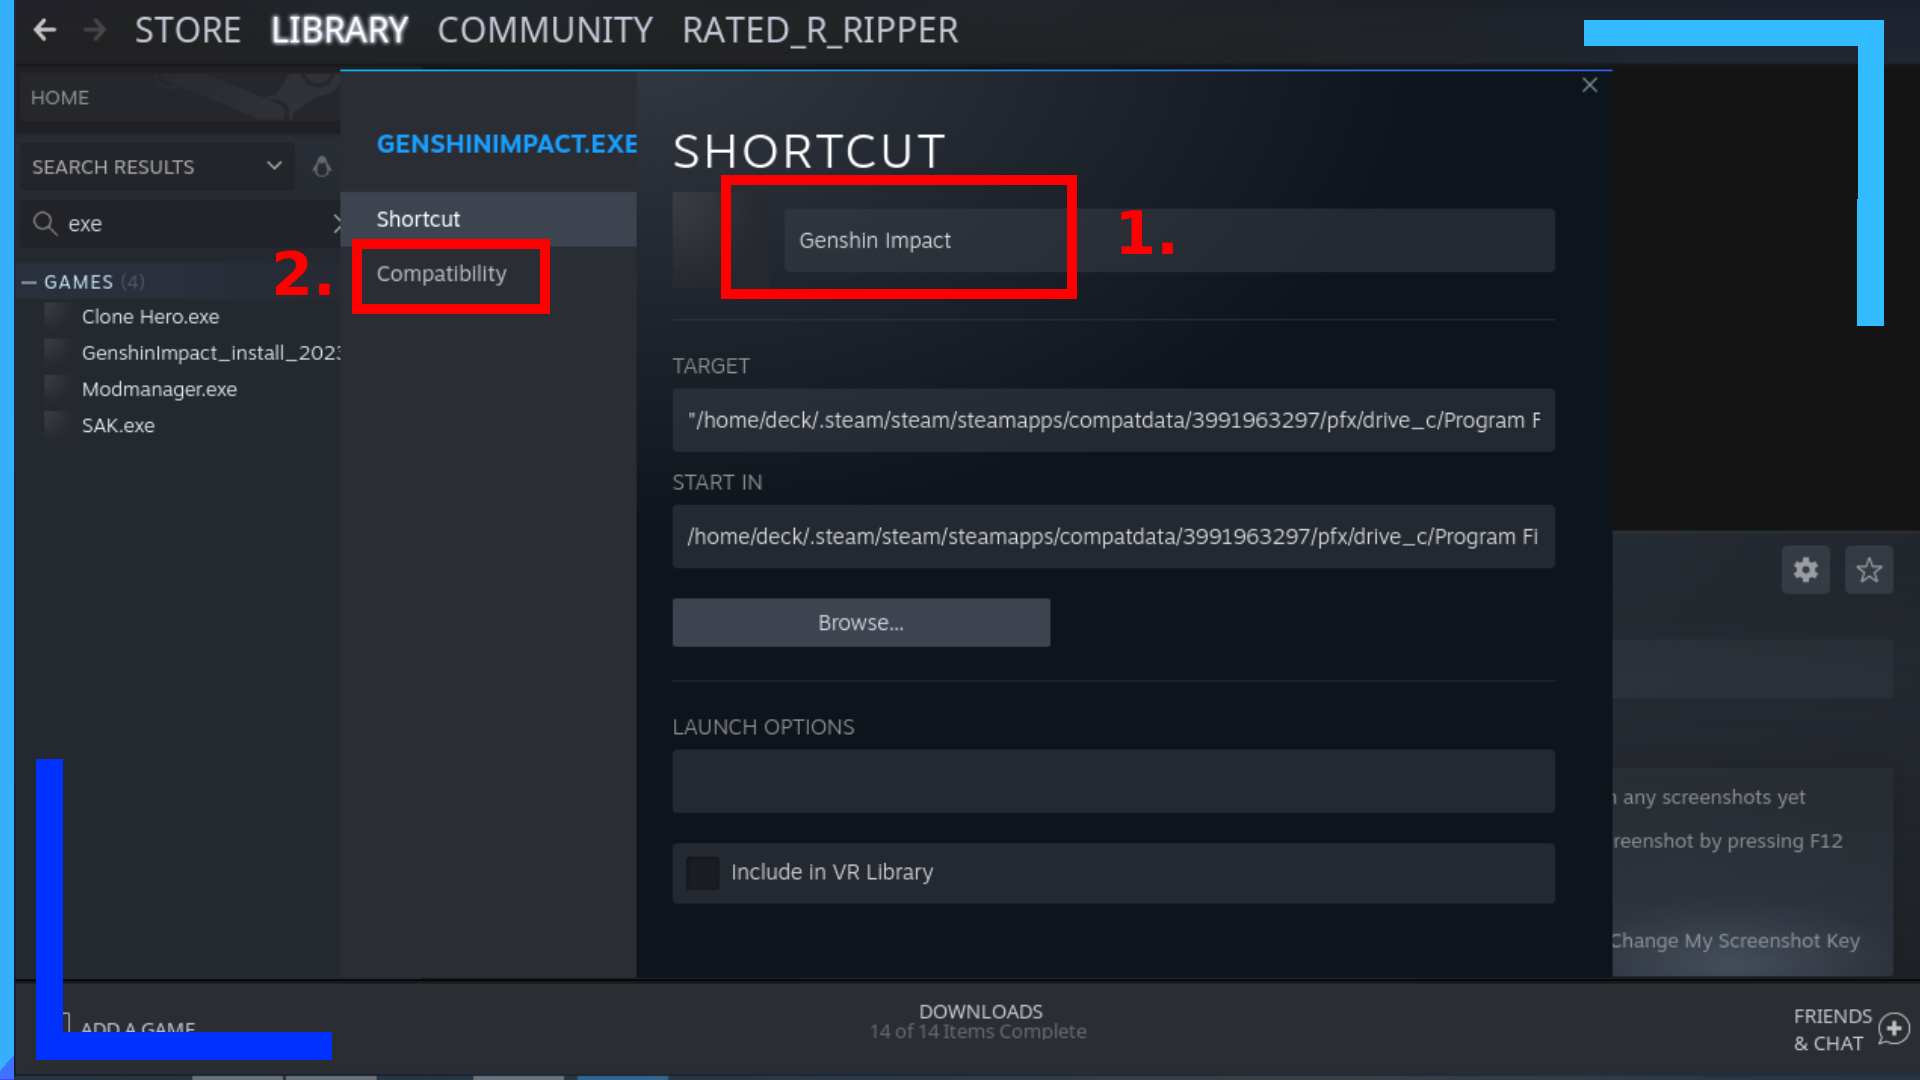
Much like we added the installer to Steam earlier, we now need to do the same for the main Genshin Impact game file.
But before that, we need to change the name from “GenshinImpact.exe” to “Genshin Impact” (1). The reason being, if you don’t do this Steam won’t be able to recommend community controller layouts, which you absolutely need if you want to play it properly (thanks for the tip Deck Wizard).
When that’s done, click on “Properties” from the left-hand column.
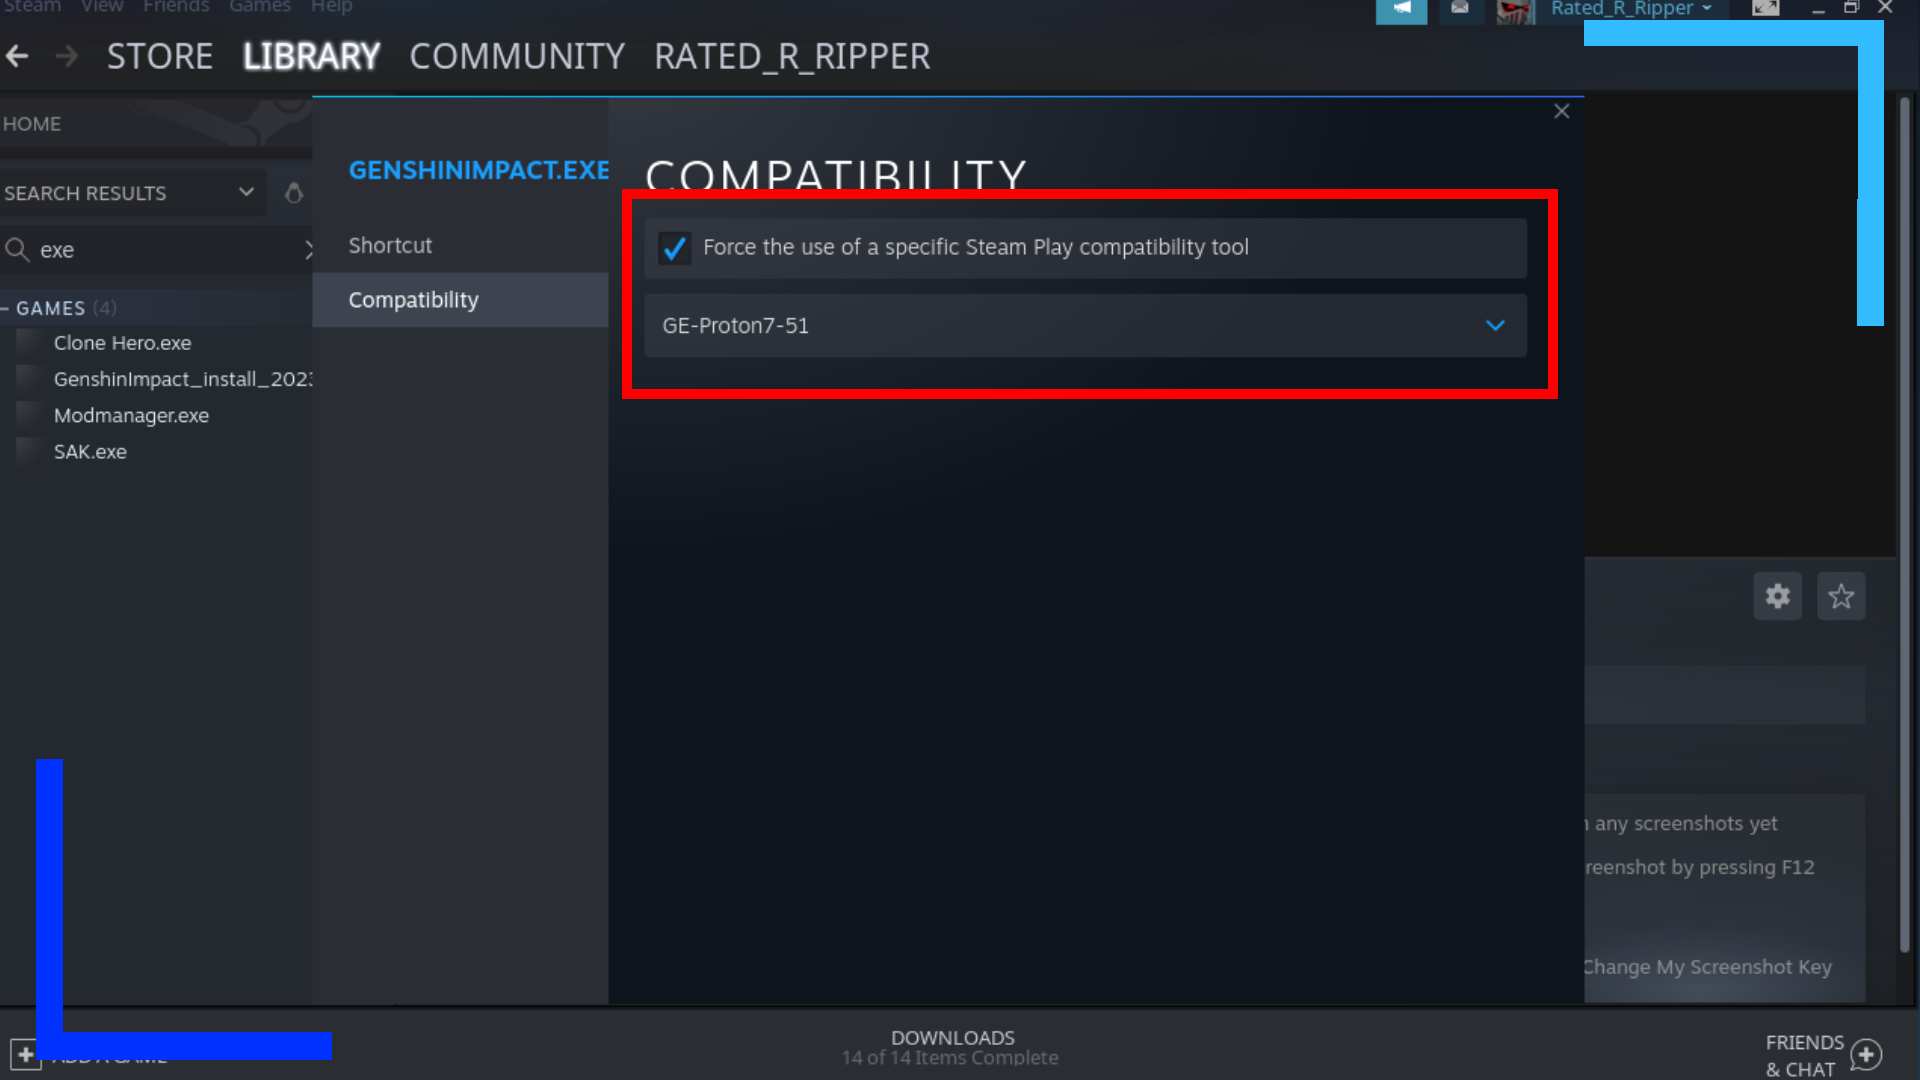
Now all that’s left to do is click on the tickbox to force the use of a specific tool then set the Proton version to the latest version (Proton 7.0-6 at the time of writing).
Close the window and Genshin Impact is now ready to be booted either in desktop mode or gaming mode. And remember, if you want to grab some custom Genshin artwork with minimal effort, Decky can do that for you.
Also, if the on-screen cursor starts behaving badly, hold the Steam button then use either the right trackpad or the right stick to regain control over it.
Note: If you run into any problems with the installed Proton version, the latest Proton GE has been reported to work pretty well as a substitute.
Controller Scheme Recommendation
There are several community layouts available, but the one most are using is called “Lightsourced PS5 Config.” This appears to mimic console controls pretty well and is a solid starting point, especially for newcomers.
All images captured on Steam Deck.

