Accessing screenshots on Steam Deck is fairly painless if the game comes from Steam. If you’re after a non-Steam game, you’re going to need to load up desktop mode and peruse through a host of folders to find what you’re after.
Here are the easiest ways to access screenshots on Steam Deck complete with pictures to guide you through it.
Method 1: Access Screenshots in Gaming Mode
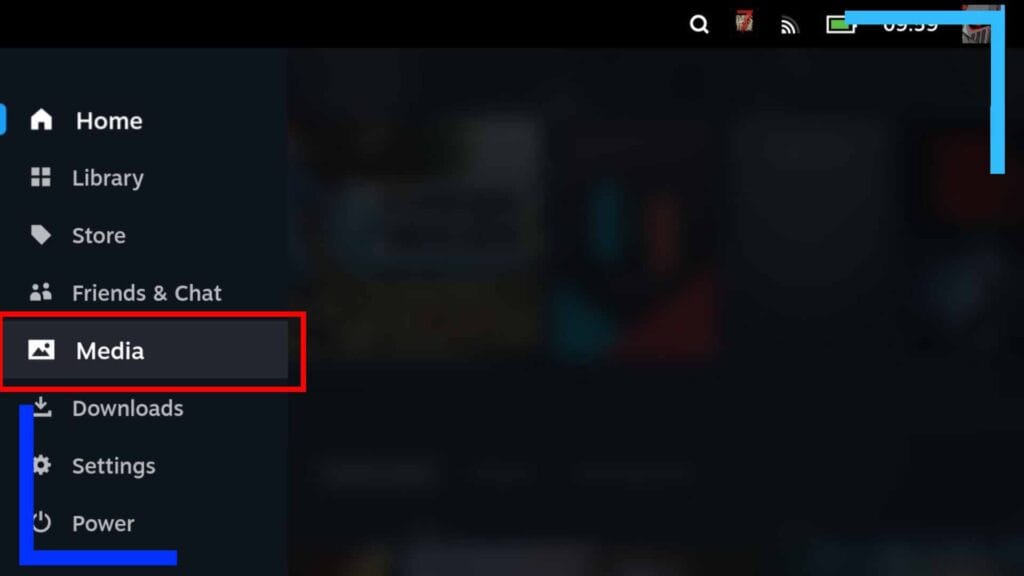
To access screenshots in gaming mode on Steam Deck, load up the Steam Deck and once you’re at the main homescreen, press the ‘B’ button to bring up the menu.
Next scroll down to ‘media’ and click the ‘A’ button on it.
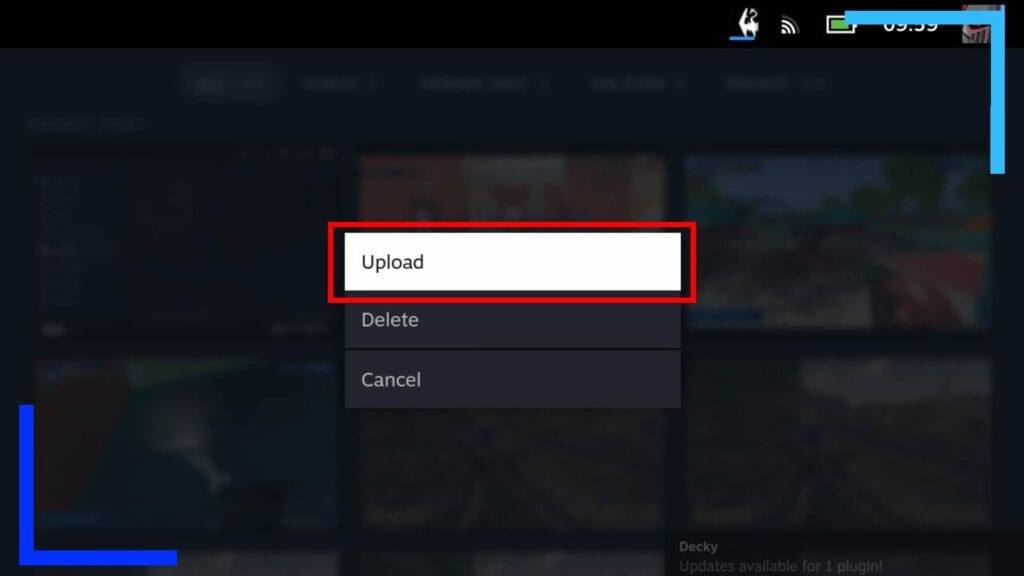
Doing this will bring you into the screenshots folder in gaming mode. From here, find the screenshot you want to share and click the three lines button on it.
A new menu will now pop up. Click on ‘upload’ to start the uploading process.
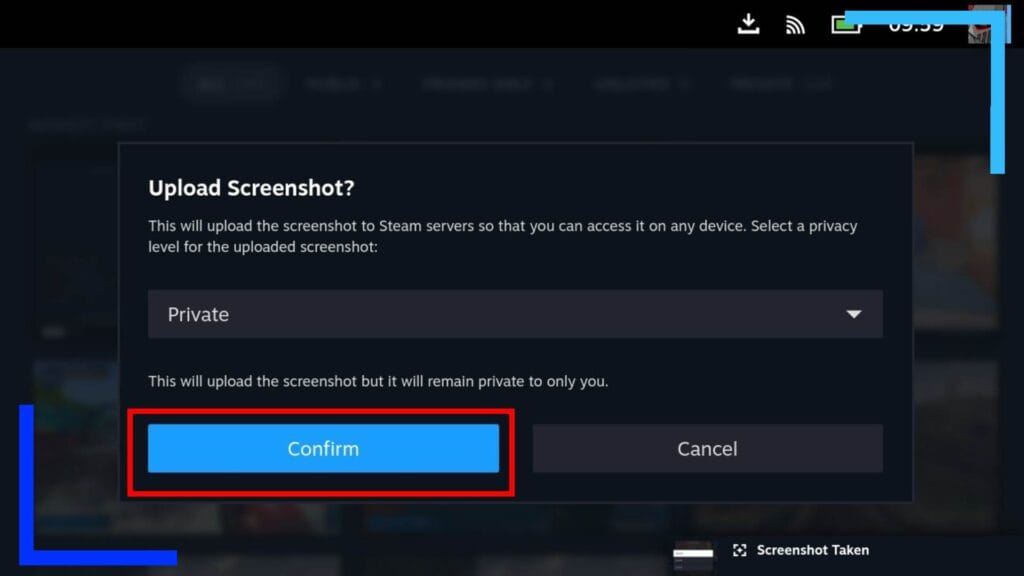
After clicking ‘upload’ another menu will appear. This is where you can set your screenshot to either public (everyone can see it) or private (only you can see it).
Make that selection and when you’re done, click on ‘confirm’ and the screenshot will be uploaded to the Steam servers.
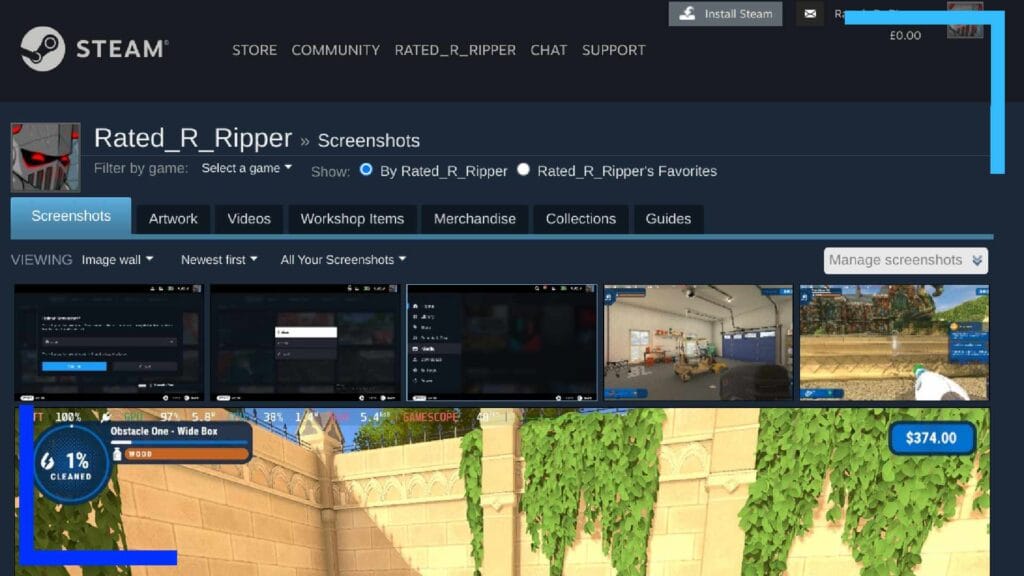
To access your screenshot, and download it, head on over to the Steam website.
If you don’t have that link handy, you can always access your uploaded screenshots by visiting the Steam website, then by clicking on your name followed by ‘content’. Easy stuff.
Conclusion
This is by far the easiest way to grab your screenshots, but it’s also very limited. This method only covers games you purchased from the Steam store. It won’t cover non-Steam games including ROMs, anything from the Heroic Launcher, Battle.net, or Windows games you’ve installed outside of Steam. To access those screenshots, keep reading to learn how to find them.
Method 2: Access Screenshots in Desktop Mode
Start by loading up desktop mode by holding down the power button until a menu appears in the center of the screen.
Now just click on ‘switch to desktop’ and the Steam Deck will load up the Linux-based desktop environment.
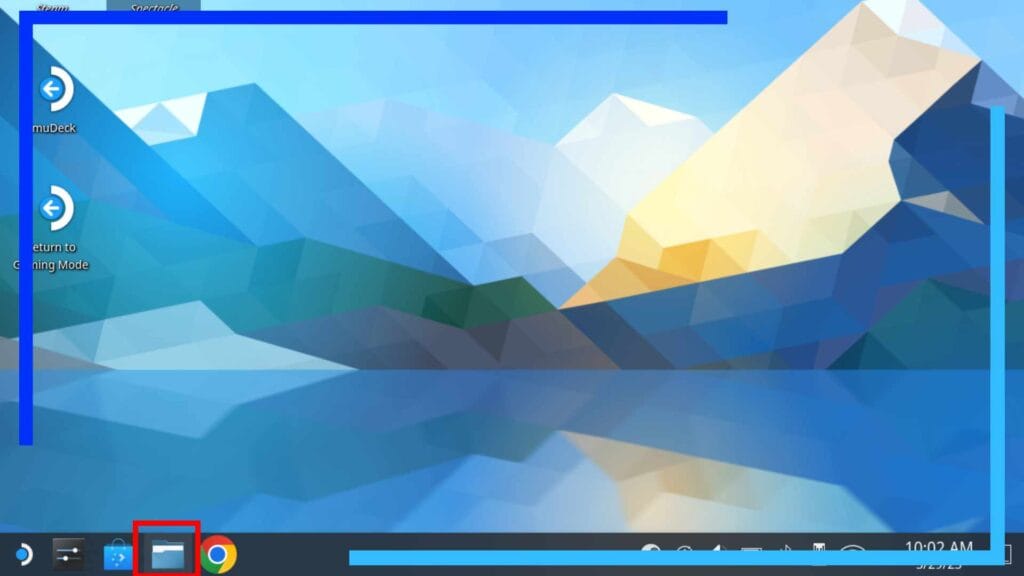
Once desktop mode has loaded up, click on the Dolphin File Explorer (the blue bag icon, shown in the image above) to load up the app.
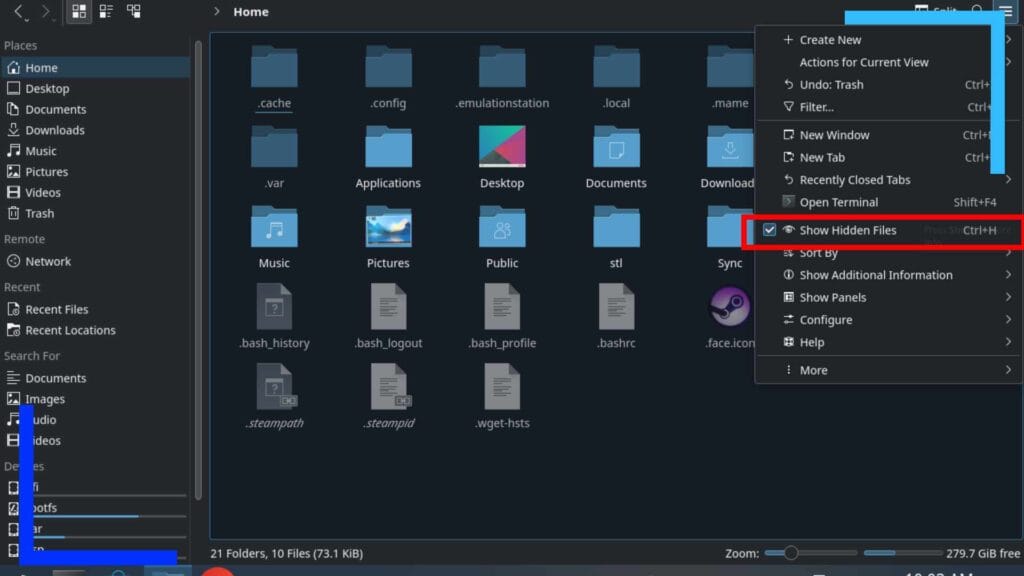
Before we do anything, let’s enable ‘show hidden files’. Without doing this, you won’t be able to see the full path we need to follow.
In the top left corner of Dolphin is a three lines button (not the three lines button on the Steam Deck itself). Click on that and from the drop-down menu, click on ‘show hidden files’.
You should now be able to see a bunch of greyed-out folders that weren’t there before.
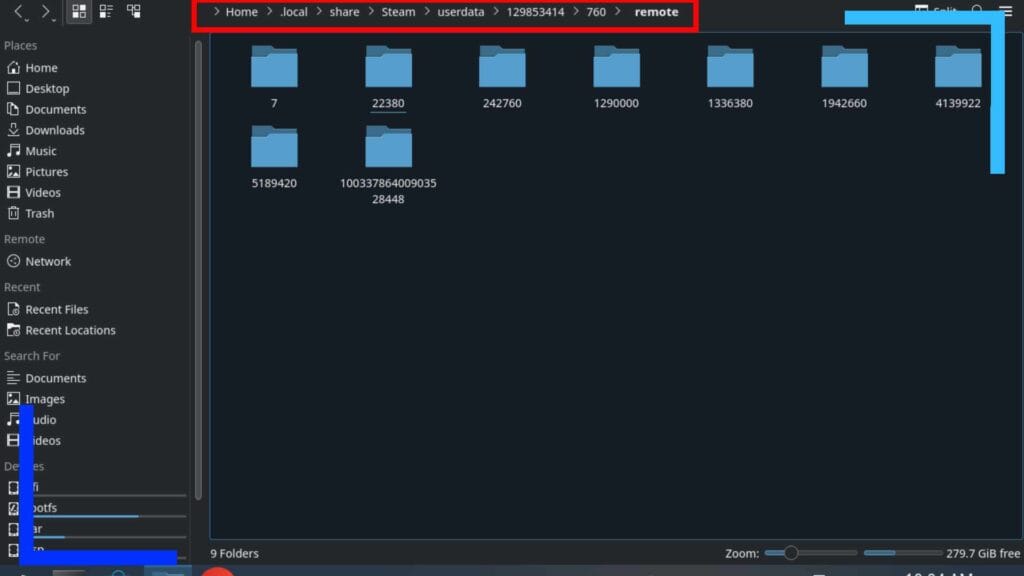
To access the screenshot folders on Steam Deck, navigate through the following folders:
Home > .local > share > Steam > userdata > Your ID > 760 > remote
Once you enter the remote folder you’ll spot a host of folders with numerical names. Each of these numerical names translates to a game ID. Yes, I know, it’s more complex than it needs to be. I found the quickest way to work out which ID is which is to head to the SteamDB website and type the game’s name in there. After hitting enter, you should be greeted with the game and the game’s ID. Handy, right?
Once you have the ID, click on the corresponding folder inside ‘remote’ and you’ll be greeted with the game’s screenshot folder.
If that’s too much effort, though, I found the method I use below saves a lot of time.
Navigate through the following path as normal:
Home > .local > share > Steam > userdata > Your ID > 760 > remote
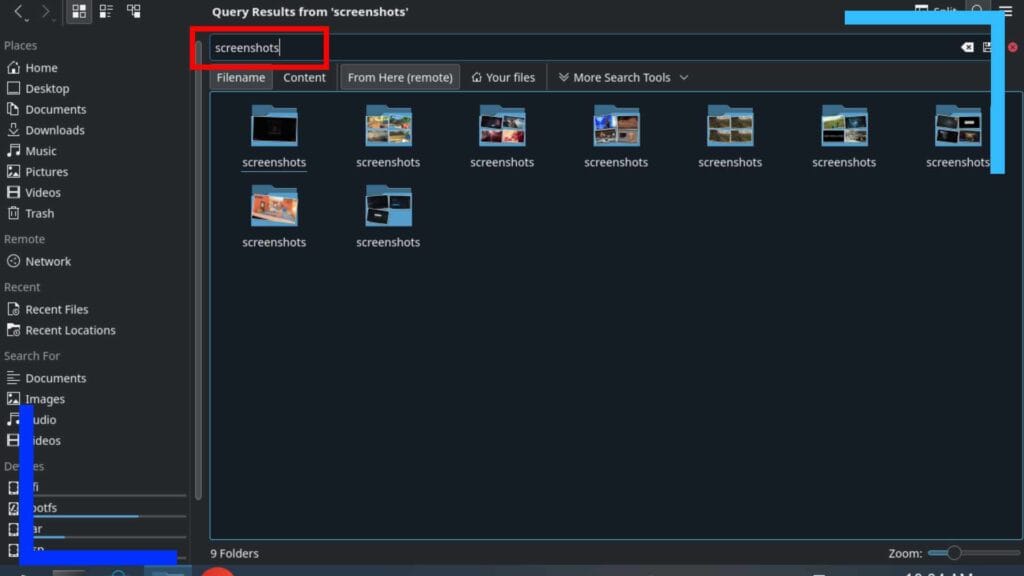
Only this time, when you reach the ‘remote’ folder, click on the magnifying glass near the top right corner of the screen and type in “screenshots” with the on-screen keyboard. This will bring up all your screenshots folders in desktop mode and yall you need to do is click on the folder with the thumbnails of the game you want.
That, for me anyway, is much simpler than having to load up another site just to check a game ID.
Conclusion
Although method two is a little more long-winded, it’s currently the easiest way to access screenshots in desktop mode. Plus once you’ve found the screenshots, you can copy them to your pictures folder for easy access later.
Or, if you’re like me, dump them in the pictures folder then use a web browser to email them to yourself so you can access them on the go. By copying them to the pictures folder, when you upload them, your screenshots are a click away rather than having to go through the long path each time.
Hey, it’s a small thing for sure but if it saves time, it’s always worth doing.