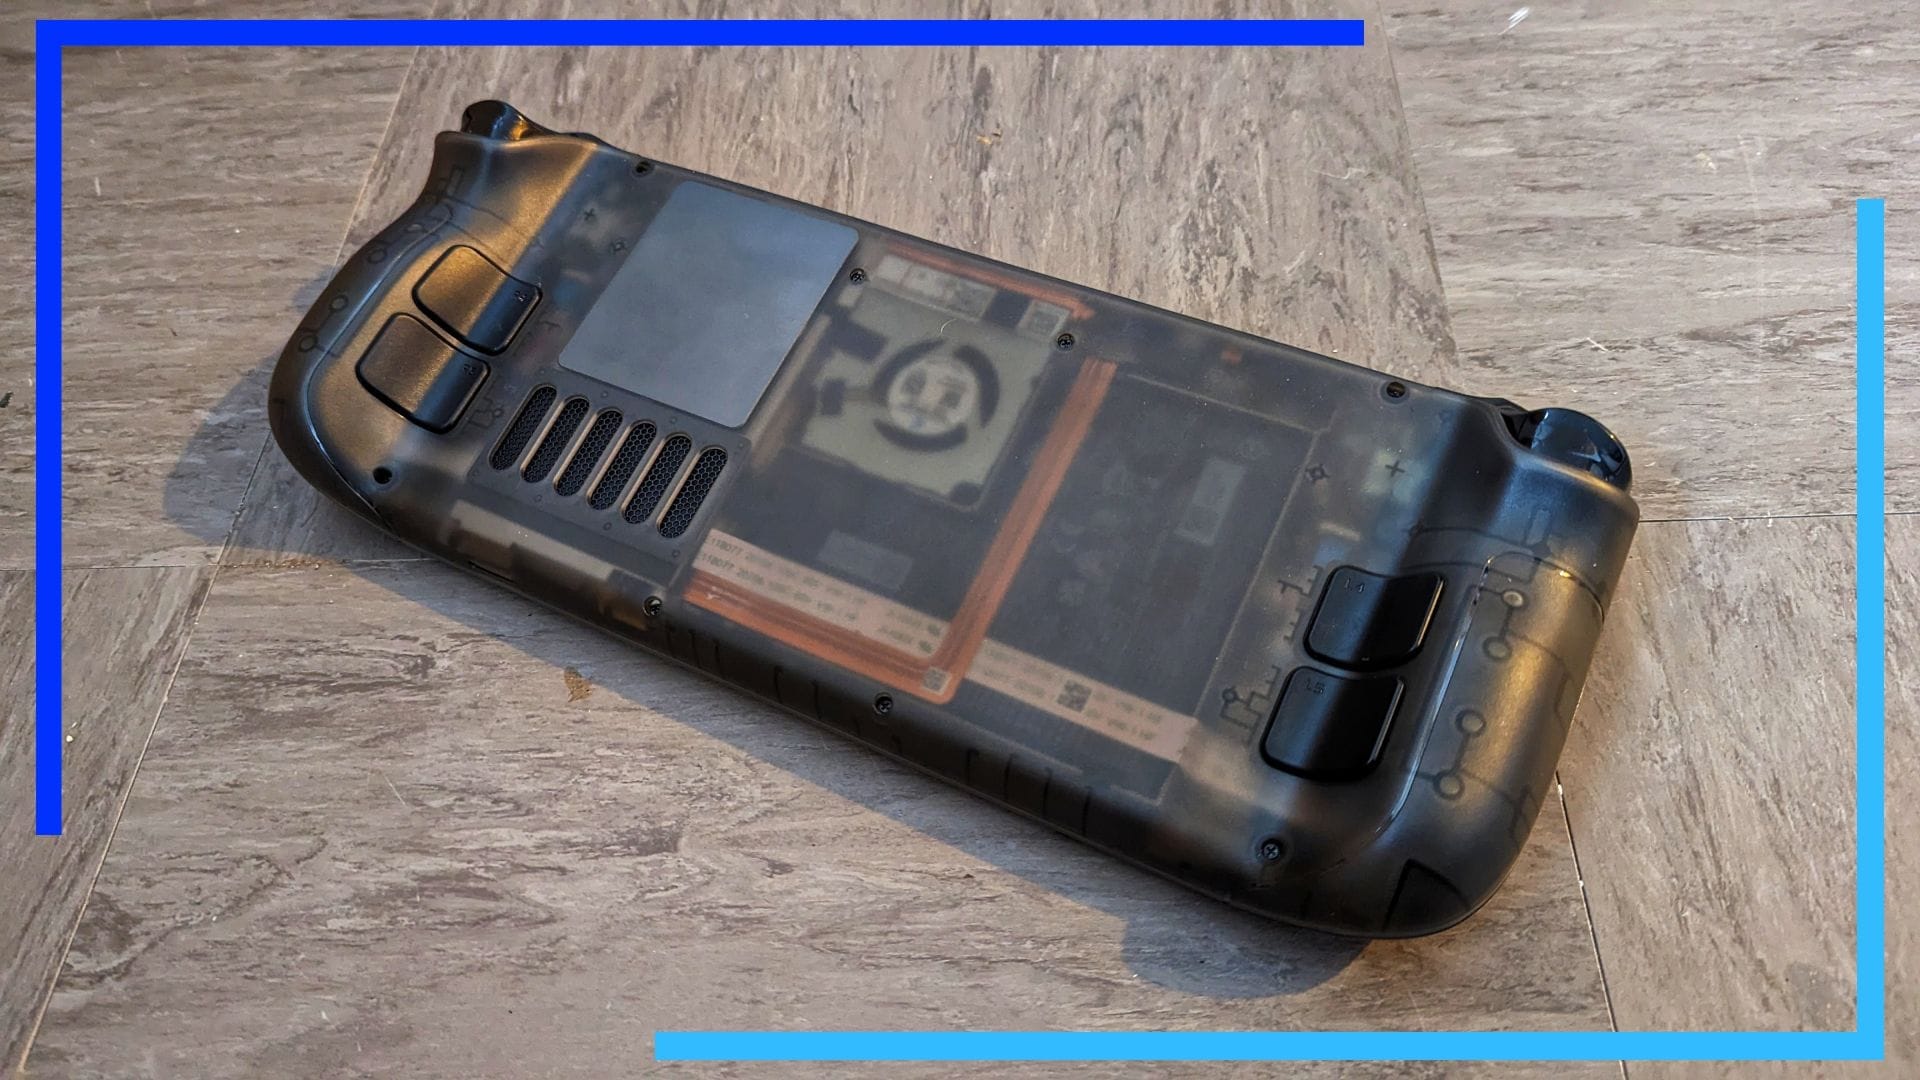
Inventory Check
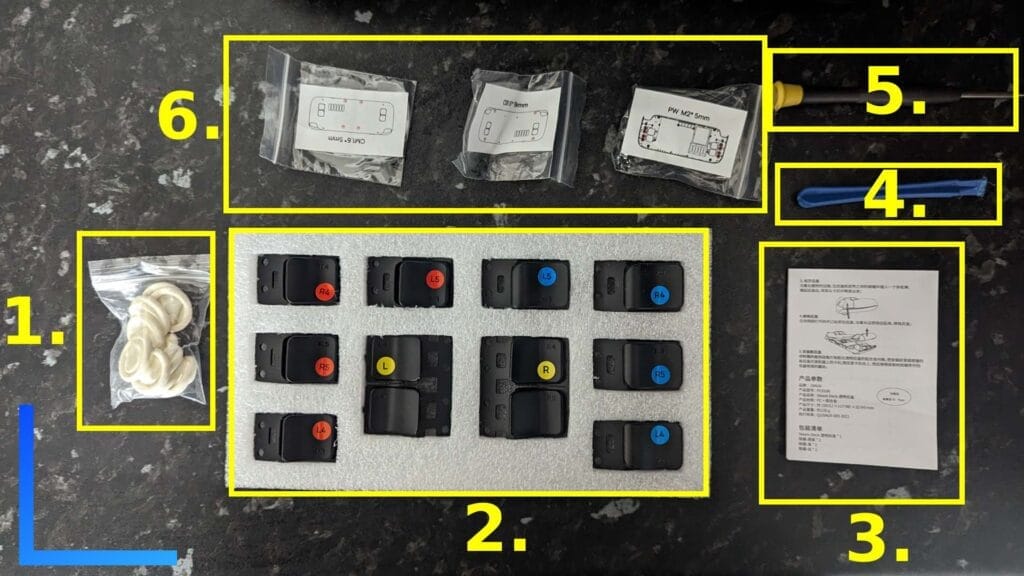
First things first, let’s make sure we’ve got everything we need to get the JSAUX transparent Steam Deck backplate installed. I’d also strongly suggest taking out the microSD card right now. Seriously, if you try to pry the case off while the SD card is inserted, you’re going to end up breaking something.
It’s also worth equipping the finger condoms now. They’re rubber, meaning you won’t be conducting anything while you’re taking the Steam Deck apart.
- Finger condoms
- Replacement triggers
- Instructions
- Phillips-head screwdriver
- Replacement screws – three bags
Step 1: Unscrew the Back
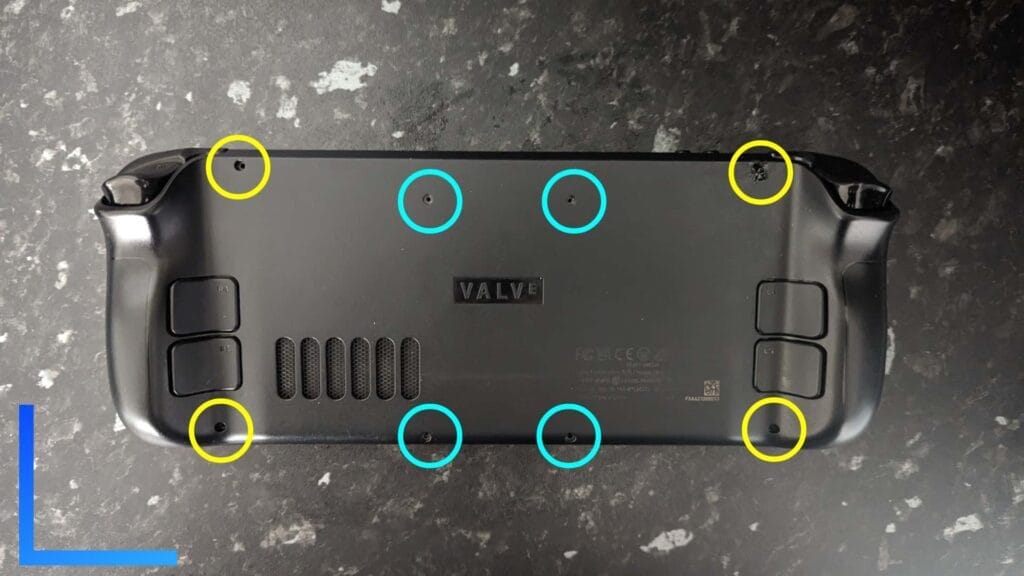
Let’s kick things off by removing the screws on the back of the Steam Deck.
In the image above, I’ve color coded the different types of screws. The ones highlighted in yellow are slightly longer than those highlighted in blue, and should only be used on the outer holes. Don’t mix and match them.
When they’re all out, you should have eight screws in total – four CM1.6 5mm, and four CB1.6 9mm screws.
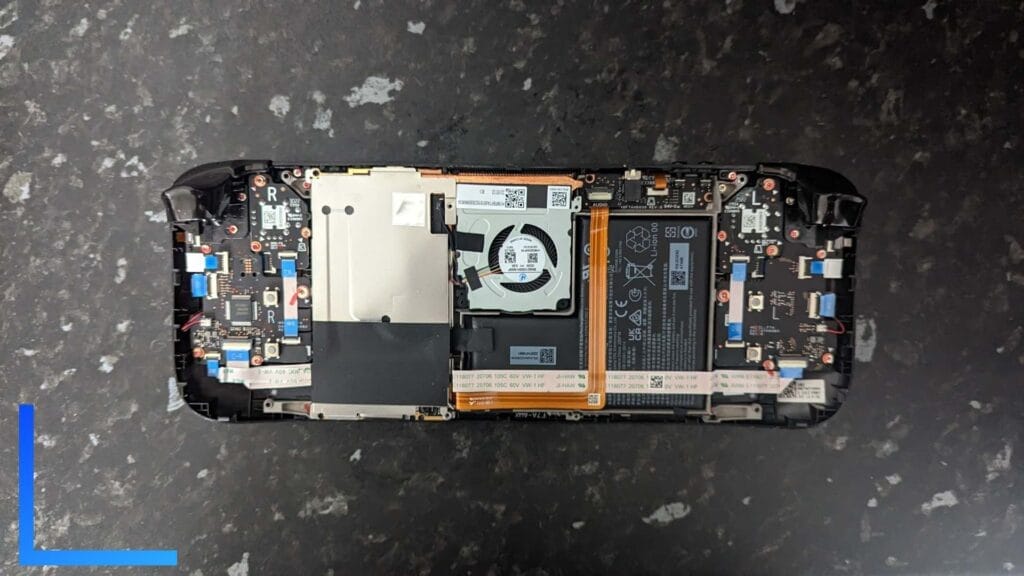
Once all eight screws are out, put them to one side.
Next grab the pry tool and run it in the groove along the bottom side of the Steam Deck. This should loosen the original backplate and let you continue running the pry tool around the sides until the whole thing pops off.
If you find it doesn’t budge, try starting on the sides by the triggers and slowly working your way around the outside.
Step 2: Pick Your Replacement Triggers
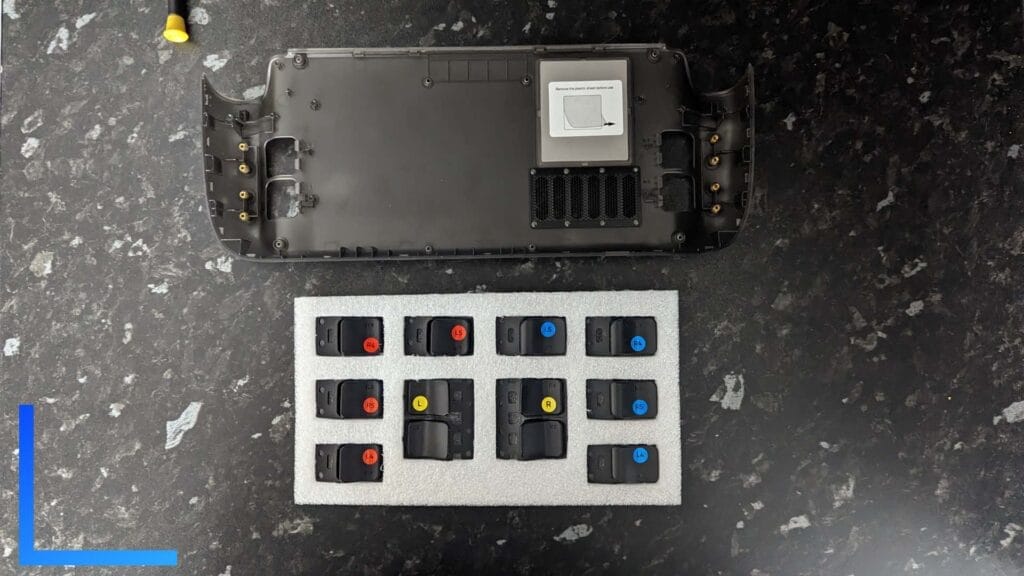
As the JSAUX backplate is different from the original Steam Deck backplate, JSAUX includes three different sets of back triggers to replace the L4/L5 and R4/R5 buttons.
Take them out of the foam padding and try dropping them into the JSAUX backplate to see which ones you like the feel of. Or, if you want something close to the original feel of the Valve-made back triggers, just grab the ones with the yellow stickers on.
Once you’re sure, feel free to peel the stickers off the triggers if you don’t want them left on.
Step 3: Install the Replacement Triggers
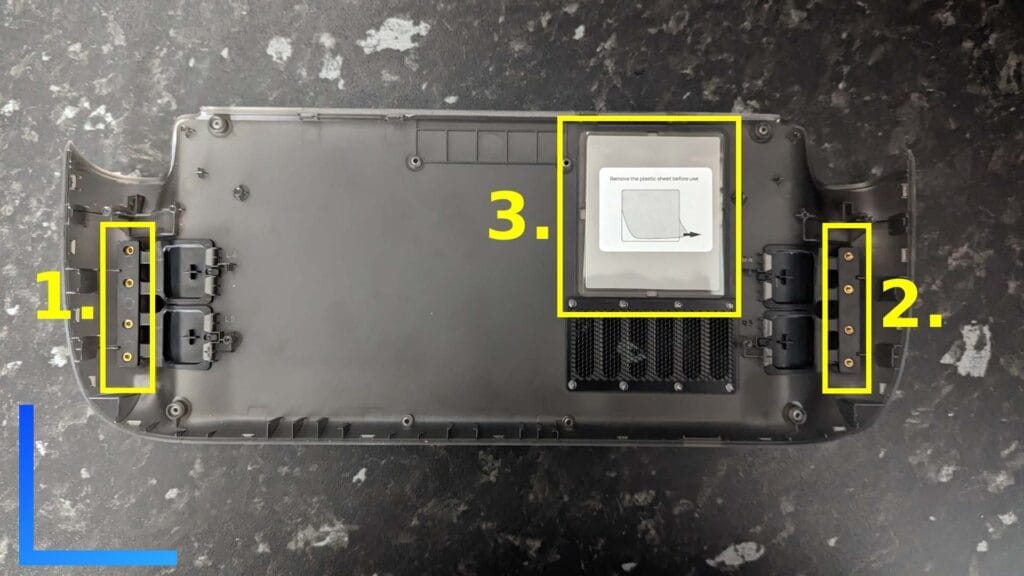
Make sure the longer piece on the inside edges are inside the groove on the backplate and the outside sections with the holes in are above the screw ports, and the triggers will fall into place.
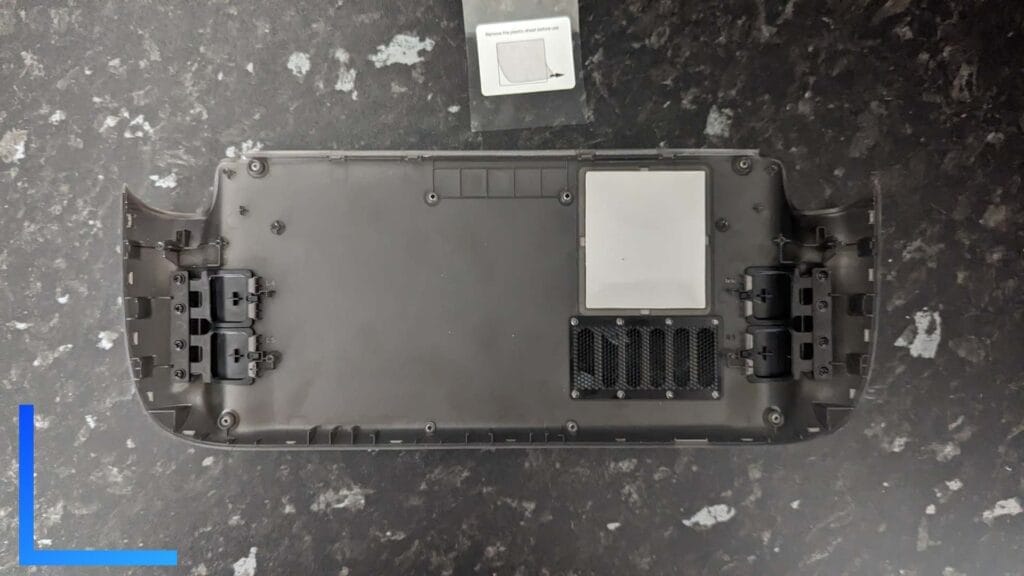
Grab the bag of screws marked “PW M2 5mm”. These screws and only these screws are what you need to screw the triggers into place.
You’re aiming to place four screws on the far left side and four screws on the far right. I found being directly above the screws while you’re putting them in is the easiest way to do things.
When all eight screws are screwed in, remove the label from the heat pad (the big, soft grey panel).
Step 4: Screw the JSAUX Backplate into Place
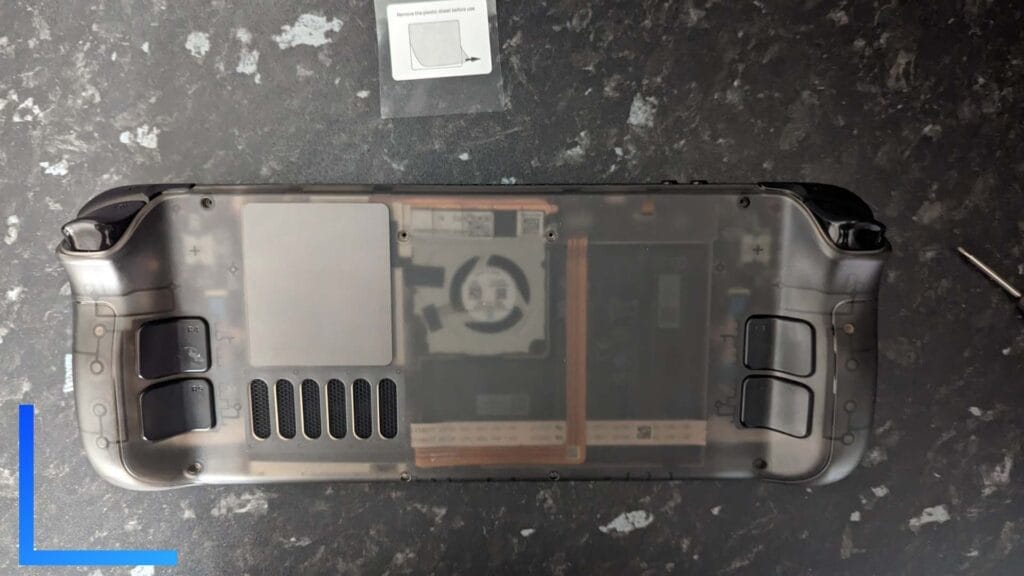
Line up the JSAUX backplate with the Steam Deck and slowly lower it into place.
I found putting slight pressure on the bottom of the case and then pressing on the area around the triggers caused the backplate to click into place.
The main seam should be flush with the Steam Deck’s frontplate with the exception of the area by the volume buttons. For some reason, that area didn’t go flush until I installed the screws.
As I say, you should feel and hear a click once the backplate has connect to the frontplate. If you’ve heard or felt that, you’re good to move on.
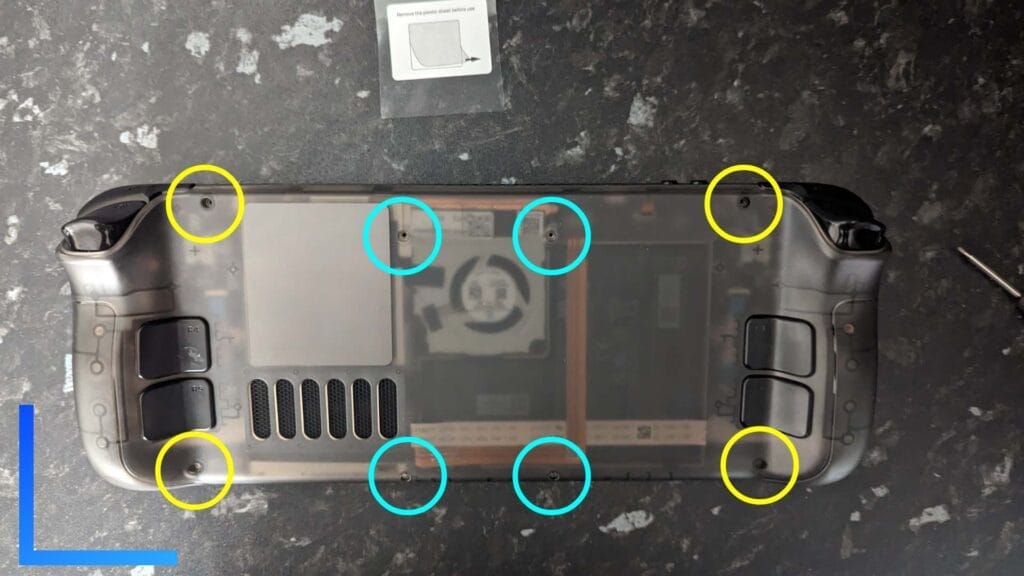
This next part is the same as when we removed the screws from the original backplate, only in reverse.
For the yellow circles, grab the bag of screws with the CB1.6 9mm sticker on, and for the blue circles, it’s the bag with CM1.6 5mm.
All of the new screws should go in without much of a problem. One word of warning, don’t overscrew them. Get them nice and snug, but don’t screw them so they’re impossible to get out. If you ever need to upgrade your SSD or we get a transparent frontplate, you’ll thank your past self later.
How to Get a Warn Screw Out the Steam Deck
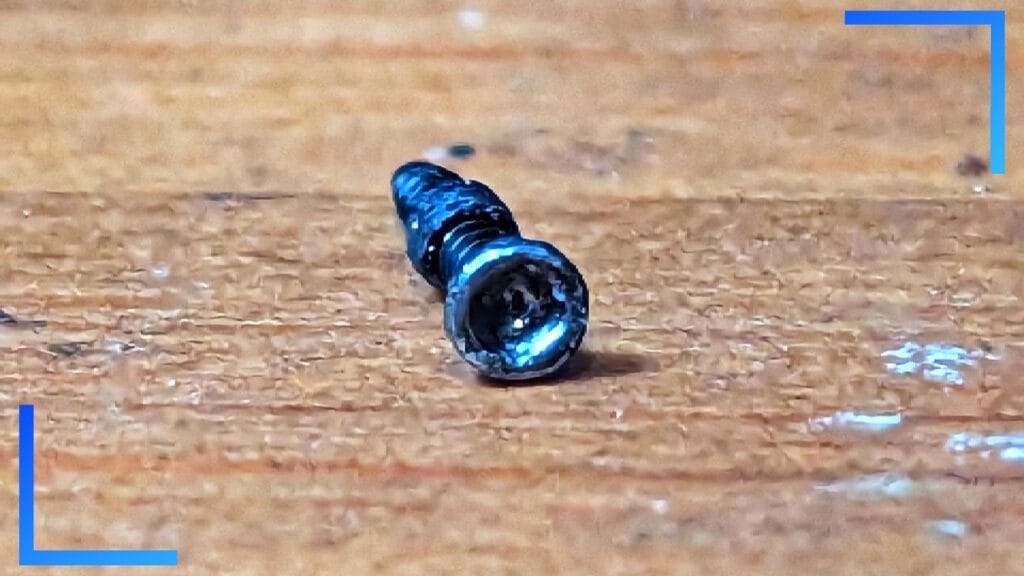
For a reason that is beyond me, Valve decided to screw the screws into the Steam Deck so tight that a screwdriver can’t always shift them. The image above shows the result of what happened when I first tried to remove my default screws. Suffice to say, this single screw was a pain. I couldn’t get it out with a screwdriver.
If this happens to you, and I genuinely hope it doesn’t, there are a few things worth trying.
The obvious suggestion is to try shoving a rubberband or small piece of duct tape into the hole so it sits above the troublesome screw. When you push the screwdriver into place, the rubberband or duct tape should fill the groove in the screw and offer a little bit more resistance for the screwdriver to grab onto.
If that doesn’t work, you may need a drill with a reverse function and a set of screw extractor tools. The idea here is to drill a new, small hole into the screw, then use the extractor and the drill in reverse to unscrew it.
The rubberband method didn’t work for me because the screw was too worn to be of any use. I also don’t own a drill with a reverse function. So what did I do?
I ended up using a soldering iron with the intention of soldering a screwdriver to the screw so they become one. This didn’t work, and I ended up melting my case. The upshot, however, was that the case just popped off, meaning I could get a set of pliers and unscrew the screw manually.
Don’t try that method though. You’ll ruin the backplate. Only do that if you’re an impatient idiot like me.
*JSAUX transparent Steam Deck backplate provided by JSAUX
**All images captured by Wesley Copeland

