Breath of the Wild remains one of the most-played games from the Wii U era, and with so many game-changing mods available, it’s well worth learning how to install The Legend of Zelda: Breath of the Wild mods on Steam Deck. It’s also not anywhere near as complicated as it once was.
Before, there was a lot of building, extra programs, and general Linux tomfoolery. Now, mercifully, the process is much more streamlined and can be completed in around 30 minutes. Here’s how I did it.
What You Need
- A Steam Deck with the Cemu emulator set up
- An unpacked version of Breath of the Wild that’s playable in Cemu
- Breath of the Wild update data installed to Cemu
- Breath of the Wild DLC data installed to Cemu
The Short Version
- Download and Install Miniconda
- Download and install the Steam Deck version of BCML
- Set up BCML by following the on-screen instructions
- Install mods through BCML
- Enable BCML in the Cemu graphics pack settings
The In-Depth Version
If you’re not familiar with the Steam Deck, Linux programs, and the more technical elements, below you’ll find an in-depth version to walk you through every step, complete with images.
Part 1: Install Miniconda
The program we’ll be using later, BCML, requires a specific version of Python to work even at all. In the interest of keeping things simple, we’ll be installing Miniconda 3.7 as our solution.
Step 1: Enter Desktop Mode
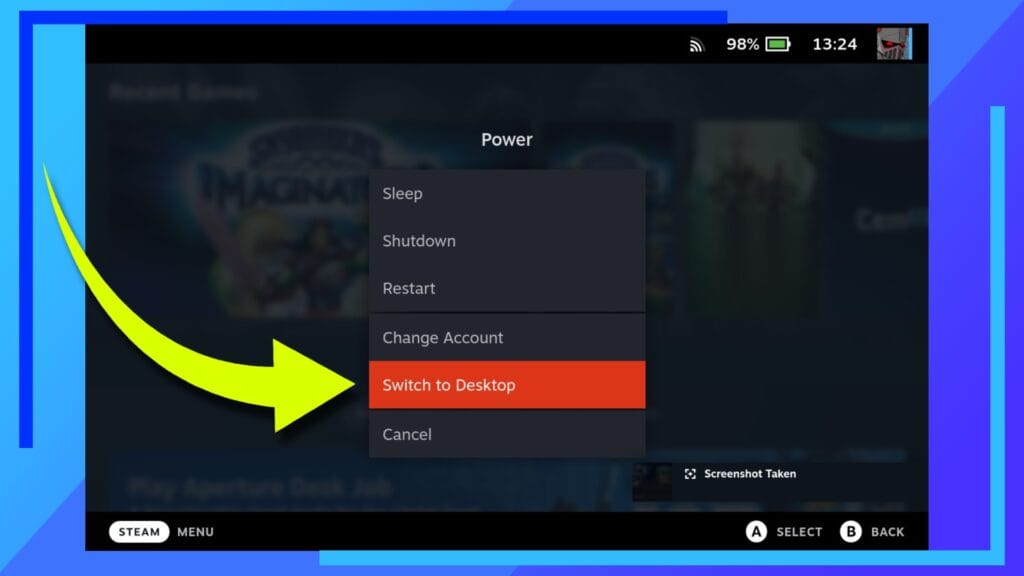
Begin by booting into Desktop Mode on the Steam Deck. To do this, hold down the power button until a menu appears then hit Switch to Desktop. After a few seconds, the Steam Deck will reboot and we’ll be one step closer to installing Zelda: Breath of the Wild mods on Steam Deck.
Step 2: Grab the Install Files
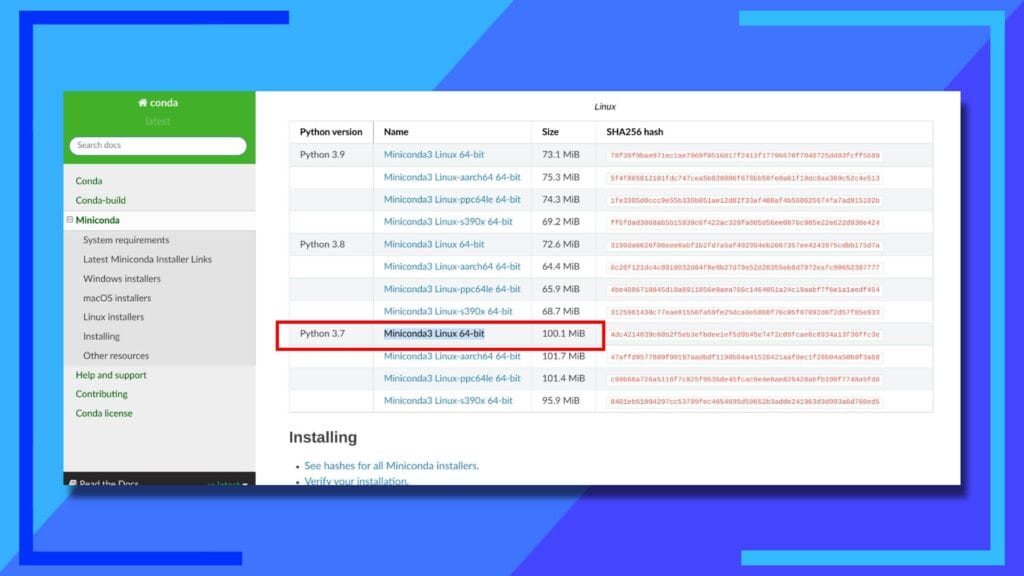
The next thing we’ll want to do is use the web browser to download the file Miniconda3 Linux 64-bit located under the Python 3.7 heading from the Miniconda Github. By default, this file will be placed in your downloads folder, accessible through the Dolphin file explorer (the blue folder icon).
Step 3: Turn the File into an Executable
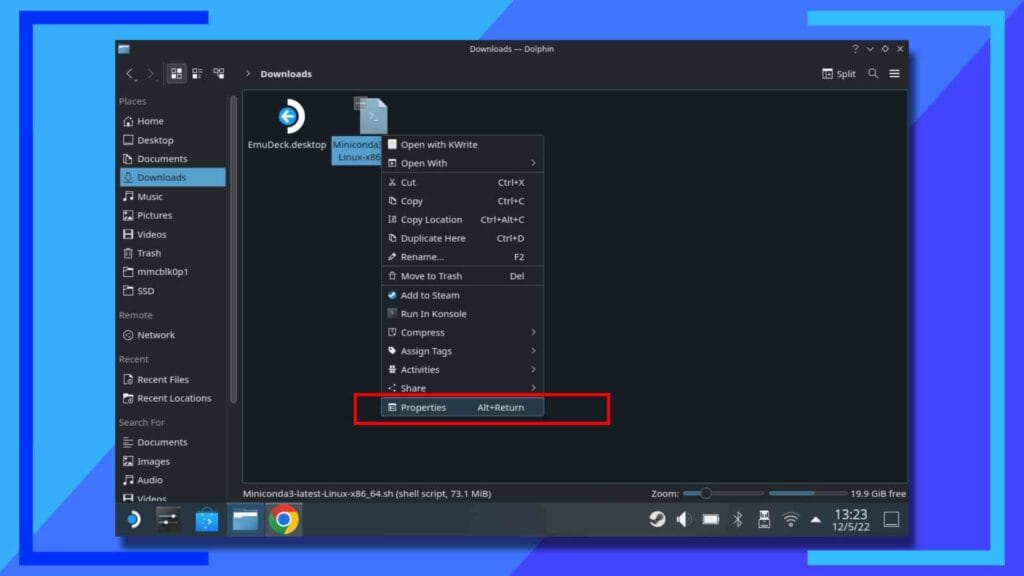
Now we’ve got the file, we need to make it gain the ability to run. Start by left-clicking the file and select Properties.
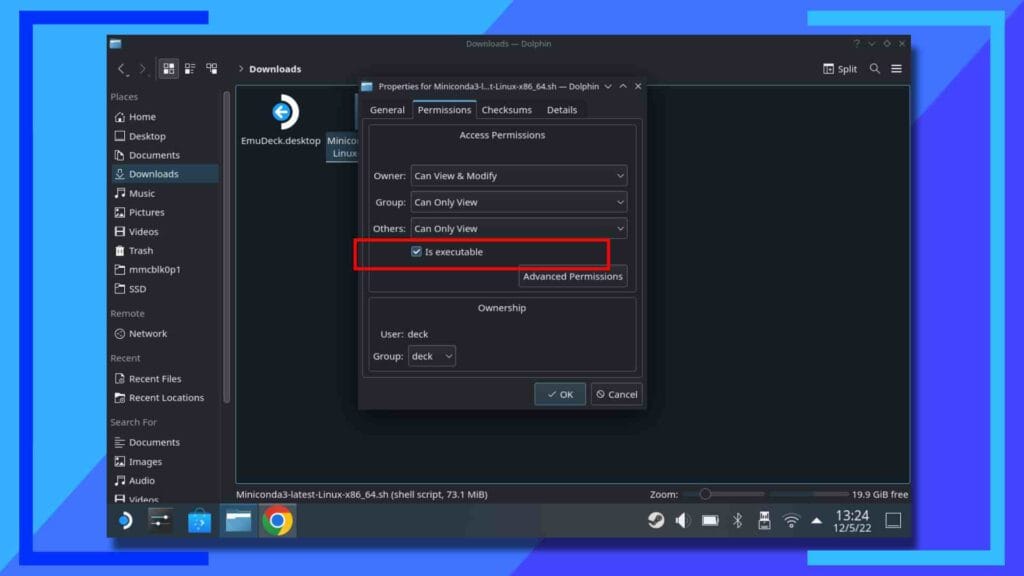
In the second tab across – Permissions – there should be a box that’s unticked marked Is Executable. Tick that box, then hit OK to move on.
Step 3: Install Miniconda Through Konsole
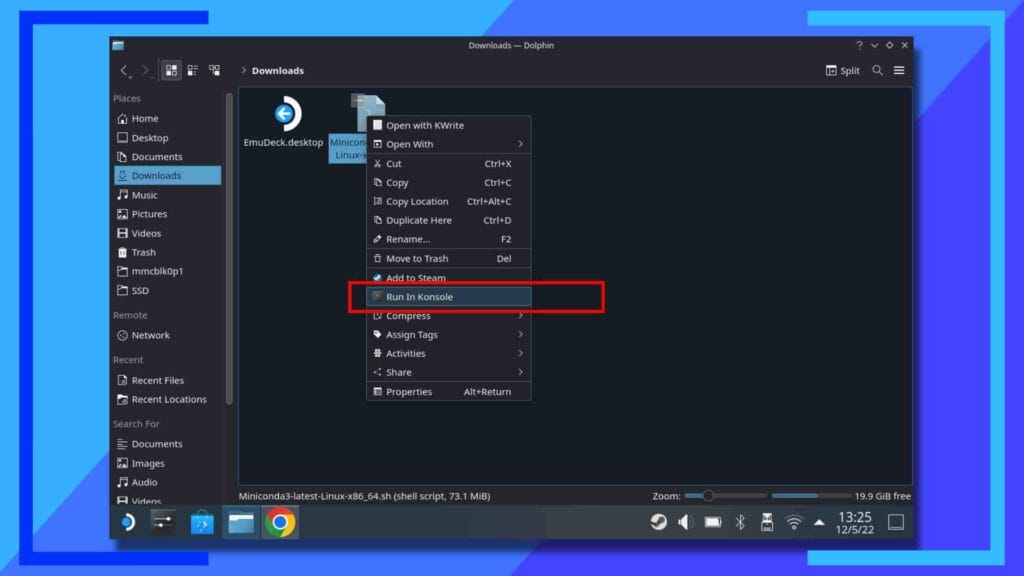
Now that we’ve told the Steam Deck this is an executable file, the only thing left to do is to run it.
Left-click the file once more, only this time hit Run In Konsole.
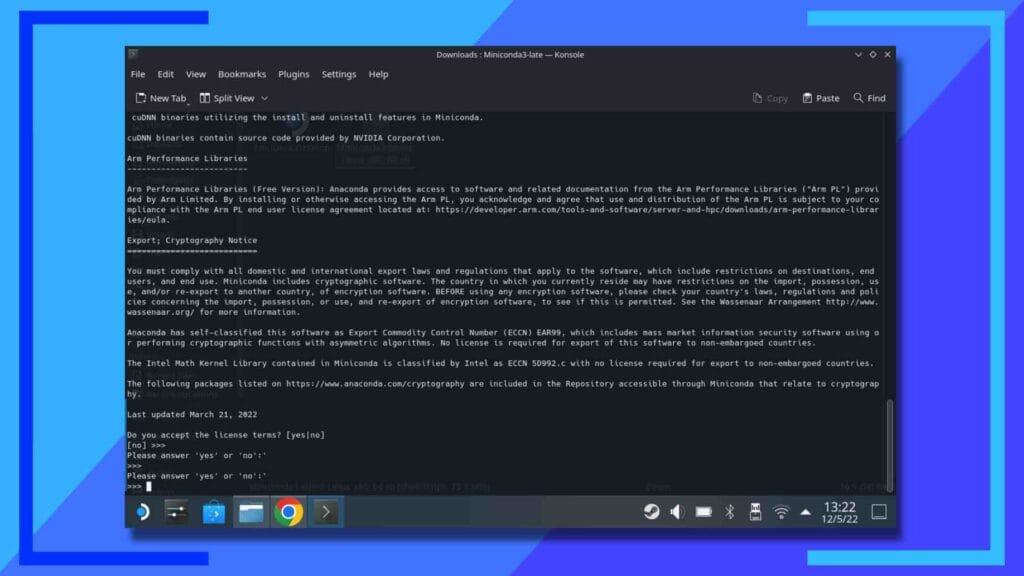
A new window will open and it’s now just a case of following the on-screen instructions. One thing to note, when you get to the license terms, you’ll need to press Enter multiple times to scroll the page down until you get to the next part.
If it feels like it’s taking forever, don’t panic. That’s normal. Also, Enter counts as pressing the right trigger on the Deck if you want to save some time.
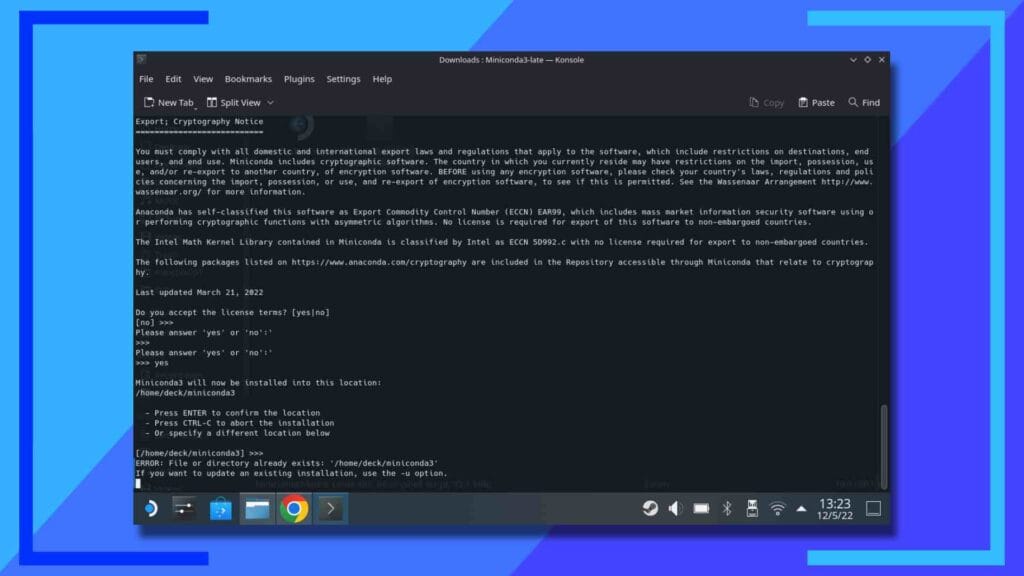
Once you’ve typed in the Yes and hit Enter to accept the license terms, follow the on-screen instructions and Miniconda will be installed onto the Steam Deck.
Part 2: Install BCML
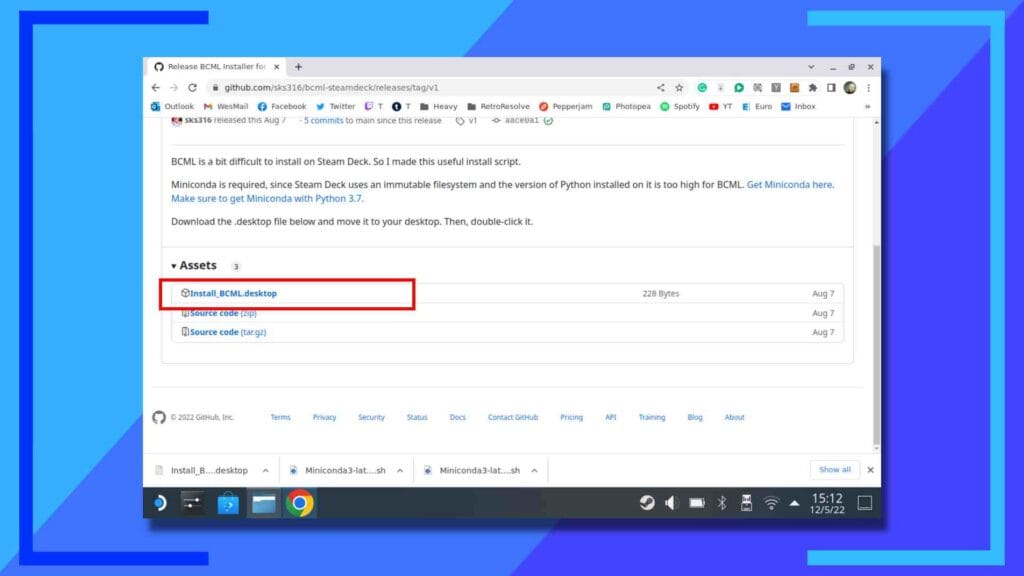
You have two options here: You can either download the full BCML repository and build a working version within Linux through the command menu, or you can do what I did which is far, far less effort.
Rather than downloading the original BCML file, we’re going to get this file that’s been specifically set up for Steam Deck. This next part is quite complex so make sure you read it a few times just to be sure.
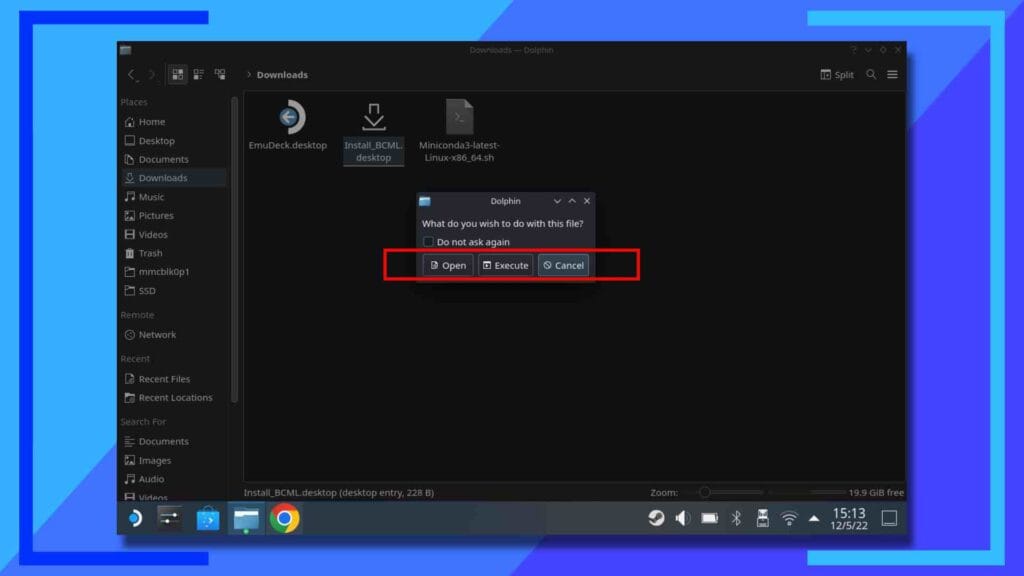
Open your downloads folder and click on the file twice, then select Execute. The program will then install itself.
That’s it. How much easier was that than building the repository yourself?
Part 3: How to Install Mods With BCML on Steam Deck
BCML – or Breath of the Wild Cross-platform Mod Loader – can import mods that utilize the following file types: ZIP, RAR, 7z, or BNP. That said, just because something is that type of file or is housed in that type of file, it doesn’t mean it’s 100 percent compatible. As always, be sure to read the mod’s usage rules.
To give you an idea of what BCML is capable of, in the example below I’ll be replacing Link with a Linkle mod that changes not just the main character’s appearance, but also their animations and voice lines too.
Step 1: Setting Up BCML Correctly
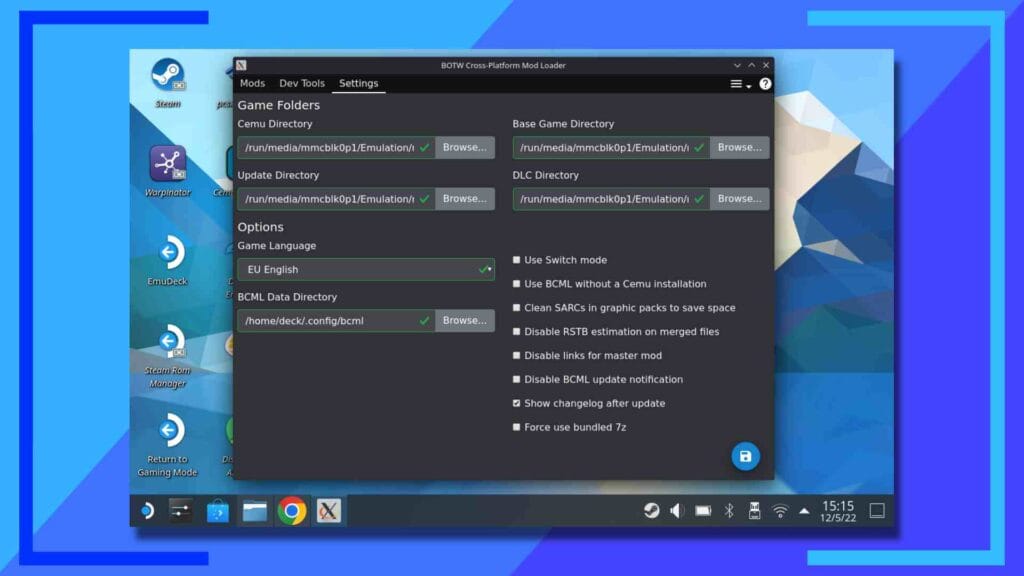
This is by far the most complex part of the process. Mostly because if you don’t know your internal file structure, finding the right path can be a challenge.
The idea here is to Browse and locate four files: The Cemu main launcher file, the Breath of the Wild game, the update data, and the DLC.
Some things to note. If the box isn’t green, you’ve got the path wrong. Also, in the case of the game files, you’re looking for the Folder housing the XML files.
Now, here’s where things get tricky. Depending on how you have everything set up, your paths may be different from mine. If you’ve installed EmuDeck, everything you need is located in the Wii U folder found inside the ROMs folder.
My main path to all the folders is:
/ > run > media > mmcblk0p1 > Emulation > roms > wiiu
But, as I say, this could be different depending on your setup.
Once all the paths are green, that means you’re good to hit the save icon in the bottom-right corner of the screen and finish the installation process.
Step 2: Click the Plus Icon to Add Mods
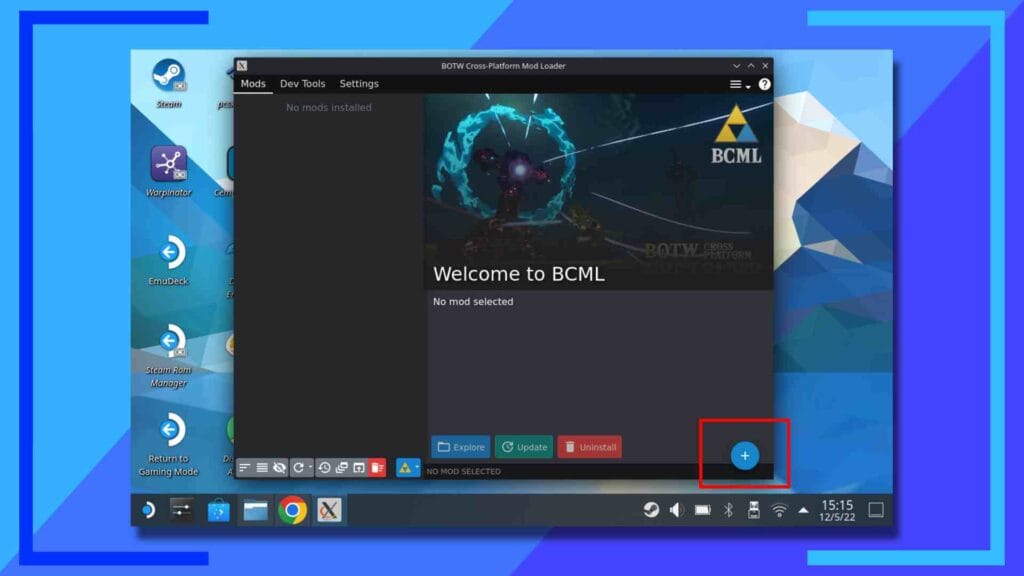
Open up BCML by clicking twice on the desktop icon.
Once it loads, it’ll look quite bare. That’s expected. Using the Linkle Mod as an example, I downloaded the file to the downloads folder on the Deck and extracted it, leaving me with a BNP file.
To kick things off, press the plus button (+) in the bottom-right corner of BCML.
Step 3: Locate the Mod File
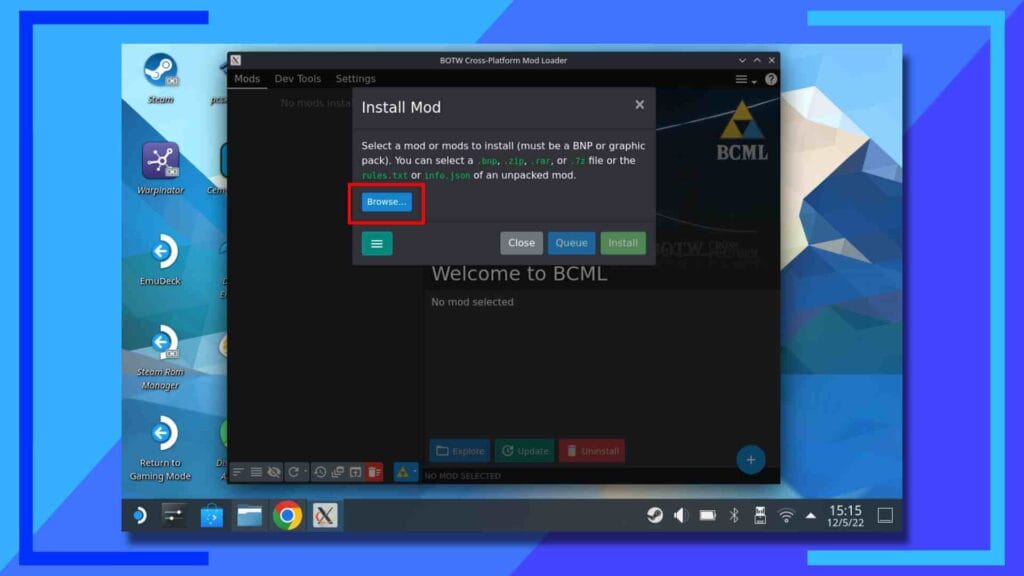
From the pop-up menu, click Browse then navigate to where the mod is located and click on it twice.
Step 4: The Installation
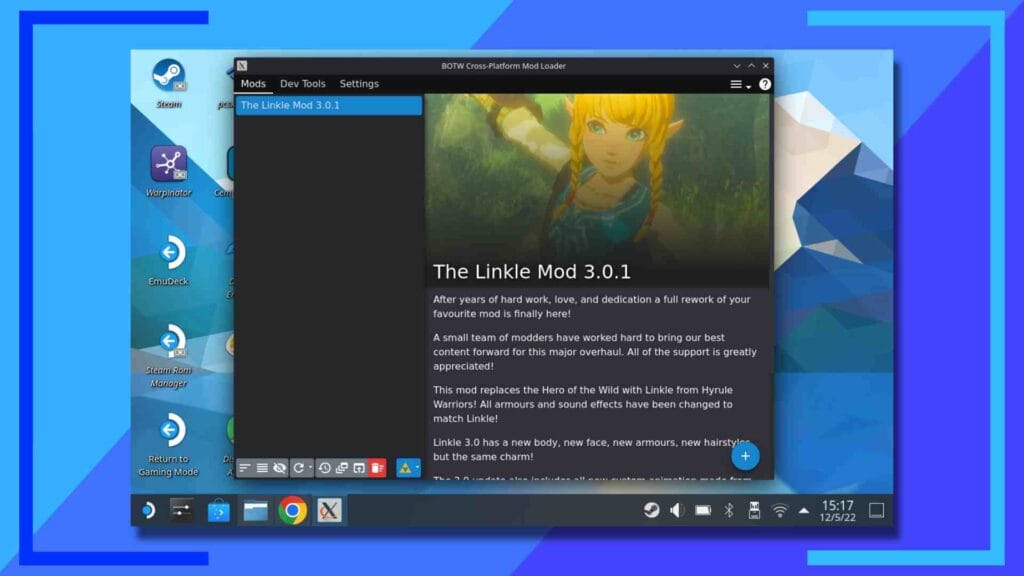
The mod will then be installed and added to BCML. Easy, right?
Enabling BCML in Cemu
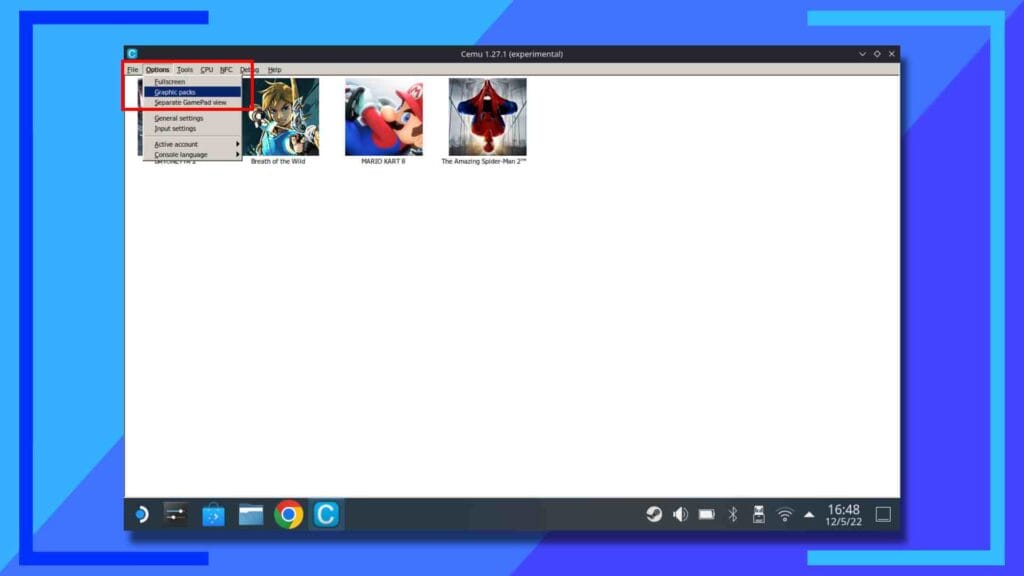
Okay, we’re nearly done. Just a few things left to do. Let’s finish by loading up Cemu then in the top-left corner, select Options then Graphic Packs.
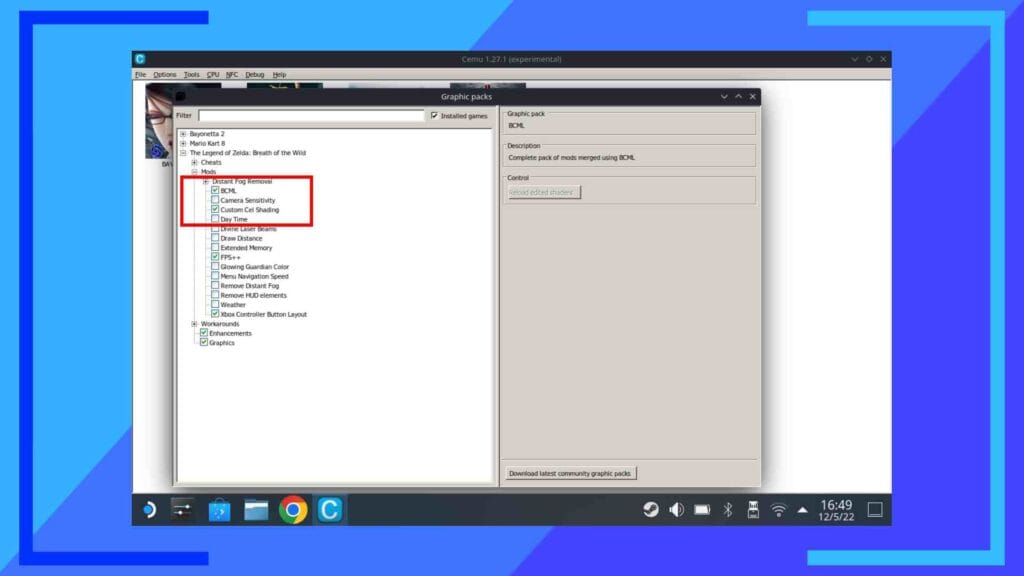
A new menu should pop up. Click on the plus (+) next to The Legend of Zelda: Breath of the Wild to open up the different options. Next, click on the plus for mods, then make sure BCML is enabled.
Press the x in the top-right corner to close and save the settings, or alternatively, feel free to take a look at some of the other options available to you here, including the ability to turn off weapon durability, a 60 frames hack (I’ve only managed to get 45 frames tops so far), and many other quality of life improvements.
That’s it. You’re now free to go off and play Breath of the Wild Mods on Steam Deck as much as you like. If you’re looking for places to download Breath of the Wild mods, GameBanana and NexusMods have some really killer stuff on there.
Can You mod the Switch Version of Breath of the Wild on Steam Deck?
Hypothetically, yes. But should you? No, not really. The Switch is more powerful than the Wii U, which makes running the Switch version on the Steam Deck much more complicated.
There’s also the fact that the Cemu emulator runs really well on Steam Deck, whereas Yuzu and Ryujinx are very hit and mess due to them being newer.
Lastly, modding a Switch console so you can dump your own games isn’t anywhere near as straightforward as modding a Wii U. With the Switch, you need specific launch versions to even be in with a chance of modding. With Wii U, you run a webpage.
In short, don’t bother with the Switch version. Stick with the Wii U version and mod it to be on par with the Switch instead. It’s much simpler.

